As a professional photographer, I can tell you that taking the photo is only half the story. The other half happens on your computer, in your editing application. This is where you breathe life into a flat RAW file, correct mistakes, and apply your unique creative vision. But when you’re just starting, the sheer number of photo editing applications can feel overwhelming. Which one is right for you? How do you even begin to choose? Don’t worry; we’ve all been there. This guide will walk you through the best options, from smart AI-powered platforms to traditional manual editors, and help you find the perfect tool to start your journey.
Key Takeaways
- Your Goals Matter Most: The best software for a hobbyist is different from what an aspiring professional needs. Choose a tool that matches your current skill level and can grow with you.
- AI Simplifies the Process: Modern AI-powered tools like Imagen can dramatically shorten the learning curve. They help you achieve professional, consistent results without spending months learning complex manual controls.
- Think in Workflows, Not Just Edits: The best photographers have an efficient process for everything from culling (selecting) photos to editing and delivering them. A platform that supports this entire workflow will save you countless hours.
- Free vs. Paid: Free software is a great way to learn the basics without commitment. However, paid applications usually offer more powerful features, better organization, and more streamlined workflows that are essential for serious work.
Before You Choose: What Do You Really Need?
Jumping into the first editing app you find is a common mistake. Before you download anything, let’s take a step back and think about what you actually need. A little planning now will save you a lot of frustration later.
What Are Your Photography Goals?
First, be honest about why you’re editing photos. Your answer will point you toward the right type of tool.
- The Hobbyist: Are you just looking to improve your vacation photos or make your family portraits look a little better before sharing them on social media? You probably need something user-friendly with simple, effective tools and maybe some fun filters. You don’t need a complex, professional-grade application.
- The Aspiring Professional: Do you dream of shooting weddings, portraits, or real estate? If so, you need a tool that delivers high-quality results, helps you develop a consistent style, and organizes large batches of photos. Efficiency is key here, as time is money.
- The Social Media Creator: Is your main goal to create stunning content for Instagram, TikTok, or a personal blog? You might need a tool that combines photo editing with graphic design elements, like adding text or creating layouts.
Key Editing Features Every Beginner Should Know
No matter which app you choose, you’ll encounter a few fundamental tools. Understanding these basics will make any software feel more approachable.
- Crop & Straighten: This is your composition tool. Cropping lets you trim the edges of a photo to improve focus on your subject. Straightening fixes tilted horizons—a classic beginner mistake.
- Exposure: Simply put, this controls the overall brightness of your photo. If your picture is too dark or too light, the exposure slider is your first stop.
- Contrast: Contrast is the difference between the light and dark areas of your photo. Increasing contrast makes the darks darker and the lights lighter, adding “pop” and dimension to an image.
- White Balance: Have you ever taken a photo indoors that looked too yellow or orange? That’s a white balance issue. This tool corrects the color temperature to make the whites in your photo look truly white, ensuring all the other colors look natural.
- Color Correction (Saturation & Vibrance): These tools control the intensity of the colors. Saturation boosts every color equally, which can sometimes look unnatural. Vibrance is a bit smarter; it boosts the less-saturated colors more while protecting skin tones, often producing a more pleasing result.
Budget: Free vs. Subscription vs. One-Time Purchase
Finally, let’s talk about money. Photo editing software comes in a few different pricing models.
- Free: You can’t beat the price! Free options are perfect for testing the waters. The trade-off is often a less intuitive interface, fewer features, or a lack of good organizational tools.
- Subscription: This is the most common model today. You pay a monthly or yearly fee for access to the app and all its updates. This keeps you on the latest version but is an ongoing cost.
- One-Time Purchase: You pay a larger fee upfront and own that version of the software forever. You may have to pay again for major future upgrades.
Now that you have a better idea of what you’re looking for, let’s explore some of the best photo editing software for beginners.
Top Photo Editing Software for Beginners
We’ll start with a modern, AI-powered approach and then cover the more traditional manual editors. This list is structured to help you find the right fit, whether you prioritize speed, control, or cost.
1. Imagen: The Smart Workflow Assistant
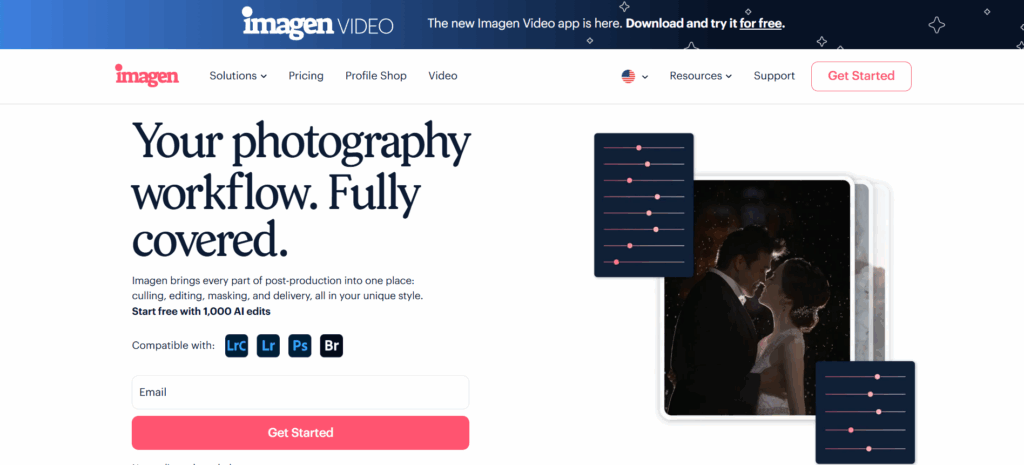
For years, beginners faced a tough choice: spend hundreds of hours learning complex manual sliders or settle for generic, one-size-fits-all filters. Imagen changes the game by offering a third, much smarter path. It’s not just an editor; it’s a complete post-production platform designed to learn your unique style and apply it with incredible speed and consistency.
Why It’s a Great Choice for Beginners
The biggest hurdle for new photographers isn’t learning what a slider does; it’s learning how to use all the sliders together to create a consistent, professional look across hundreds of photos. This is where most beginners get stuck. Imagen lets you bypass that steep learning curve entirely.
Instead of adjusting dozens of settings for every single photo, you teach Imagen’s AI how you edit. Once it learns your style, it can edit thousands of photos for you in minutes, giving you a massive head start. This frees you up to focus on what you love—being behind the camera. It’s a logical first step for anyone who wants professional results without the years of manual trial and error.
How Does It Work?
Imagen’s process is built around the concept of an AI Profile, which is essentially a deep understanding of your personal editing style. You have two main ways to get started.
- Personal AI Profile: This is your own unique editing DNA. To create it, you simply upload at least 3,000 of your previously edited photos to the Imagen app (ideally from a cohesive Lightroom Classic catalog). The AI analyzes all your adjustments—from exposure and contrast to tiny color tweaks—and builds a profile that can edit new photos exactly like you would. As you continue to edit and upload your final tweaks, your profile gets even smarter and more accurate over time.
- Talent AI Profiles: What if you don’t have thousands of edited photos yet? No problem. Imagen has collaborated with industry-leading photographers from around the world to create Talent AI Profiles. You can browse different styles, find one you love, and apply it to your photos instantly. It’s a fantastic way to get professional-grade edits while you’re still developing your own style.
More Than Just Editing
Imagen is designed to handle your entire workflow, which is a huge advantage for anyone who wants to get serious about photography.
- AI Culling: Before you can edit, you have to select your best photos from a shoot. This process, called culling, can be incredibly tedious. Imagen’s Culling Studio automatically groups similar photos, identifies blurry shots or closed eyes, and gives you ratings, helping you find your best images in a fraction of the time.
- AI Tools: Beyond your main style, Imagen offers specific tools to handle common tasks like Straighten, Crop, Subject Mask, and Smooth Skin. These can be applied automatically during the editing process, saving even more time.
- Cloud Storage: You can even back up your RAW photos directly to the cloud with Imagen. This keeps your work safe and accessible from anywhere.
Who Is It For?
Imagen is ideal for the ambitious beginner or aspiring professional who values their time and wants to produce consistent, high-quality work from day one. It helps you build good workflow habits and frees you from the most time-consuming part of photography, letting you focus on shooting and growing your business.
Pricing: Imagen uses a pay-per-edit credit system, which is flexible for beginners. You only pay for what you use, with no monthly subscription required for editing. Culling and other features are available as part of subscription plans.
2. Adobe Lightroom (Cloud-Based)
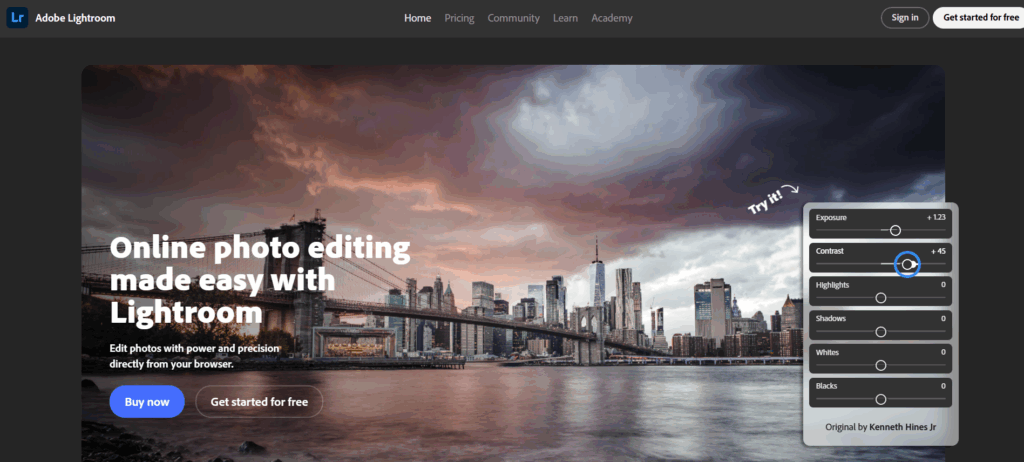
Often just called “Lightroom,” this is the streamlined, cloud-focused version of Adobe’s popular editor. It’s designed to be simple and accessible, with a consistent interface across desktop, mobile, and web.
Features for Beginners
The interface is much cleaner and less intimidating than its “Classic” counterpart. The editing tools are presented as simple sliders, and helpful features like Auto adjustments provide a good starting point. The biggest advantage is its cloud integration. Any photo you import and any edit you make is automatically synced across all your devices. You can start editing on your laptop and finish on your tablet without missing a beat.
Learning Curve
The learning curve for Lightroom is gentle. The basic tools are intuitive, and you can get good results quickly. The built-in tutorials and “Discover” section, where you can see how other photographers edited their photos, are excellent learning resources. It lacks the deep organizational features of Lightroom Classic, but for a beginner, this can actually be a benefit, as there’s less to learn upfront.
Who Is It For?
Lightroom is perfect for the hobbyist or beginner who shoots with multiple devices (including a phone) and wants the convenience of editing anywhere. It’s great for those who prioritize a simple interface and easy sharing over deep, professional-level organizational tools.
Pricing: Included in the Adobe Photography Plan (starting around $9.99/month), which typically comes with 20 GB of cloud storage, or available in a plan with 1 TB of storage for around $19.99/month.
3. Adobe Lightroom Classic

Adobe Lightroom Classic has long been the industry standard for professional photographers. It’s an incredibly powerful application for both organizing and editing your photos on your local computer. It operates on a “catalog” system, which is a database that keeps track of all your photos and the edits you make to them.
Features for Beginners
The core of Lightroom Classic is its Develop module, where you’ll find panels of sliders to control everything from basic exposure to intricate color adjustments. For beginners, the Basic panel is where you’ll spend most of your time. It contains all the fundamental sliders we discussed earlier (Exposure, Contrast, White Balance, etc.).
Lightroom’s other strength is its organization. You can use keywords, star ratings, and color labels to sort through thousands of photos, which is essential for managing large projects. This robust system is why so many professionals rely on it.
Learning Curve
The learning curve for Lightroom Classic is moderate to steep. While the basic sliders are easy to understand, the sheer number of panels, tools, and features can be intimidating. The catalog system itself can be a point of confusion for new users who are used to simple folder structures. However, because it’s the industry standard, there are countless tutorials online to help you learn.
Who Is It For?
Lightroom Classic is for the beginner who wants to learn the fundamentals of manual editing from the ground up. If you enjoy the process of tweaking sliders and want a robust system for managing a large photo library on your local computer, this is a solid choice. It’s also the application that works hand-in-hand with Imagen for the most efficient professional workflow.
Pricing: Included in the Adobe Photography Plan (starting at $9.99/month), which also includes Photoshop and cloud-based Lightroom.
4. Adobe Photoshop
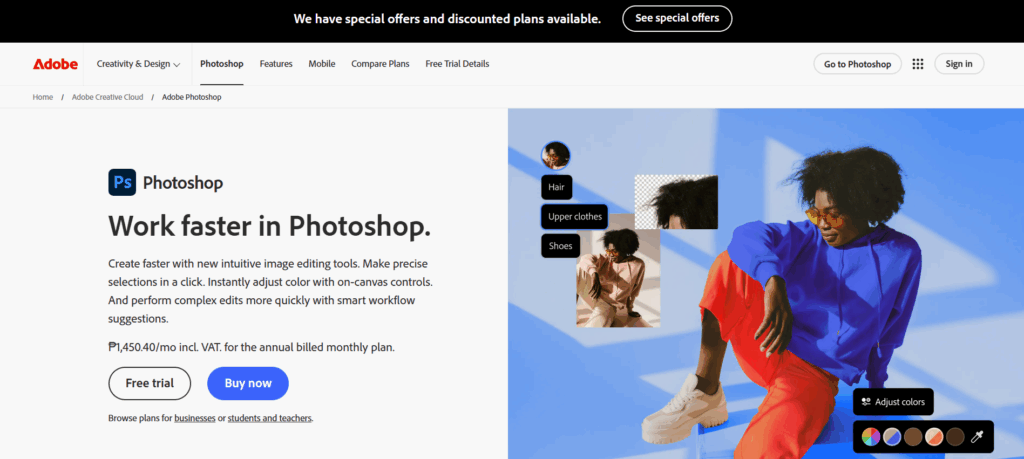
Many beginners think they need to learn Photoshop right away, but that’s a common misconception. Photoshop is not primarily a photo organizer or batch editor. It’s a pixel-level editor designed for detailed, intensive work on single images.
Features for Beginners
Photoshop’s power lies in its system of layers and masks. This allows you to make complex adjustments to specific parts of an image without affecting the rest. It’s the tool you use for tasks like removing distracting objects (like a trash can in the background), combining multiple photos into one composite image, or performing high-end skin retouching.
Learning Curve
The learning curve for Photoshop is notoriously steep. It’s a vast program with hundreds of tools, and it can take years to master. For a beginner just wanting to improve their photos, diving into Photoshop first can be incredibly frustrating and is often overkill.
Who Is It For?
A beginner should approach Photoshop as a specialized tool, not a primary editor. You’ll turn to it after making your basic adjustments in a program like Lightroom or Imagen. It’s for when you need to do something that your main editor can’t, like advanced retouching or creative compositing.
Pricing: Included in the Adobe Photography Plan (starting at $9.99/month).
5. Capture One Pro
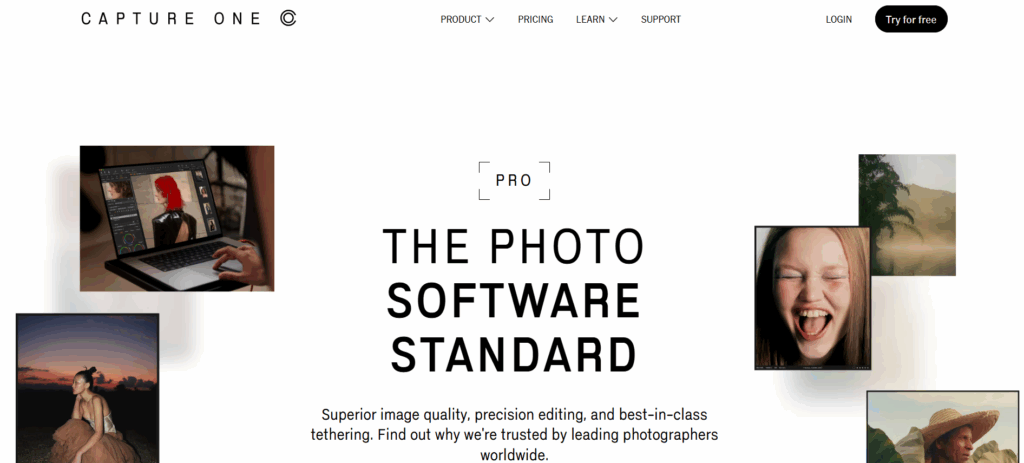
Capture One Pro is a direct competitor to Lightroom Classic and is favored by many high-end commercial and studio photographers for its exceptional color editing tools and tethered shooting capabilities (shooting directly into the computer).
Features for Beginners
Capture One’s color tools are its main selling point. The Color Editor gives you incredibly precise control over specific color ranges, allowing for nuanced adjustments that can be difficult to achieve in other programs. Its interface is clean and customizable, but it has a distinctly professional feel.
Learning Curve
Similar to Lightroom Classic, Capture One has a steep learning curve. Its logic and workflow are different from Adobe’s, so even experienced Lightroom users will need time to adjust. It’s a powerful tool, but it assumes a certain level of technical understanding.
Who Is It For?
Capture One Pro is for the serious beginner with a strong interest in color grading, particularly in genres like portrait, fashion, or product photography. If you plan to do a lot of studio work, its tethering features are second to none.
Pricing: Available as a monthly/yearly subscription or as a higher-priced perpetual license (one-time purchase).
6. Skylum Luminar Neo

Luminar Neo is an editor that leans heavily into AI-powered tools to make complex edits simple. It positions itself as an alternative to Lightroom and Photoshop, combining organization with creative, AI-driven features.
Features for Beginners
Luminar Neo is known for its “one-click” AI tools. Features like Sky AI (which replaces a boring sky with a dramatic one), Enhance AI (a “magic” slider that improves a photo’s overall look), and various portrait enhancement tools are very appealing to beginners. It uses a layer-based system that is more intuitive than Photoshop’s.
Learning Curve
The learning curve is quite low. The interface is user-friendly, and the AI tools are designed to give you impressive results with minimal effort. It encourages experimentation and is a lot of fun to use.
Who Is It For?
Luminar Neo is for the hobbyist or social media creator who wants to achieve creative, often dramatic, edits quickly. If you’re less concerned with subtle, precise adjustments and more interested in making your photos “pop” with AI assistance, Luminar Neo is a great choice.
Pricing: Available as a subscription or a perpetual license.
7. Canva
While not a traditional photo editor, Canva has become an essential tool for anyone creating content for the web or social media. It’s a graphic design platform at its core, but it includes enough photo editing features to be very useful for beginners.
Features for Beginners
You can upload your photos to Canva and make basic adjustments like cropping, brightness, and contrast. You can also apply filters. But Canva’s real power is in its templates. You can drop your edited photo into a professionally designed template for an Instagram story, a Facebook post, or a blog banner, and easily add text and other graphic elements.
Learning Curve
The learning curve for Canva is practically non-existent. Its drag-and-drop interface is incredibly intuitive.
Who Is It For?
Canva is for the social media creator, blogger, or small business owner. If your end goal is to use your photos as part of a larger design, Canva is an indispensable tool. It’s not for serious photographers looking to perfect their images, but rather for content creators who need to publish quickly.
Pricing: Offers a very generous free tier. The Pro subscription unlocks more templates, stock photos, and advanced features.
8. GIMP (GNU Image Manipulation Program)
GIMP is a long-standing, open-source, and completely free alternative to Adobe Photoshop. It’s an incredibly powerful piece of software developed by a community of volunteers.
Features for Beginners
GIMP offers many of the same advanced features as Photoshop, including layers, masks, advanced selection tools, and a wide array of filters. If there’s a complex editing task you need to do, chances are GIMP can handle it.
Learning Curve
The learning curve is very steep. The user interface is often cited as being less intuitive and polished than its commercial counterparts. Finding high-quality, up-to-date tutorials can also be more challenging. It requires patience and a willingness to learn.
Who Is It For?
GIMP is for the beginner on a zero budget who needs the power of a pixel editor like Photoshop. If you’re willing to trade a polished user experience for a powerful, free tool, GIMP is a fantastic option.
Pricing: 100% Free.
9. darktable
Just as GIMP is the free alternative to Photoshop, darktable is the free, open-source alternative to Lightroom Classic. It’s a non-destructive RAW photo editor and organizer.
Features for Beginners
darktable provides a professional-grade workflow, including photo management and a comprehensive set of editing modules for everything from basic exposure adjustments to advanced color grading and noise reduction. It offers a lot of technical control over the editing process.
Learning Curve
Like GIMP, darktable has a steep learning curve. Its interface is dense and technical, and the sheer number of editing modules can be overwhelming. It’s built by and for developers and technical users, and it shows.
Who Is It For?
darktable is for the technically-minded beginner on a zero budget who wants a powerful RAW workflow tool and isn’t afraid to spend time learning a complex system.
Pricing: 100% Free.
Summary & Comparison
| Software | Best For | Learning Curve | Pricing Model | Key Feature |
| Imagen | Ambitious beginners, aspiring pros | Very Low | Pay-per-use & Subscription | AI that learns your personal editing style |
| Lightroom (Cloud) | Hobbyists, mobile users | Low | Subscription | Seamless cloud sync across devices |
| Lightroom Classic | Learning manual editing fundamentals | Moderate-Steep | Subscription | Professional photo organization & editing |
| Photoshop | Specialized, advanced retouching | Very Steep | Subscription | Layers, masks, and pixel-level control |
| Capture One Pro | Serious color work, studio pros | Steep | Subscription or Perpetual | Superior color editing tools |
| Luminar Neo | Quick, creative AI edits | Low | Subscription or Perpetual | One-click AI tools like Sky Replacement |
| Canva | Social media content creation | Very Low | Freemium | Templates and graphic design tools |
| GIMP | Free Photoshop alternative | Very Steep | Free | Powerful, free pixel editing |
| darktable | Free Lightroom alternative | Very Steep | Free | Powerful, free RAW workflow |
Final Thoughts: Building Your Workflow
As you can see, there isn’t one “best” photo editor for everyone. The right choice depends entirely on your goals, budget, and how you like to work.
For a beginner who wants to get professional results quickly and build a sustainable business, a workflow-centric platform like Imagen is a game-changer. It automates the most time-consuming parts of the process, allowing you to focus on your photography. You can pair it with Lightroom Classic for organization and final tweaks, creating a powerful, efficient system that professionals use every day.
If you’re a hobbyist who just wants to have fun and make your photos look better, the cloud-based Lightroom or the creative tools in Luminar Neo are excellent, user-friendly options.
And if you’re on a tight budget, don’t be afraid to dive into the world of free software like GIMP and darktable. They are incredibly capable, and the skills you learn there will transfer to any other editor you use in the future.
The most important thing is to pick a tool and start practicing. Your first edits won’t be perfect, and that’s okay. Every professional photographer started exactly where you are now. The journey of learning to edit is a creative process in itself. Embrace it, have fun, and watch your photos transform.
Frequently Asked Questions (FAQ)
1. What’s the difference between a RAW and a JPEG file? A JPEG is a compressed image file that has already been processed by your camera. It’s smaller and ready to share immediately. A RAW file is an uncompressed file that contains all the data captured by your camera’s sensor. It’s much larger and looks flat straight out of the camera, but it gives you far more flexibility and control during the editing process. Professionals almost always shoot in RAW.
2. Do I need a powerful computer for photo editing? It helps, especially when working with high-resolution RAW files. The most important components are a fast processor (CPU), plenty of RAM (16 GB is a good starting point, 32 GB is better), and a fast storage drive (an SSD, or Solid State Drive). A good, color-accurate monitor is also crucial.
3. What is “non-destructive” editing? Non-destructive editing means that your original photo file is never permanently changed. Software like Lightroom, Capture One, and Imagen works by creating a set of instructions for how to display the edited photo. You can always go back and change your edits or revert to the original image at any time. This is a fundamental concept in modern photo editing.
4. Can I use my phone for professional photo editing? Mobile editing apps, like the Lightroom mobile app, have become incredibly powerful. For many tasks, you can achieve professional-looking results on a phone or tablet. However, for managing large volumes of photos, precise color work, and printing, a desktop computer is still the preferred tool for most professionals.
5. What are presets and should I use them? A preset is a saved collection of editing settings that you can apply to a photo with one click. They are a great way to speed up your workflow and achieve a consistent look. Many photographers sell their presets. They can be a good starting point, but they often require further tweaking to fit each specific photo.
6. How is an AI Profile different from a preset? A preset applies the exact same set of adjustments to every photo, regardless of the photo’s content. An Imagen AI Profile is much smarter. It analyzes the unique characteristics of each individual photo (like the lighting, colors, and subject matter) and applies your personal style in an adaptive way. This results in a much more accurate and consistent edit across a whole gallery of photos taken in different conditions.
7. What is “culling” and why is it important? Culling is the process of going through all the photos from a shoot and selecting the best ones to edit and deliver. It’s a critical first step in any professional workflow. Culling effectively saves you from wasting time editing photos that you won’t end up using. AI tools like Imagen’s Culling Studio can significantly speed up this process.
8. Do I need to learn Photoshop to be a good photographer? No. Many successful professional photographers rarely, if ever, open Photoshop. You can accomplish 95% of photo editing tasks in a RAW editor like Lightroom or with a platform like Imagen. You only need Photoshop for very specific, advanced tasks like heavy retouching or compositing.
9. How long does it take to learn photo editing? The basics can be learned in a few weeks. Becoming truly proficient and developing a unique style can take years of practice. This is why AI-powered tools are so valuable for beginners; they bridge that experience gap and allow you to get high-quality results much faster.
10. Can AI editing replace a human editor? AI editing is a tool to assist, not replace, the photographer. The creative vision still comes from you. You teach the AI your style, and you make the final decisions. The AI handles the repetitive, time-consuming tasks, freeing you up to be more creative.
11. Which software is best for portraits? For portraits, you’ll want tools for skin smoothing, color correction, and precise adjustments. Lightroom Classic and Capture One are excellent for manual control. Imagen is particularly strong because its AI can learn your specific style of portrait editing and apply it consistently. Luminar Neo also has many easy-to-use AI portrait tools.
12. Which software is best for landscapes? Landscape editing often involves enhancing colors, recovering details in highlights and shadows, and sometimes combining multiple exposures (HDR). Lightroom Classic and Capture One are industry standards. Luminar Neo is also popular for its AI Sky Replacement tool.
13. What’s the best way to back up my photos? The “3-2-1” rule is the gold standard: Keep 3 copies of your data on 2 different types of media, with at least 1 copy off-site. For a photographer, this could mean:
- 1: Your working files on your computer’s internal or external drive.
- 2: A backup on a separate external hard drive.
- 3: An off-site backup using a cloud storage service like Imagen Cloud Storage, Backblaze, or Dropbox.