

Photo culling software for school photographers: A Complete 2026 Guide
Table of contents
- Why Culling Is the Hardest Part of School Photography
- What to Look For in Culling Software for High-Volume Work
- How Imagen Handles Culling and Batch Editing Together
- Where Dedicated Tools Still Earn Their Place
- Building a School-Day Workflow That Scales
- Matching the Tool to Your Studio’s Volume
- Frequently Asked Questions
- What is the best type of photo culling software for school photographers?
- How does culling software handle the huge volume of a picture day?
- How much does Imagen cost, and is there a free trial?
- Can culling software fix blurry or out-of-focus school photos?
- Should I use one tool or several for school photography?
School photography is a volume business before it is anything else. A single picture day can put 800 students in front of your backdrop, and by the time you add retakes, sports teams, class group shots, and the occasional sibling combo, one location can hand you 4,000 to 6,000 frames in an afternoon. The right photo culling software for school photographers is the tool that gets you from a full card to a clean, deliverable set without swallowing your whole evening. This guide walks through what culling software actually does for high-volume school work, how it fits alongside batch editing and color grading, and how to choose a setup that keeps every class looking consistent while you move fast.
The short answer up front: the strongest workflow pairs fast AI culling to clear out blinks, missed focus, and near-duplicate bursts with a batch editing pass that applies one consistent look across every student. Below you will see how the pieces fit, where dedicated tools earn their place, and where a batch-first desktop app like Imagen removes the biggest bottleneck.
Why Culling Is the Hardest Part of School Photography
Culling is the step where most school photographers lose their evenings. Unlike a wedding, where you are telling a story and can be selective, picture day is a promise to every family that their child gets a clean, usable frame. You cannot skip a student, and you cannot deliver a blink. That means reviewing a burst of three to five frames per child, catching the closed eyes, the half-turned head, the kid who looked at the wrong camera, and picking the keeper. Multiply that by several hundred students and the math gets punishing quickly.
Good culling software attacks this in two ways. First, it groups near-identical frames so you review a burst as one decision instead of five. Second, it flags technical problems automatically, so soft focus and closed eyes surface before you waste attention on them. The goal is not to remove your judgment. The goal is to put the obvious rejects out of the way so your judgment goes only where it matters, which is choosing the single best expression for each child.
What to Look For in Culling Software for High-Volume Work
Not every culling tool is built for the scale a school photographer faces. When you are evaluating options, weigh these factors against a real picture-day card, not a ten-image sample.
Speed at volume. A tool that feels fast on 200 images can crawl on 5,000. Look for software that processes a full day’s take in a single pass rather than choking partway through. The first pass finishing quickly is what lets you edit the same night instead of pushing delivery a week out.
Burst and duplicate grouping. Since school work is inherently a series of near-duplicates per student, strong duplicate detection is the single most valuable feature. It collapses the review from thousands of individual choices into a manageable set of small decisions.
Focus and eye detection. Automatic flagging of soft frames and closed eyes saves the most tedious part of the review. The best tools surface these so you confirm rather than hunt.
A workflow that continues past the cull. Culling is only half the job. If your culling tool hands off cleanly into editing, or handles both in one flow, you avoid the friction of exporting, re-importing, and re-matching files between apps.
How Imagen Handles Culling and Batch Editing Together
Imagen is a desktop app for Mac and Windows built for photographers who deliver whole shoots rather than single hero frames, with the AI processing handled in the cloud. You download and install it, sign in, and it does not need Lightroom running underneath it. For a school photographer with a laptop and a deadline, that matters, because the work starts the moment you upload rather than after a long local import, and edited photos arrive in batches as they process, so you can start reviewing early frames while the rest finish.
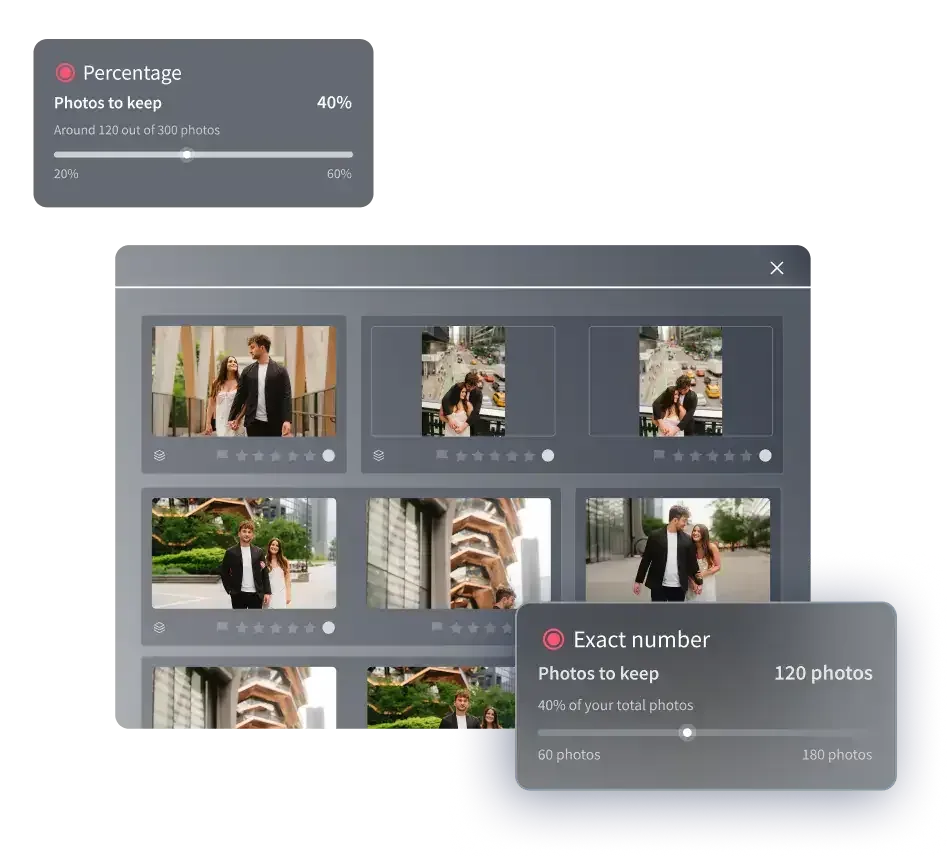
Culling runs as part of the flow. Imagen narrows the near-duplicate bursts that picture day produces, so the ten frames of one student collapse toward the keeper before you spend time scrolling. AI filters such as blur and closed eyes help you narrow a class further, and if you prefer, you can skip AI culling and cull manually for free. Once the take is culled, your Personal AI Profile applies color correction, exposure balancing, and white balance in your own consistent style across every frame. That consistency is the quiet superpower for school work. A student photographed under the gym lights at 9 a.m. and another shot near a window at 2 p.m. come back looking like one coherent set, which is exactly what a school expects when the whole grade lands in the same yearbook spread. Imagen reports that the first batch finishes in under 10 minutes, which is the difference between delivering this week and delivering next.
Where a single frame needs individual attention, the AI Assistant handles the exceptions per photo, covering object removal and background or plate blur. You can reuse a style profile you built earlier, so the look you established last season carries into this one without rebuilding it from scratch. You can see how the batch and culling flow works, and try Imagen’s new Studio where you cull, edit and export in one project, on the Imagen site.
Pricing is pay-as-you-go, with a monthly base fee plus a charge for the photos you export. Exploring the tools is free, so you can run a real class through it before committing. Two honest limits are worth stating plainly. Imagen does not sharpen or deblur a soft capture, so a frame that missed focus needs a different tool. It also does not run face-recognition delivery galleries or replace an entire background. Within its lane, culling the take and batch-grading it to one consistent look, it removes the exact bottleneck school volume creates.
Where Dedicated Tools Still Earn Their Place
No single app covers every job on a school card, and it helps to know which tasks belong to a specialist. A batch-first tool handles the volume, and these dedicated categories take the frames that need something else.
Sharpening, noise reduction, and upscaling. When a frame is soft, shot in a dim gym, or needs to be enlarged for a large print or a wall composite, a dedicated detail-enhancement tool uses trained models to sharpen, denoise, and upscale. This is deliberately outside a batch grader’s scope, so keep one of these in your kit for the handful of images that need rescue, understanding that they improve capture quality within limits and cannot invent focus that was never there.
Detailed skin and portrait retouching. Senior portraits and premium packages sometimes call for close, frame-by-frame skin work: blemish cleanup, dodge and burn, frequency-separation retouching. A dedicated portrait retouching tool automates a strong starting point that a retoucher refines by hand. This is craft on a single face, not a pass across a thousand frames, so it sits beside your batch workflow rather than replacing it.
True HDR bracket merging. If you bracket exposures in a tricky auditorium or a bright-window classroom and need to merge them into a single high-dynamic-range file, that merge is a distinct job for a dedicated HDR tool. It is separate from a batch color and tone grade, so route those brackets to the tool built for them.
Compositing and layer work. Green-screen backgrounds, memory-mate templates, and complex composites are layer-based tasks. A layer-based editor gives the pixel-level control those jobs need. It is hands-on work, which is why it lives at the end of your pipeline for the specific frames that require it.
Building a School-Day Workflow That Scales
A workflow that survives a heavy picture-day season usually follows the same order. Start by uploading the full card and letting culling software narrow the bursts and flag the technical rejects, so your review is short and focused on choosing expressions. Next, run a batch editing pass that applies your consistent style to the entire set at once, which is what keeps every class matching across the yearbook. Then send only the exceptions to specialists: the soft frame to a sharpening tool, the senior portrait to a retoucher, the bracketed set to an HDR merge, the memory mate to a layer-based editor.
The principle is to let the batch tool carry the volume and reserve hand work for the frames that genuinely need it. Most school photographers waste their time doing manually, one frame at a time, what a batch pass would apply to the whole grade in one move. Fixing that order is usually a bigger speed gain than any single feature. When your culling and batch grade share one flow, you also skip the export-and-re-import friction that eats time between separate apps.
Matching the Tool to Your Studio’s Volume
Your volume and your package mix point straight at the right setup. If you shoot large picture days and consistency across hundreds of students is the whole game, a batch-first tool that culls and grades in one flow removes the bottleneck and finishes the first pass in minutes. If your work leans toward premium senior sessions where each face is a small, careful edit, a retouching-first setup rewards the time you invest per frame. Most working school photographers run two tools rather than one: a batch app for the day’s volume and consistency, plus a specialist for the rare file that needs deep retouching, sharpening, or a composite.
Whatever you choose, test it against a real card before a season starts, not a handful of clean frames. The tool that feels effortless on a small sample is not always the one that holds up when a full day’s take lands at once. Run an actual class through Imagen while it is free to explore, time how long the first pass takes, and check whether the consistency holds from your first backdrop to your last.
If your busy season also includes weddings and events, a few companion guides go deeper on the parts that eat the most hours. See photo culling software for wedding photographers, batch photo editing software for wedding photographers, and color grading software for wedding photography. You can also browse the full library of photography workflow tips for more on culling, batch editing, and consistent finishing.
What’s new in Imagen: Imagen is now an intelligent, agentic Studio for professional photographers, the next step for the same Imagen you may already know. Cull, edit, review and export in a single project, in whatever order suits a busy picture day. Use AI culling to narrow a big take, then apply your Personal AI Profile, learned from your past edits, to the keepers. The Studio is rolling out gradually as a beta.
Frequently Asked Questions
What is the best type of photo culling software for school photographers?
The strongest fit for school work is software that combines fast AI culling with batch editing in one flow, because picture day produces thousands of near-duplicate frames per student that need both a quick cull and a consistent look. Imagen does this in a desktop app for Mac and Windows, narrowing bursts and then applying your style across the whole set, with the first batch finishing in under 10 minutes. Standalone culling apps also work well if your editing lives elsewhere.
How does culling software handle the huge volume of a picture day?
Good culling software groups near-identical frames so you review a burst of shots per student as a single decision, and it flags soft focus and closed eyes automatically. That turns thousands of individual choices into a manageable set of quick confirmations. The best tools process a full day’s card in one pass rather than slowing down partway through, so you can start editing the same evening.
How much does Imagen cost, and is there a free trial?
Imagen is pay-as-you-go, with a monthly base fee plus a charge for the photos you export. Exploring the tools is free, so you can run a real class through it before committing, and you pay only when photos leave Imagen.
Can culling software fix blurry or out-of-focus school photos?
Culling software identifies soft frames so you can reject or replace them, but it does not repair focus. Imagen does not sharpen or deblur soft captures at all. For a frame that missed focus and must be delivered, you would use a dedicated sharpening and detail-enhancement tool, and even those improve capture quality only within limits rather than inventing focus that was never recorded.
Should I use one tool or several for school photography?
Most school photographers use two. A batch-first tool like Imagen handles the volume by culling and grading the whole day to one consistent style, while a specialist tool takes on deep retouching for senior portraits, sharpening for soft frames, HDR merges, or layer-based composites like memory mates. Match each tool to the job it does best rather than forcing one app to do everything.
