10 Best Free Alternatives to Lightroom in 2026
Table of contents
- Key Takeaways
- Why Photographers are Ditching Subscriptions in 2026
- 1. Imagen: The AI-Powered Workflow Alternative
- 2. Darktable: The Professional Open-Source Standard
- 3. RawTherapee: The Technical Powerhouse
- 4. DigiKam: The Ultimate Asset Manager
- 5. Photopea: The Best Browser-Based Alternative
- 6. GIMP: The Classic Hybrid
- 7. Polarr: The Social Media Specialist
- 8. LightZone: The Zone System Alternative
- 9. Apple Photos & Google Photos: The Native Cloud Options
- 10. Luminar Neo (Free/Trial Version): The AI Specialist
- The 2026 Lightroom Alternative Decision Matrix
- Frequently Asked Questions
- Can these free alternatives handle my camera’s RAW files?
- What about lens correction profiles?
- Is it difficult to migrate my library from Lightroom?
- Can I use my Lightroom presets in these programs?
- Do any of these free tools support tethered shooting?
- How do these programs handle printing and soft-proofing?
- What is the catch? Why are these tools free?
- If I’m a professional, is a free tool really a good idea?
- Can I do local adjustments like in Lightroom?
Adobe Lightroom has been the king of photo editing for years. But its kingdom is built on a subscription model that many photographers are starting to question. That monthly fee adds up, and frankly, the competition has become ferocious. You don’t have to pay to get professional-grade results anymore.
In 2026, the field of free Lightroom alternatives isn’t just about saving money; it’s about finding the right tool for your specific workflow. Whether you need a powerful RAW processor, an AI-driven assistant, or a top-tier digital asset manager, there’s a free option that can deliver without the recurring bill.
Key Takeaways
- Subscription Fatigue is Real - A 2025 survey found that 52% of creators are actively looking to replace subscription tools. Adobe’s cheapest Lightroom plan costs $143.88 per year, which adds up to over $700 over five years.
- AI is the New Standard - Tools like Imagen offer a workflow alternative by automating editing and culling, reducing manual work by up to 90%. This is a crucial consideration for high-volume photographers, as 74% have already adopted AI tools.
- Open-Source is Pro-Grade - Don’t mistake free for basic. Darktable supports over 550 RAW camera formats, and RawTherapee’s 32-bit float engine ensures maximum image quality, rivaling paid software.
- Asset Management Matters - For photographers with large catalogs, DigiKam is a standout, capable of managing libraries with over 100,000 photos without significant lag.
- Browser-Based Editors are Powerful - You don’t always need a hefty desktop app. Photopea serves over 10 million monthly active users and can handle RAW files and PSDs directly in a browser.
- Mobile-First is a Valid Workflow - For social media creators, mobile-centric editors like Polarr are often faster and more effective. It’s no surprise that 68% of Gen Z photographers prefer mobile-first editing suites.
Why Photographers are Ditching Subscriptions in 2026
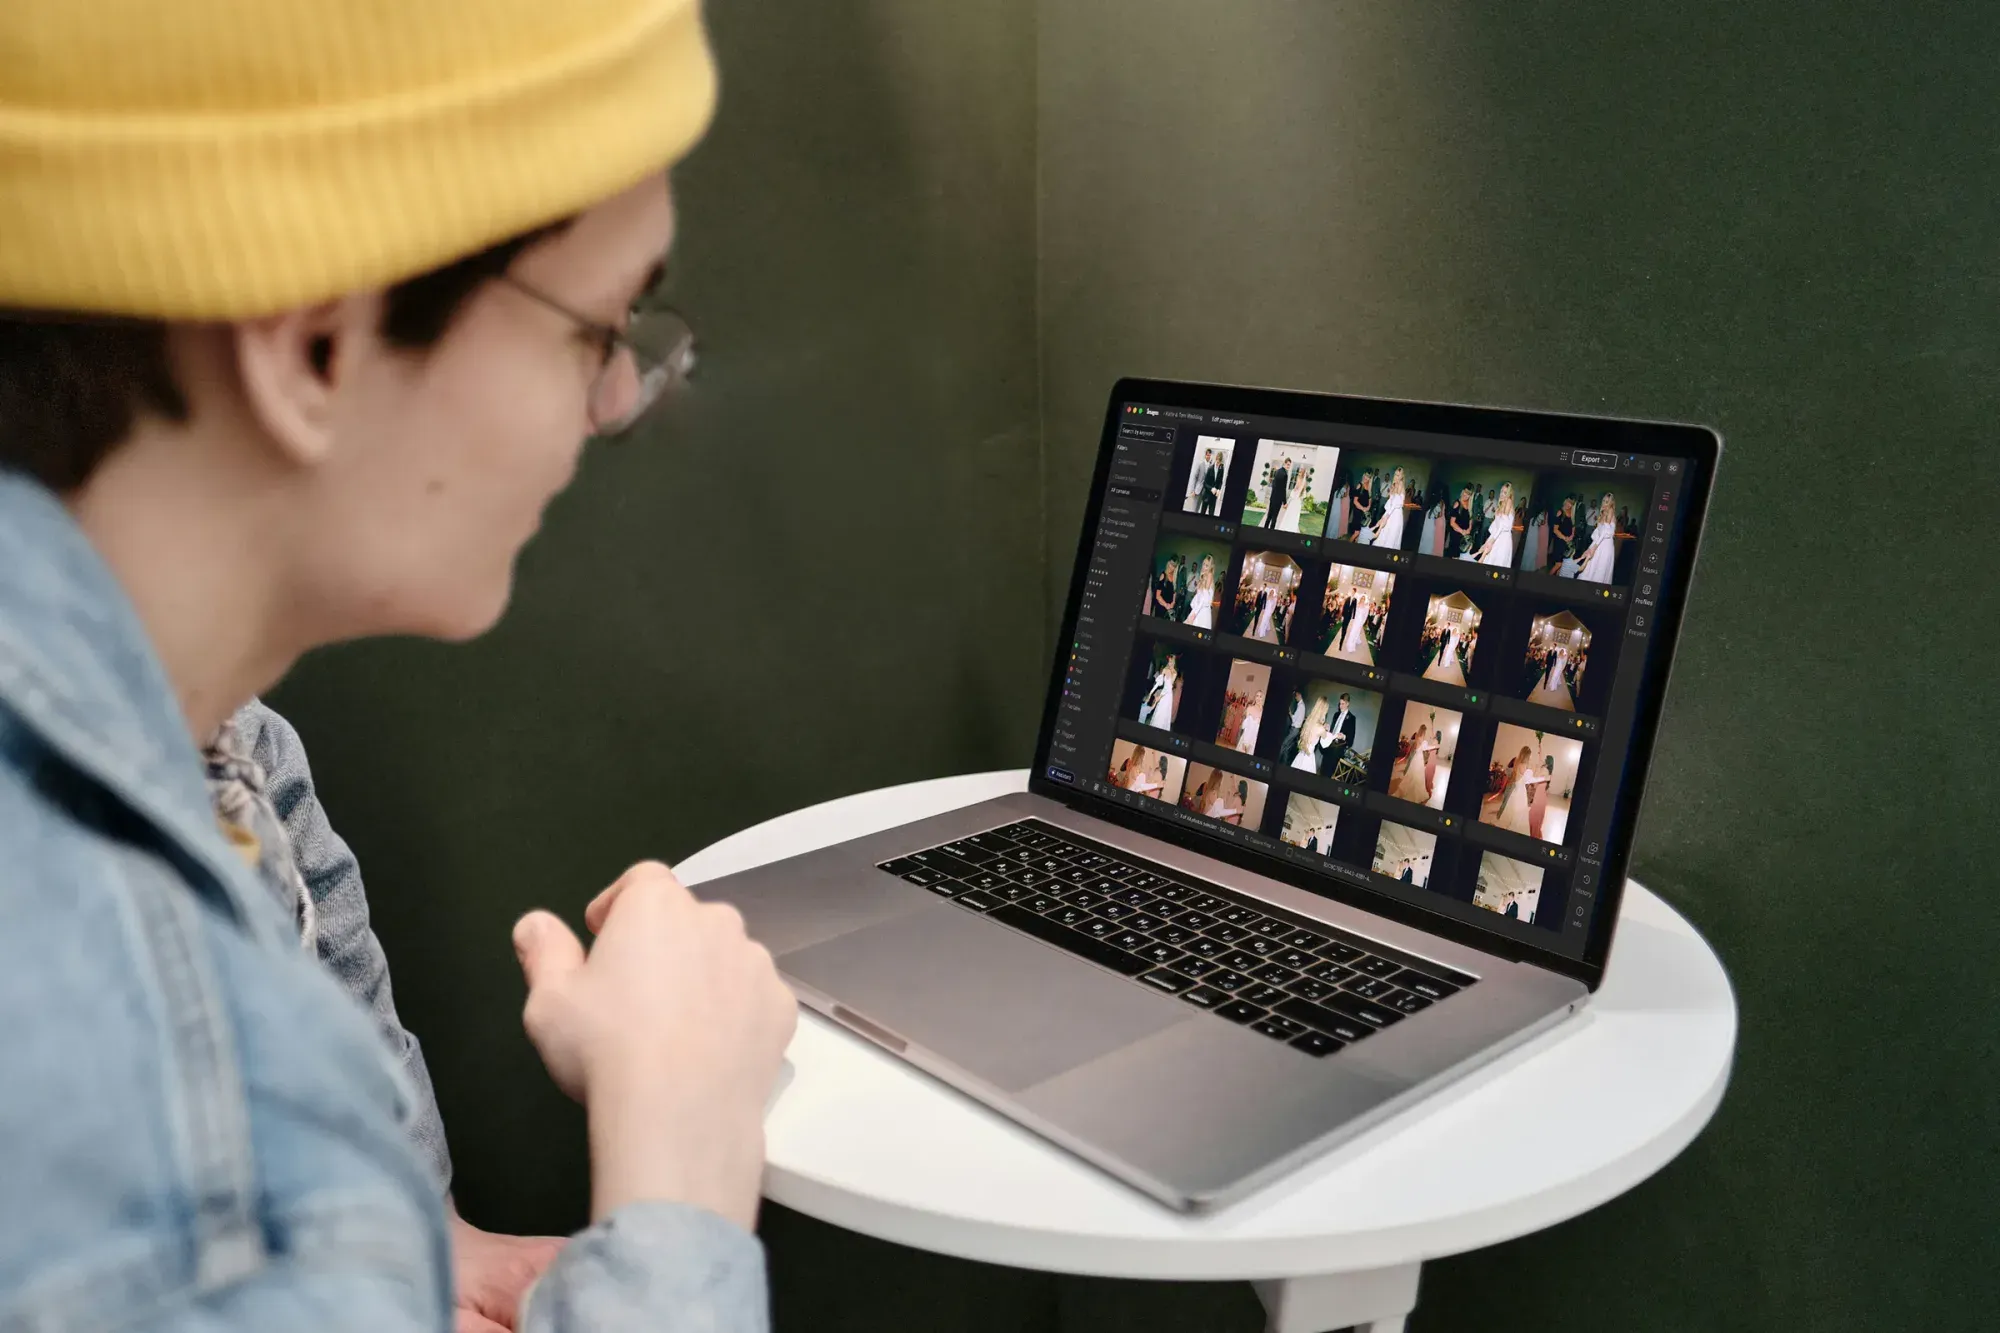
The movement away from subscription-only software isn’t just a trend; it’s a fundamental shift in how creators think about their toolset. Look, the core reason is simple: subscription fatigue. A recent report revealed that 52% of independent creators are hunting for perpetual license or free alternatives to their monthly software bills. It’s a constant drain, and photographers are doing the math.
that math. Adobe’s cheapest Lightroom plan runs $143.88 per year ($11.99 a month), and the Photography plan with Photoshop runs $239.88. Over five years, even the cheaper one is $719.40. For a working professional, that might seem like the cost of doing business. But for hobbyists and semi-pros, that’s a new lens or a weekend workshop. That annual cost is precisely why 45% of hobbyists say they’re seeking alternatives.
But this isn’t just about cost. The open-source community has made incredible strides. These aren’t clunky, difficult tools anymore. They’re mature platforms backed by passionate developers. The use of open-source creative software has jumped by 22% since 2022. At the same time, the rise of powerful AI in free and alternative tools means you’re not sacrificing modern features. You can get sophisticated AI masking, subject detection, and automated adjustments without being locked into Adobe’s ecosystem. And with 60% of photographers now using a hybrid cloud and local storage model, the demand for flexible tools that aren’t tied to a specific cloud service is higher than ever.
1. Imagen: The AI-Powered Workflow Alternative
Let’s be clear: Imagen isn’t a free editor in the traditional sense. These days, it’s now an intelligent Studio for professional photographers, rolling out gradually over several weeks. It’s still an alternative to the entire manual editing and culling process, which for many photographers is the most significant cost of all: time. While other tools on this list replace Lightroom’s sliders and buttons, Imagen replaces the hours you spend in front of them, plus AI filters that flag things like blur before you even start.
Here’s a typical scenario for a wedding photographer. You’ve just shot 3,000 photos. First, you’ve to cull them, which can easily take 4-6 hours. Then, you spend another 15-20 hours editing the selected 500-700 images in Lightroom. That’s a huge bottleneck. With Imagen, the workflow is completely different.
You start by using the AI photo culling tool. It analyzes the entire shoot for focus, closed eyes, duplicates, and composition, delivering a curated gallery in minutes, not hours. Once culled, you apply an AI Profile. You can either use a pre-built Talent AI Profile from a top-tier photographer or, and this is the really powerful part, create a Personal AI Profile trained on your own edited photos. You feed it your past Lightroom catalogs, and it learns your unique style down to the last detail: your white balance preferences, your tone curves, even your approach to HSL adjustments. The platform’s internal benchmarks show it can edit 1,500 images in under 10 minutes, effectively reducing total editing time by up to 90%. For that wedding photographer, a 20-hour editing job becomes a one-hour review and tweak session. You’re not just getting a Lightroom alternative, you’re getting hours of your week back to spend however you want.
This approach has resonated with pros, as 74% of professional photographers now use AI-assisted tools. You work within Lightroom Classic, so there’s no new interface to learn. It’s a plugin that transforms your existing software from a manual tool into an automated one. Imagen pricing is pay-as-you-go or subscription-based, but when you calculate the hours saved, it presents a compelling financial argument against doing everything by hand.
2. Darktable: The Professional Open-Source Standard
If you’re looking for a direct, feature-for-feature free replacement for Lightroom, Darktable is probably where your search ends. This is a serious, professional-grade tool that doesn’t hide its complexity. It’s built on the concept of a “virtual lighttable” for organization and a “darkroom” for non-destructive RAW editing. It’s a familiar workflow for anyone coming from Lightroom.
What sets Darktable apart is the sheer depth of its editing modules. Where Lightroom gives you a set of curated sliders, Darktable offers over 60 different modules for everything from basic exposure and color correction to advanced color grading with the “color balance rgb” module and complex masking. You’ve parametric masks, drawn masks, and even color-based masks that offer a level of control that often surpasses Lightroom’s.
Here’s what that means in practice:
- Professional Color Management - It has a full-featured, ICC profile-based color management system that ensures color consistency from your camera to your screen to your final print.
- Tethered Shooting - You can connect your camera directly to your computer and have photos appear in Darktable as you shoot, a feature typically reserved for paid software.
- Advanced Scripting - Darktable is scriptable using Lua, allowing you to automate repetitive tasks and create your own custom workflows.
- Massive RAW Support - It boasts support for over 550 unique RAW camera formats, a testament to its active open-source community.
This isn’t a tool for casual users. The learning curve is steep, and the interface can feel less polished than Adobe’s. But for photographers who want total control and are willing to invest the time to learn, Darktable is arguably more powerful than its paid counterpart. It’s a perfect example of the 22% growth in open-source creative software; it’s mature, strong, and completely free.
3. RawTherapee: The Technical Powerhouse
While Darktable is the all-in-one powerhouse, RawTherapee is the specialist for photographers obsessed with technical image quality. Its primary mission is to extract every last bit of data from your RAW files with the highest possible fidelity. It’s less of an asset manager and more of a pure RAW development engine.
Its biggest claim to fame is its processing engine. RawTherapee uses a 32-bit floating-point engine, which means calculations are performed with extreme precision. This is especially critical during the demosaicing process (the step where the RAW sensor data is converted into a viewable image). The result is incredible detail retention, smoother gradations, and a reduced risk of artifacts, especially when making extreme adjustments to highlights and shadows.
Pros and Cons
What makes it great:
- Superior Demosaicing Algorithms - It offers multiple demosaicing algorithms like AMaZE and LMMSE, which are often considered superior to Lightroom’s for fine detail and artifact prevention.
- Advanced Color Tools - The color handling tools are incredibly sophisticated, allowing for precise control over hue, saturation, and luminance across the entire spectrum.
- Wavelet Levels - A unique tool that lets you adjust contrast and sharpness at different detail levels, similar to frequency separation in Photoshop, but non-destructively.
- Batch Processing Queue - You can set up your edits on one photo, copy them to hundreds of others, and send them to a processing queue that runs in the background.
Where it falls short:
- No Digital Asset Management (DAM) - It has a file browser, but it’s not a library tool. There are no collections, virtual copies, or extensive keywording features like in Lightroom or DigiKam.
- Steeper Learning Curve - The interface is dense and technical. Terms like “CIECAM02” and “wavelets” are front and center, which can be intimidating for beginners.
- Slower Performance - Because of the high-precision calculations, it can feel slower than Lightroom, especially on older hardware.
Honestly, RawTherapee isn’t for everyone. If you’re a landscape or architectural photographer whose primary concern is squeezing the absolute maximum quality from your files, it’s an unbeatable free tool. But if you need an efficient workflow for managing thousands of photos from an event, you’ll find its lack of DAM features a major roadblock.
4. DigiKam: The Ultimate Asset Manager
One of Lightroom’s biggest jobs is acting as a Digital Asset Manager (DAM). It organizes, keywords, and catalogs your entire photo library. But as libraries grow, Lightroom can slow to a crawl. For photographers with truly massive archives, DigiKam is the best free alternative focused almost exclusively on professional-grade organization.
Think of it as a supercharged library module. DigiKam is built to handle huge collections. It’s capable of managing databases with well over 100,000 images using a strong backend (you can choose between SQLite for simplicity or MariaDB for performance) without the lag that plagues other programs. Its feature set is laser-focused on metadata and organization.
Here’s a checklist for what you can manage with DigiKam:
- Comprehensive Metadata Editing - It supports IPTC, XMP, and Exif standards flawlessly. You can edit metadata for thousands of images at once, create templates, and write data to sidecar files or directly into the images.
- Advanced Tagging and Rating - Go beyond simple keywords. You can create hierarchical tag trees, use color labels, star ratings, and even add pick labels. This structure makes finding specific images in a massive archive incredibly fast.
- Powerful Search Capabilities - Search by almost any criteria imaginable: metadata, tags, location, camera model, lens type, and even by sketching a rough outline or picking a color from a photo.
- Facial Recognition - Its face detection and recognition engine is surprisingly powerful for an open-source tool. You can scan your entire library, tag people, and then quickly find every photo of a specific person.
- Geotagging and Map View - Drag and drop photos onto a map to assign GPS data, or view your photos plotted on a world map. It’s perfect for travel photographers who want to organize their work by location.
While DigiKam does have a basic RAW editor (which can be supplemented by integrating with RawTherapee or Darktable), its real strength is organization. If your main frustration with Lightroom is its performance with large catalogs, DigiKam is the answer. It doesn’t try to be the best editor; it aims to be the best free photo library on the planet.
5. Photopea: The Best Browser-Based Alternative
What if you don’t want to install anything at all? Photopea is a shockingly powerful image editor that runs entirely in your web browser. It has gained immense popularity, boasting over 10 million monthly active users, because it removes the barrier of entry for photo editing. There’s no download, no installation, and no registration required.
It looks and feels a lot like an older version of Photoshop, which makes it immediately familiar to many users. But beneath that familiar interface is a surprisingly capable RAW editor. You can drag and drop a DNG, CR2, NEF, or other RAW file directly into the browser window, and it will open a RAW editing dialog similar to Adobe Camera Raw.
Quick Tips for Using Photopea
- Work on the Go - Because it’s browser-based, you can use Photopea on a Chromebook, a library computer, or a friend’s laptop without leaving any software behind. All you need is an internet connection.
- Handle Complex Files - It has excellent support for .PSD files, meaning you can open layered files from Photoshop, make adjustments, and save them back in the same format. This is fantastic for collaborating with people who use Adobe products.
- Use Keyboard Shortcuts - Most of the standard Photoshop keyboard shortcuts you’ve committed to muscle memory work in Photopea. CTRL+J to duplicate a layer, V for the move tool, B for the brush-it all works.
- Connect Cloud Storage - While it works locally in your browser, you can easily open files from and save to services like Google Drive or Dropbox, creating a simple, cloud-based workflow.
Photopea isn’t going to replace a dedicated desktop app for a professional’s entire workflow. It lacks library management and its RAW editing controls aren’t as nuanced as Darktable or RawTherapee. But for quick edits, working on a machine where you can’t install software, or for users who need a free tool that feels instantly familiar, it’s an incredible resource.
6. GIMP: The Classic Hybrid
GIMP (GNU Image Manipulation Program) is one of the oldest and most well-known open-source graphics programs, often cited as the top free alternative to Photoshop. With over 100 million total downloads, its legacy is clear. However, out of the box, it’s not a great Lightroom replacement because its strength lies in raster graphics and detailed manipulation, not RAW processing and library management.
But you can transform it into a capable RAW workflow tool by using it as a “host” for a dedicated RAW processor. This hybrid approach gives you the best of both worlds: a powerful developer for your RAW files and a top-tier pixel editor for retouching and compositing.
Here’s how you can set it up:
- Install GIMP - First, download and install the latest version of GIMP for your operating system (Windows, macOS, or Linux).
- Install a RAW Processor - Next, install either Darktable or RawTherapee. Both are excellent choices. Darktable offers a more integrated feel, while RawTherapee provides that technical precision.
- Configure the Plugin - In GIMP, you don’t need to do much. When you try to open a RAW file (like a .CR3 or .NEF) from GIMP’s file browser, it will automatically detect that you’ve Darktable or RawTherapee installed. It will then launch that program as a plugin.
- Develop Your RAW File - Make all your primary adjustments-exposure, white balance, color grading, lens corrections-inside the Darktable or RawTherapee window that opens. You’re using their superior RAW engine.
- Send to GIMP - Once you’re finished with your RAW adjustments, you simply close the developer window. The program will then send a high-quality 16-bit TIFF file over to GIMP’s main interface.
- Finalize in GIMP - Now you can perform any pixel-level edits: advanced retouching, frequency separation, adding text, or compositing multiple images.
This process isn’t as smooth as Lightroom’s integrated workflow. It involves two separate interfaces and a hand-off step in the middle. But it’s an incredibly powerful and completely free setup that combines the strengths of the best open-source tools available.
7. Polarr: The Social Media Specialist
Not every photographer is aiming for a perfectly color-accurate print to hang in a gallery. Many creators are focused on producing beautiful, consistent content for platforms like Instagram, TikTok, and Pinterest. For this workflow, speed, aesthetics, and mobile accessibility are far more important than technical precision. This is where Polarr shines.
Polarr is a cross-platform editor (available on iOS, Android, Web, and Desktop) that’s built for the modern creator. It has a strong set of editing tools, including masks and local adjustments, but its defining feature is its community-driven ecosystem of filters and styles. This is especially true for the younger generation of photographers; a 2024 study showed that 68% of Gen Z photographers prefer mobile-first editing suites for their social media work.
Modern workflows are less about a single, monolithic application and more about a flexible chain of specialized tools. A photographer might cull in one app, do base edits in another, and apply a final ‘look’ in a third, often on a mobile device, to meet the demands of fast-paced content creation.
Itamar Haim, SEO Expert and Digital Strategist specializing in search optimization and content marketing.
The “Polarr style” workflow is unique. Users can create complex looks using adjustments, overlays, and LUTs, and then save them as a custom style. But here’s the clever part: you can share these styles with others as a QR code. You can scan a code you see online and instantly import that exact look into your own editor. This has created a massive community where creators share and remix styles, allowing for rapid aesthetic experimentation. It’s perfect for an influencer who needs to maintain a consistent look across all their posts. You can create a master style, share it with your team via a QR code, and ensure every photo has the same vibe, regardless of who edits it.
Polarr’s free version is very generous, offering most of the core editing tools. A subscription unlocks more advanced features like 3D LUTs, custom overlays, and more powerful masking tools. But for many social media creators, the free version is all they need to build a stunning and consistent feed.
8. LightZone: The Zone System Alternative
Most photo editors, including Lightroom, are based on the same model: a series of sliders that you push and pull to adjust global parameters like exposure, contrast, and saturation. LightZone throws that entire concept out the window. It’s a non-destructive RAW editor built around a graphical, layered approach inspired by Ansel Adams’ famous Zone System.
Instead of sliders, you work with a tool called the ZoneMapper. This tool displays a histogram-like representation of the 16 tonal zones in your photo, from pure black to pure white. You can click and drag directly on this visual map to expand or compress specific tonal ranges. For example, you can grab the shadows (Zones II and III) and pull them down to deepen them, while simultaneously grabbing the highlights (Zones VII and VIII) and pushing them up to brighten them, all in one fluid motion. It’s a very intuitive way to visualize and manipulate the light in your image.
Here’s how the workflow differs:
- Layer-Based Adjustments - Every tool you apply (like the ZoneMapper, Sharpen, or Color Balance) is added as a new layer in a stack. You can change the opacity of these layers, change their blending modes, and re-order them at any time.
- Vector-Based Selections - You draw selections using vectors (lines and curves), which can then be used to apply tools to specific parts of the image. You can also control the feathering of these selections to create smooth, natural transitions.
- Pre-defined Styles - It comes with a number of pre-built styles that combine several tool layers to achieve specific looks, like “Soft Light” or “High-Contrast B&W,” which you can then dissect to learn how they were created.
LightZone is definitely a niche tool. Its interface feels dated, and its performance can be sluggish. But for photographers who think visually and find sliders to be an abstract and uninspiring way to edit, its unique approach can be a revelation. It forces you to think about light, not numbers, which can be a powerful creative exercise.
9. Apple Photos & Google Photos: The Native Cloud Options
Sometimes the best tool is the one you already have. Both macOS/iOS and Android come with powerful, free, built-in photo management apps: Apple Photos and Google Photos. For years, these were seen as simple consumer apps, but they’ve evolved into surprisingly capable editors, especially for photographers who are deeply invested in their respective ecosystems.
The biggest advantage here’s convenience and integration. Your photos sync automatically across all your devices (phone, tablet, computer) without any effort. This aligns perfectly with modern storage trends, where 60% of photographers use a hybrid cloud/local model. The AI-powered search is also phenomenal. You can search for “sunsets at the beach” or “pictures of my dog in the snow,” and the apps will find relevant photos without you ever having to add a single keyword.
A Quick Comparison
Apple Photos:
- Best for - Users fully inside the Apple ecosystem (iPhone, iPad, Mac).
- RAW Support - Excellent RAW support on both macOS and iOS. You can perform non-destructive edits on your RAW files.
- Editing Tools - The editing tools have become quite advanced, with control over definition, vibrance, warmth, and individual color channels, plus a powerful curves tool.
- Downside - It’s a walled garden. Getting your photos out with all their metadata and non-destructive edits intact can be a pain if you want to switch to a different system.
Google Photos:
- Best for - Users who want cross-platform accessibility (works great on Android, iOS, and the web).
- RAW Support - It supports RAW files, but the editing capabilities are more limited compared to Apple Photos on a Mac.
- Editing Tools - Features excellent AI-driven tools like “powerful Eraser” for removing unwanted objects and “Portrait Light” for relighting faces.
- Downside - The free storage tier is limited. Once you exceed it, you’ve to pay for a Google One subscription, at which point it’s no longer truly “free.”
Neither of these will replace Lightroom for a professional workflow that requires printing, soft-proofing, or complex local adjustments. But for hobbyists, families, or anyone whose primary goal is to easily manage and share photos across their devices, they’re powerful and convenient free alternatives.
10. Luminar Neo (Free/Trial Version): The AI Specialist
While Luminar Neo is a paid app, its free trial or a limited free version can function as a powerful specialist tool in your otherwise free workflow. Think of it as a free “finishing” plugin that you can use to perform specific, high-impact AI edits that other free software just can’t handle. It’s particularly useful for tasks that would normally require hours of complex masking in GIMP.
The strategy here’s to do 90% of your work in a tool like Darktable or RawTherapee-your RAW development, color correction, and basic adjustments. Then, for a select few images that need a special touch, you can bring them into Luminar Neo for a final, AI-powered polish.
Here’s a quick guide to using it as a specialist tool:
- Develop Your Photo - Do all your primary RAW editing in your main free editor. Export the image as a high-quality 16-bit TIFF.
- Open in Luminar Neo - Open the TIFF file in the trial version of Luminar Neo.
- Apply AI Tools - Now, you can access its suite of AI tools. For example:
- Sky AI - Replace a boring, overcast sky with a dramatic sunset in just two clicks. The AI handles all the complex masking around trees and buildings automatically. According to Skylum’s own labs, this can be done in less than 5 seconds.
- Portrait Bokeh AI & Face AI - For portraits, you can add creamy background blur, brighten faces, enhance eyes, and even perform subtle skin smoothing without any manual brushing.
- Relight AI - This tool builds a 3D depth map of your photo, allowing you to realistically add a light source and control the brightness of the foreground and background independently.
- Save Your Final Image - Once you’ve applied the AI enhancements, save the final image. You’ve just used a sophisticated AI tool to complete a complex task in seconds, for free.
This approach isn’t a long-term solution, as trials eventually end. However, it’s a fantastic way to see what modern AI editing can do and can be a lifesaver for that one “hero” shot that needs to be perfect.
The 2026 Lightroom Alternative Decision Matrix
Choosing the right tool depends entirely on your needs. A professional wedding photographer has vastly different requirements than a hobbyist landscape shooter or a social media content creator. This table breaks down the best options based on common workflows.
| Tool Name | Best For | Key Feature | OS Compatibility | AI Capability |
|---|---|---|---|---|
| Imagen | High-Volume Professionals (Weddings, Events) | Personal AI Profiles that learn your editing style | macOS, Windows (via Lightroom Classic) | Excellent (AI Editing, Culling, Masking) |
| Darktable | Serious photographers wanting a full, free suite | Professional modules & tethered shooting | macOS, Windows, Linux | Basic (Some masking assistance) |
| RawTherapee | Technical photographers demanding max image quality | 32-bit float processing engine & advanced demosaicing | macOS, Windows, Linux | None |
| DigiKam | Users with massive photo libraries (100k+) | strong database backend & advanced metadata tools | macOS, Windows, Linux | Good (Face Recognition) |
| Photopea | Quick edits, collaboration, and use on any computer | Runs in a browser with no installation needed | Web Browser (All OS) | Limited (Some AI-powered filters) |
| GIMP + Plugin | Users who need both RAW editing and pixel manipulation | Combines RAW processing with advanced layer-based editing | macOS, Windows, Linux | None (Relies on plugins) |
| Polarr | Social media creators and influencers | Sharable filters via QR codes & fast mobile workflow | macOS, Windows, iOS, Android, Web | Good (AI-driven filters & face detection) |
| Apple/Google Photos | Casual users seeking convenience and auto-syncing | smooth ecosystem integration & powerful AI search | macOS, iOS / Android, Web | Excellent (Search, Object Removal, Auto-Enhance) |
Whatever editor you settle on, the slow part of a big shoot is the same: choosing and editing hundreds of similar frames. AI photo culling and an AI RAW photo editor that learns your style take that part off your hands, in Lightroom Classic or without it.
Frequently Asked Questions
Can these free alternatives handle my camera’s RAW files?
Yes, for the most part. Tools like Darktable and RawTherapee have excellent and constantly updated RAW support for hundreds of camera models. You can usually check their websites for a specific list of supported cameras before you commit.
What about lens correction profiles?
This is a key feature where free tools have caught up. Both Darktable and RawTherapee use the Lensfun database, which contains correction profiles for thousands of lenses to automatically fix distortion, vignetting, and chromatic aberration, just like Lightroom.
Is it difficult to migrate my library from Lightroom?
Migrating the photos themselves is easy, but migrating your edits is impossible. You’ll be starting fresh. For your library metadata (keywords, ratings, etc.), you must first ensure Lightroom is set to write changes to XMP sidecar files. Tools like DigiKam can then import this data.
Can I use my Lightroom presets in these programs?
No. Lightroom presets (.lrtemplate or .xmp) are proprietary and only work within Adobe’s ecosystem. You’ll need to find or create new presets for the specific program you choose, though many have active communities that share styles.
Do any of these free tools support tethered shooting?
Yes. Darktable has excellent support for tethered shooting, allowing you to connect your camera directly to your computer. This is a professional feature that makes it a very strong contender for studio photographers.
How do these programs handle printing and soft-proofing?
Darktable has a dedicated “Print” view with full color management controls for soft-proofing your images against a printer profile before you print. RawTherapee also has soft-proofing capabilities. This is an area where the more professional-oriented tools excel.
What is the catch? Why are these tools free?
There’s no catch. Most of these tools (Darktable, RawTherapee, GIMP, DigiKam) are open-source. They’re developed and maintained by a global community of volunteers who are passionate about creating high-quality software that’s accessible to everyone.
If I’m a professional, is a free tool really a good idea?
It depends on your workflow. For a high-volume photographer, the time saved by a paid AI tool like AI photo editing from Imagen often provides a much higher return on investment than the money saved by a free editor. For a fine art or landscape photographer, the superior quality from RawTherapee might be the best choice, regardless of cost.
Can I do local adjustments like in Lightroom?
Absolutely. Darktable offers incredibly powerful masking tools (drawn, parametric, and color-based) that allow you to apply any of its modules to specific parts of an image. LightZone’s entire workflow is based on regional adjustments. Polarr and others also offer various masking tools.