

The Wedding Photo Editing Checklist for Ceremony Photos Before Client Delivery
Table of contents
- 1. Cull the strongest ceremony frames first
- 2. Correct exposure and white balance for every lighting change
- 3. Even out skin tones across the entire set
- 4. Apply a consistent grade that matches your style
- 5. Watch for mixed light sources within a single scene
- 6. Handle backlit aisle and processional shots
- 7. Straighten verticals in venue architecture
- 8. Do a final review before delivery
- Frequently asked questions
A solid wedding photo editing checklist for ceremony photos comes down to eight checkpoints: cull the strongest frames, fix exposure and white balance for each lighting change, even out skin tones, apply a consistent grade, watch for mixed light sources, handle backlit aisle shots, straighten venue architecture, and do one final pass before you send the gallery. Ceremony coverage is unforgiving because the light shifts constantly, from a bright outdoor aisle to a dim, candlelit altar, often within the same twenty minutes.
Skipping any one of these steps is usually what makes a gallery feel inconsistent to a client, even when every individual photo looks fine on its own. The checklist below walks through each step in the order most photographers actually work, so you can use it as a pass or fail list on your next ceremony set.
Ceremony coverage also carries more weight with clients than almost any other part of the day. These are the frames that get printed, framed, and shown to family for years, so a missed step here is far more visible than a small inconsistency in candid reception shots. Building the habit of running through the same checklist on every wedding, rather than editing by feel, is what keeps a body of work looking professional from one gallery to the next.
1. Cull the strongest ceremony frames first
Editing before culling wastes time on photos that will never leave your hard drive. Ceremony coverage produces heavy bursts, several frames of the same kiss, the same ring exchange, the same walk down the aisle, and most of them are near duplicates. Pick the sharpest, best expressed frame from each moment and set the rest aside before you touch color or exposure.
A tight cull also protects consistency later. If you carry ten similar frames of the recessional into your edit, you multiply the chance that one gets a slightly different white balance or crop than the rest, and a client will notice that inconsistency faster than almost anything else in the gallery.
Set a rough target for how many ceremony frames belong in a final gallery before you start, based on the length of the ceremony and how many distinct moments it contained. Having a number in mind, even a loose one, makes it easier to be honest about which near duplicate frame is actually the strongest rather than keeping three or four out of habit.
2. Correct exposure and white balance for every lighting change
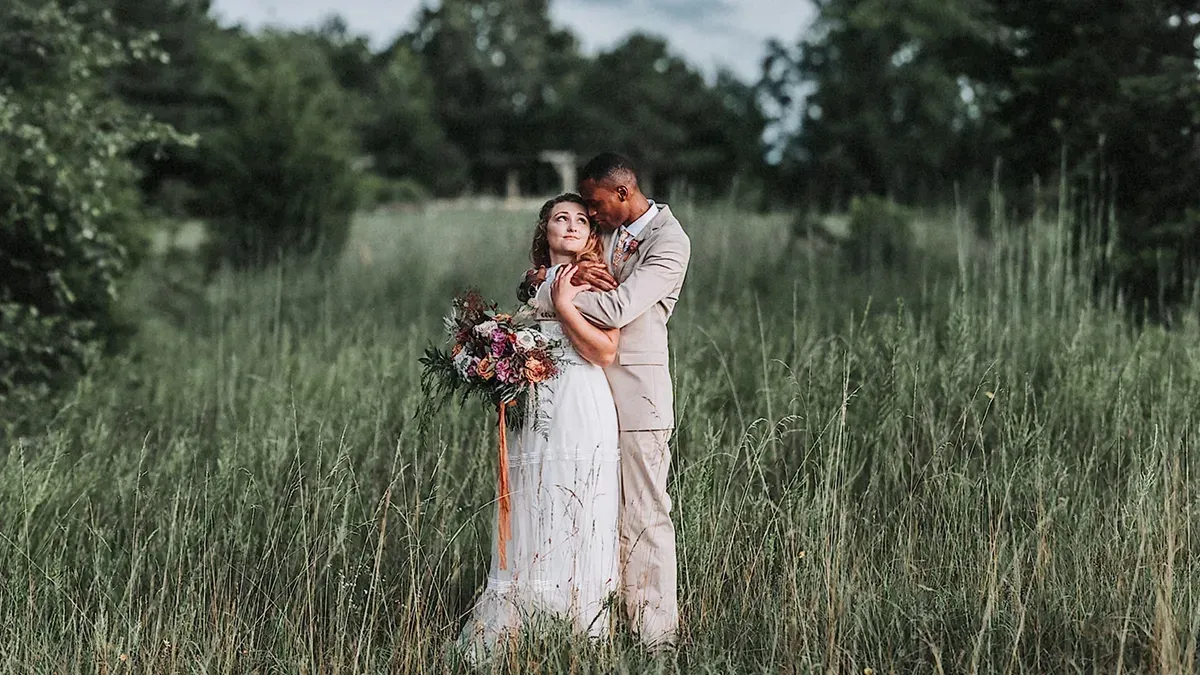
Ceremonies rarely happen under one light source for the whole event. A bright aisle entrance, open shade under a tree, a dim indoor altar, and a sunset exit can all show up in the same twenty minute sequence. Group your ceremony images by lighting condition rather than by chronological order, and correct exposure and white balance separately for each group.
Treating the whole ceremony as one lighting scenario is one of the most common reasons a gallery looks patchy. A processional shot taken in full sun and a vow shot taken in altar shade need different starting points, even if they are only two minutes apart.
A practical way to group frames is by physical location rather than by time stamp: entrance, aisle, altar, and exit. Photographers who shoot the same venue repeatedly often find that lighting groups repeat from wedding to wedding, which makes it faster to recognize which correction a given frame needs on sight.
3. Even out skin tones across the entire set
Skin tone consistency matters more during a ceremony than almost anywhere else in the day, because the couple, the officiant, and close family members appear again and again across dozens of frames. Uneven light on a face, mixed with shifting white balance, can push skin tones warm in one photo and cool in the next.
Work through the set with skin tone as a checkpoint on its own, separate from your general color pass. Compare a handful of portraits and close ups side by side rather than editing each one in isolation, since small tonal drift is much easier to spot in comparison than one frame at a time.
Pay particular attention to interracial or multi generational wedding parties, where several different skin tones appear in the same frame under the same light. A correction that flatters one face can push another too warm or too pale, so check group shots as a whole rather than approving them based on a single face.
4. Apply a consistent grade that matches your style
Once exposure and skin tones are handled, the final look needs to feel like one photographer shot the whole ceremony, not several different sessions stitched together. This is where a repeatable, personal style matters more than any single edit.
This is where an AI wedding photo editing software like Imagen helps most, since it learns your personal editing style from past work and applies it consistently across an entire shoot, rather than treating each photo as a separate decision. Imagen runs as a desktop app with cloud AI processing, works with RAW files, and also handles culling, so the culling step and the consistency step from earlier in this checklist can happen inside the same project. Pay as you go pairs a monthly base fee with a charge for the photos you export, and exploring the tools is free.
The value of a learned style profile shows up most clearly across a full ceremony sequence, where a hundred or more frames need the same grade applied without each one being adjusted by hand. Instead of eyeballing whether a new photo matches the last one, the AI style profile carries the same tonal decisions across the whole batch, then leaves room for a human pass on the handful of frames, like the mixed light or backlit shots covered next, that genuinely need individual attention.
5. Watch for mixed light sources within a single scene
Many ceremony venues combine window light with tungsten fixtures, string lights, or altar candles in the same frame. Mixed light produces color casts that a single white balance slider cannot fully resolve, since one part of the scene needs a cooler correction and another needs a warmer one.
Check these frames individually rather than batching them with the rest of the ceremony set. A quick local adjustment on the warmer or cooler zone of the image, on top of your overall grade, usually solves what a single global correction cannot.
Stained glass windows deserve their own mention here, since they throw colored light onto faces and walls that no standard white balance setting anticipates. If a venue has heavy stained glass near the altar, flag those frames during your cull so you remember to give them individual attention rather than discovering the color cast during final review.
6. Handle backlit aisle and processional shots
Backlit shots of the bride walking in, or the couple exiting through open doors, are some of the most requested images from a ceremony gallery, and also some of the easiest to get wrong. Strong backlight tends to underexpose faces while blowing out the background, so recovering detail in the subject without losing the glow behind them takes a deliberate pass rather than a single slider move.
Pull up shadows on the subject gradually and watch the highlights in the background so the scene still reads as backlit rather than flat. These frames are often gallery favorites, so it is worth giving them a second look after your main edit pass.
Resist the urge to fully expose for the shadows on a strongly backlit frame. Part of what makes these images work is the contrast between a glowing background and a subject with some natural shadow still on them, so aim for a shadow lift that keeps detail visible without erasing the mood that made the shot worth keeping in the first place.
7. Straighten verticals in venue architecture
Wide shots of a church interior, an arch, or tall windows behind the altar often show converging verticals, especially when you shot from a low angle or with a wide lens. A tilted column or a leaning doorway pulls a viewer’s eye away from the couple.
Basic straightening and leveling can be done alongside your regular edit, but if a shot needs heavier perspective correction, such as fully squaring off a wide architectural background, that is worth handling with a dedicated geometry correction tool as a separate step rather than folding it into your batch color pass.
Wide altar shots and full room shots taken from the back of a venue are the frames most likely to need this kind of correction, since a wider lens exaggerates convergence at the edges of the frame. Tighter portraits and detail shots rarely need more than a quick check, so it is worth sorting the ceremony set by lens choice or framing before you decide which images need the extra pass.
8. Do a final review before delivery
Before the gallery goes out, scroll through the full ceremony sequence in order, at normal viewing size, rather than checking thumbnails one at a time. This is the moment to catch anything that slipped through: a skin tone that drifted, a white balance mismatch between two adjacent frames, or a crop that feels off compared to the rest of the set.
If any single frame needs work beyond color and exposure, such as removing a distracting exit sign from the background or blending two exposures for a genuinely high dynamic range sky, handle that with a dedicated retouching tool before the final export rather than trying to force it into your batch edit. Photographers who want to see the full range of what Imagen covers beyond ceremony editing, including the new Studio where you cull, edit and export in one project, can look at the complete feature set on the homepage.
What’s new in Imagen: Imagen is now an intelligent, agentic Studio for professional photographers, the next evolution of the same Imagen. A ceremony gallery can stay in one project where you cull, edit, review and export in any order, with AI edits sent back to Lightroom Classic as XMP or exported as finished JPG, TIFF or PNG files. The Studio is rolling out gradually as a beta. Explore Imagen.
Frequently asked questions
How long should ceremony photo editing take before delivery? It depends on your workflow and gallery size, but the goal of a checklist like this is consistency, not speed for its own sake. Photographers who batch edit with a consistent style profile generally move through a ceremony set faster than those adjusting every frame individually, since fewer decisions are made from scratch.
Should ceremony photos be edited differently from reception photos? Often yes, at least in terms of grouping. Ceremony images tend to shift lighting quickly, aisle light, altar light, backlit doorways, so grouping and correcting by lighting condition works better than treating the whole day as one batch. Reception photos usually settle into one or two consistent light sources for longer stretches.
What is the fastest way to get consistent color across a full ceremony gallery? Building or using a personal style profile that applies your look across the whole set is the most reliable shortcut. Manually matching tone between dozens of ceremony frames one by one is slow and prone to drift, which is exactly the problem a consistent, learned editing style is meant to solve.
Do all ceremony frames need identical treatment? Not identical, but consistent. Backlit doorway shots and dim altar shots will need different starting points for exposure and white balance, but the overall grade, contrast, and skin tone approach should still feel like one cohesive style once a client scrolls through the gallery.
