

8 Wedding Photo Editing Best Practices for Ceremony Photos
Table of contents
- 1. Set a Consistent White Balance Before You Touch a Single Ceremony Photo
- 2. Protect Skin Tones Before Anything Else
- 3. Balance Exposure Between the Aisle, the Altar, and Backlit Windows
- 4. Cull Hard Before You Start Editing Ceremony Photos
- 5. Keep Color and Tone Matched Across Every Camera and Lens
- 6. Handle Mixed and Low Light Without Overprocessing
- 7. Preserve Natural Skin and Fabric Detail During Retouching
- 8. Build a Repeatable Editing Workflow for Every Ceremony You Shoot
- Frequently asked questions
The fastest way to improve wedding photo editing best practices for ceremony photos is to fix light and color before you touch anything creative. Ceremony images move through the widest range of lighting in a single wedding, from dim churches and synagogues to bright outdoor aisles and harshly backlit windows, so a consistent baseline for white balance, exposure, and skin tone matters more here than anywhere else in the gallery.
The eight practices below cover the order that actually works: cull first, protect skin, fix exposure and white balance across every frame, then move into detail and delivery. Follow them in sequence and a full ceremony set, even one shot across two cameras and three lenses, will look like a single cohesive story instead of a pile of mismatched frames.
1. Set a Consistent White Balance Before You Touch a Single Ceremony Photo
Ceremony venues rarely give you one light source. A church aisle might mix tungsten sconces, daylight pouring through stained glass, and a cool spill from a side door, all in the same ten minutes. If you correct white balance photo by photo, you end up with a gallery where the bride’s dress shifts from warm ivory to cool blue between consecutive frames, which is one of the most common complaints couples have about their wedding photos.
Start by picking two or three anchor images, ideally ones with a known neutral reference like a white shirt collar or the couple’s rings, and use those to set your baseline temperature and tint. Apply that baseline across the whole ceremony sequence first, then make small local adjustments only where the light genuinely changed, such as a processional shot near a window versus a recessional shot deeper in the room. This single step prevents most of the color drift that makes an otherwise well shot ceremony look unedited.
2. Protect Skin Tones Before Anything Else
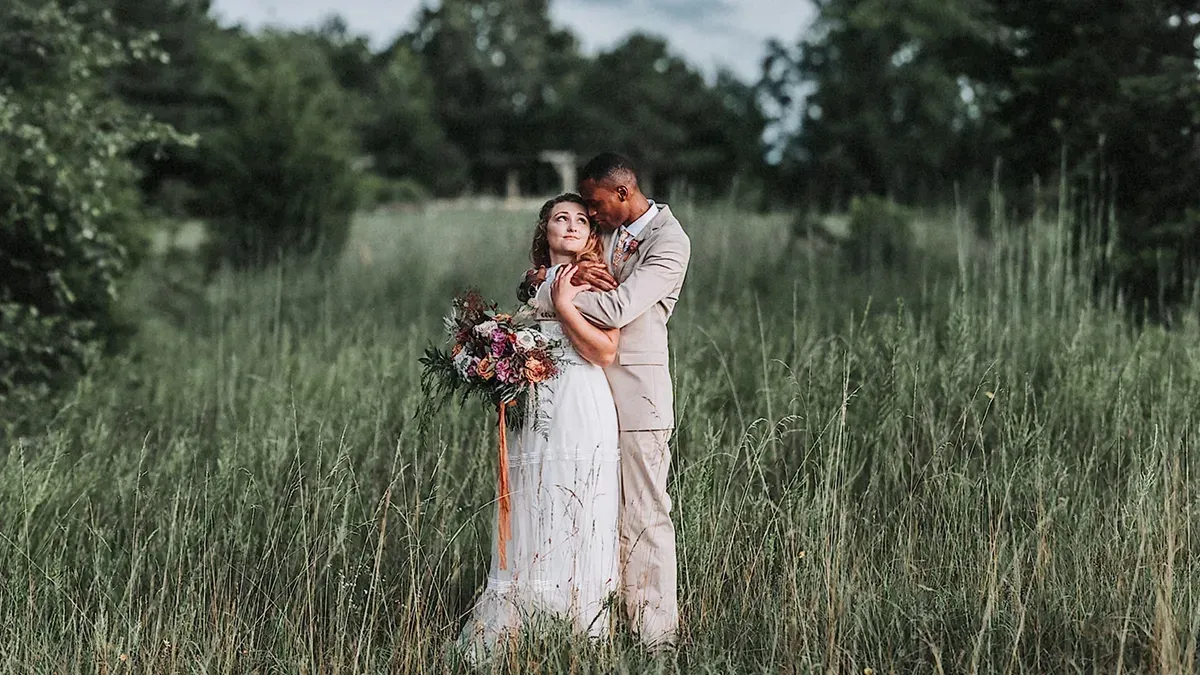
Skin tone is the detail guests and couples notice first, even if they cannot name why a photo feels off. Mixed lighting during a ceremony often pushes skin toward green, orange, or magenta casts depending on the venue’s bulbs, stained glass, or shade from a canopy. Correcting exposure and contrast without first checking skin tone tends to bake in these casts rather than remove them.
Work through a handful of representative frames, faces close to camera and faces farther back near the altar, and confirm skin reads natural before moving to broader color grading. Pay particular attention to officiants and family members standing under different light than the couple, since their skin will often need a slightly different correction even within the same frame. Getting this right early means every later adjustment, including your overall tone and contrast pass, sits on a clean foundation instead of amplifying a color problem you did not catch.
3. Balance Exposure Between the Aisle, the Altar, and Backlit Windows
Ceremony spaces frequently combine a dim aisle, a brighter altar under stage lighting, and one or more windows blasting direct sun behind the officiant. Metering for any single one of these zones usually blows out or crushes the others. The goal is not a single global exposure value, it is a set of local adjustments that make the whole frame readable without looking artificially flat.
Bring down harsh window highlights, lift shadow detail on guests seated near the back, and keep the couple’s faces as the visual anchor of exposure in every key moment: the entrance, the vows, the rings, the first kiss, and the recessional. For genuinely extreme cases, such as a ceremony shot directly against a wall of windows with multiple bracketed exposures, true high dynamic range work that merges several bracketed frames into one is usually handled with a dedicated HDR merging tool built for that specific task, separate from your day to day color and tone editing.
4. Cull Hard Before You Start Editing Ceremony Photos
A typical ceremony produces hundreds of near duplicate frames, especially during processionals, vow readings, and the recessional walk. Editing every single one wastes hours on images that will never make the final gallery, and it makes consistency harder because you are trying to grade frames you will delete anyway.
Cull first, and cull by story beats rather than by camera angle alone: pick the strongest entrance shot, the clearest vow exchange, the best ring moment, the sharpest first kiss, and a handful of genuine reaction shots from family. Batch culling tools that group similar frames and flag closed eyes or motion blur make this step dramatically faster, which matters because the time you save here is time you get back for the color and tone work that actually shapes how the gallery feels.
5. Keep Color and Tone Matched Across Every Camera and Lens
Many wedding photographers shoot ceremonies with two bodies and switch lenses mid sequence, which means raw files can carry slightly different color science even when both cameras are set to the same white balance. Left uncorrected, this shows up as a subtle but noticeable shift every time the gallery cuts between angles, which is distracting in a slideshow or album spread.
This is exactly the kind of consistency problem that batch AI editing tools are built to solve. Imagen learns your personal editing style from past work and applies that same style profile automatically across an entire shoot, including images pulled from multiple cameras and lenses, so indoor ceremony sequences shot in mixed and low light come out matched rather than patchworked. For couples married indoors under mixed venue lighting, Imagen’s indoor wedding photo editor applies that consistent grade across the whole ceremony automatically, which saves the manual cross referencing most editors do frame by frame to keep two cameras looking like one.
6. Handle Mixed and Low Light Without Overprocessing
Evening ceremonies, candlelit chapels, and dimly lit reception halls used for the vows all push noise reduction and sharpening further than a bright outdoor ceremony would need. The temptation is to push noise reduction aggressively to clean up a dark frame, but heavy noise reduction softens fine detail in lace, hair, and skin texture, which makes portraits look plastic under close inspection.
A better approach is to accept a small amount of visible grain in the darkest frames rather than smoothing it away entirely, and to lean on exposure and shadow recovery first before reaching for noise reduction sliders. Keep sharpening moderate and localized to eyes and key details rather than applying it uniformly across the frame, since uniform sharpening in low light tends to amplify noise right alongside the detail you actually wanted to enhance.
7. Preserve Natural Skin and Fabric Detail During Retouching
Ceremony photos get scrutinized closely, especially close ups of rings, hands, and faces during the vows. Over-editing here is easy to spot: skin looks waxy, veils lose their texture, and lace patterns blur into a soft haze. The goal of retouching a ceremony gallery is invisibility, the couple should notice that they look their best, not that anything was edited at all.
Keep global adjustments focused on color, tone, and exposure, and reserve heavier work for images that truly need it. Distracting elements in the background, such as an exit sign or a stray guest’s phone raised mid ceremony, are usually better handled with a dedicated object removal tool built specifically for that kind of pixel level cleanup, kept separate from your main batch editing pass so it does not slow down the rest of the gallery. The same is true for genuine blur correction on a handful of soft frames, which a dedicated deblurring tool handles more reliably than a general edit.
8. Build a Repeatable Editing Workflow for Every Ceremony You Shoot
Consistency across a single wedding matters, but consistency across every wedding you deliver is what actually builds a recognizable style clients recommend to friends. Without a repeatable workflow, each ceremony gets edited slightly differently depending on how tired you are or how much time you have that week, and that inconsistency shows up in your portfolio over time.
Document your baseline settings for white balance, exposure zones, and skin tone corrections, then apply that same starting point to every ceremony before making venue specific tweaks. Batch tools that learn your style from a library of previously edited work make this far easier to sustain across a busy season, since the starting point is generated automatically instead of rebuilt from scratch each time. If you are ready to put a consistent, repeatable editing process behind every ceremony gallery you deliver, Imagen’s photo editing platform is built for exactly that kind of volume without sacrificing a personal look, and its new Studio lets you cull, edit and export in one project.
What’s new in Imagen: Imagen is now an intelligent, agentic Studio for professional photographers, the next evolution of the same Imagen. Ceremony frames can be edited with your Personal AI Profile or a ready-made AI Profile, and more than one AI Profile can be applied to a selected set, which takes some processing time. It all lives in one project where you cull, edit, review and export. The Studio is rolling out gradually as a beta. Explore Imagen.
Frequently asked questions
How long should ceremony photo editing take? A well organized ceremony sequence, culled down to the strongest few hundred frames, typically takes a few hours to fully edit by hand once white balance, exposure, and skin tone are consistent across the set. Batch AI editing that applies a learned style profile across the whole shoot can cut that significantly, since color and tone corrections are applied automatically rather than frame by frame, leaving only a short pass for the handful of images that need individual attention.
What is the biggest mistake photographers make editing ceremony photos? Editing frames in isolation instead of as a matched sequence. Correcting white balance, exposure, and skin tone one image at a time, without cross referencing against the rest of the ceremony, is the single most common cause of a gallery that feels inconsistent from shot to shot. The second most common mistake is skipping a proper cull and editing near duplicate frames that will never make the final delivery, which wastes time that could go toward the images guests will actually see.
How much does AI wedding photo editing software cost? Pricing models vary by provider. With Imagen, pay as you go pairs a monthly base fee with a charge for the photos you export, and exploring the tools is free. Either way, you can budget editing costs against what a couple actually pays for their package, and the pricing page lists current rates.
Should I edit RAW files or JPEGs from the ceremony? RAW files whenever possible. RAW captures far more shadow and highlight detail than a JPEG, which matters enormously for ceremony photos shot in mixed lighting, since recovering a blown out window or a shadowed pew depends on the extra dynamic range RAW files retain. JPEGs compress that information away in camera, so a photo that looked fine on the back of the camera can fall apart the moment you try to pull back a bright window or lift a dark aisle in editing, especially for indoor ceremonies where the lighting shifts from minute to minute.
