

How to Do Photo Culling for Automotive Photographers: A Step-by-Step Guide
Table of contents
- How to Do Photo Culling for Automotive Photographers: Step-by-Step Guide
- Why Culling Is Its Own Skill in Automotive Photography
- Step 1: Import and Group by Shoot and Vehicle
- Step 2: Make a Fast First Pass to Reject Obvious Throwaways
- Step 3: Compare Near-Identical Angles and Pick the Sharpest
- Step 4: Drop Motion-Test and Bracket Frames You Do Not Need
- Step 5: Check Per-Vehicle Consistency Across the Set
- Step 6: How AI Culling Removes the Bottleneck
- What AI Culling Costs and When It Pays Off
- Common Culling Mistakes to Avoid
- A Repeatable Culling Checklist
- Frequently asked questions
How to Do Photo Culling for Automotive Photographers: Step-by-Step Guide
Photo culling for automotive photographers means working through hundreds or thousands of near-identical frames and keeping only the sharpest, best-exposed shot of each angle, then dropping the blinks, the motion-test frames, and the duplicate brackets before you ever open an editor. The fastest way to do it is to sort by shoot and vehicle first, make one hard pass to reject obvious throwaways, then a refined pass to pick the single winner from each tight burst. AI culling tools speed this up dramatically by flagging blur, closed eyes, and duplicates and pre-selecting the best of each group so you only confirm decisions instead of hunting for them.
This guide walks through a repeatable, step-by-step culling workflow built for the way automotive work actually shoots: big inventory rounds, rig-shot sequences, detail bursts, and rolling-shot sets where twenty frames of the same panning move all look alike until you zoom to 100 percent. Follow the steps in order and you will cut a full day’s ingest down to a tight, client-ready selection without second-guessing yourself later.
Why Culling Is Its Own Skill in Automotive Photography
Automotive shoots generate volume that few other genres match. A single dealership inventory day can produce thousands of frames across dozens of vehicles, each shot from the same standard set of angles: front three-quarter, rear three-quarter, profile, wheels, interior, dash, and detail. On a creative or editorial car shoot you add rig sequences, rolling pans, and lighting brackets, and the frame count climbs even higher. That repetition is exactly what makes culling hard. When forty frames of the same silver sedan differ only by a hair of focus or a slightly better reflection on the hood, the eye starts to blur and decisions slow to a crawl.
Good culling protects three things at once: your time, your consistency, and your client relationship. Delivering the wrong near-duplicate, a subtly soft wheel shot, or two almost-identical profiles instead of one clean pick makes the whole set feel careless. Treating culling as a deliberate skill, with a fixed process rather than a mood, is what keeps large automotive volumes manageable and your selects genuinely the best available.
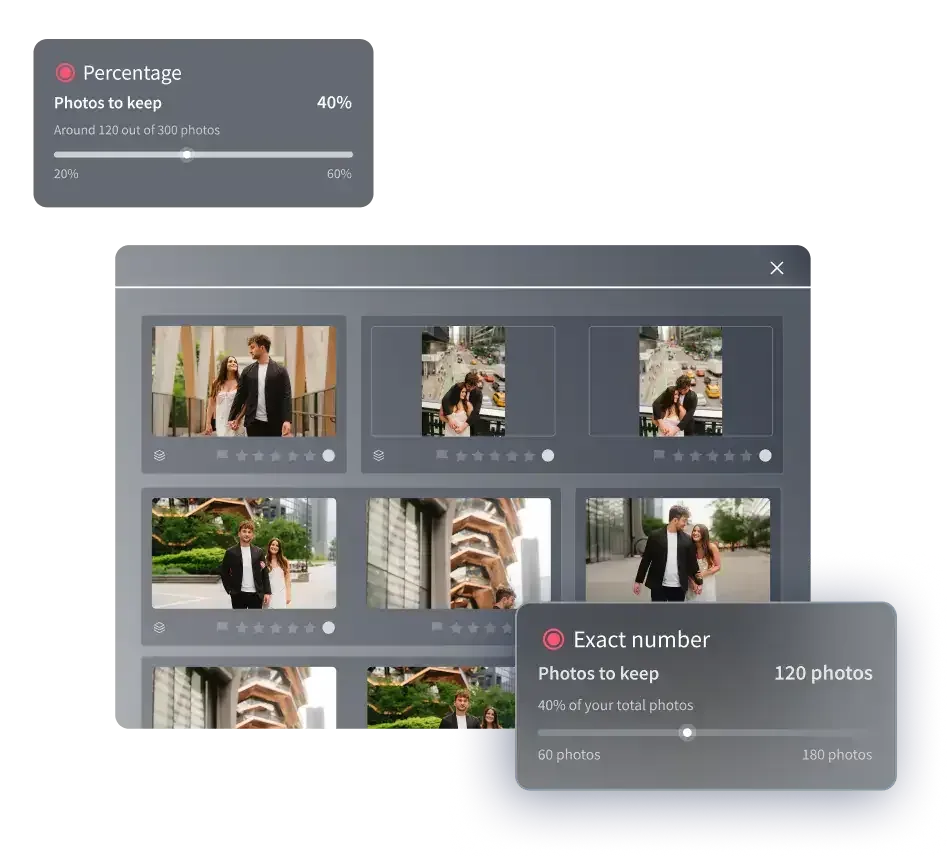
Step 1: Import and Group by Shoot and Vehicle
Before you judge a single frame, get your library organized so that culling happens inside tight, comparable groups. Ingest each shoot into its own folder, then subdivide by vehicle. For inventory work, one subfolder per car or per stock number keeps the standard angle set together and stops frames from two different vehicles bleeding into the same comparison.
Add basic metadata as you import: shoot date, location, and vehicle identifier. This makes it easy to filter later and to re-find a specific car if a client asks for a reshoot. The goal of this step is simple. When you start rejecting frames, you want to be comparing like with like, twelve versions of the same front three-quarter, not a random stream of unrelated cars.
Step 2: Make a Fast First Pass to Reject Obvious Throwaways
Your first pass is not about picking winners. It is about removing everything that can never be delivered, quickly and without agonizing. Go through the full set at a comfortable preview size and reject anything with a clear, disqualifying flaw: badly missed focus, a frame shot while you were still testing exposure or lighting, someone walking through the shot, a closed garage door in the background, or an obvious motion blur from a bumped tripod.
Work at speed here. If a frame is plainly unusable, mark it rejected and move on. Do not zoom, do not compare, do not deliberate. The point of this pass is to shrink the pile so that the careful work in later steps happens over a much smaller, much stronger set. Most automotive sets lose a large chunk of frames in this pass alone: test shots, safety duplicates, and the frames you fired just to check a reflection.
Step 3: Compare Near-Identical Angles and Pick the Sharpest
Now the real culling begins. Group the survivors by angle within each vehicle so all the front three-quarter frames sit together, all the profiles sit together, and so on. For each group of near-identical shots, your job is to choose the single sharpest, cleanest frame.
Zoom to 100 percent on the parts of the car that must be crisp: the badge, the headlight edge, the wheel, the panel line nearest the camera. Reflections matter here too. On glossy paint, the winning frame is often the one with the cleanest highlight roll-off across the hood and doors, not just the one that is technically sharpest. Check for stray reflections of you, your lights, or the surroundings in the paint and glass. When two frames are genuinely equal on sharpness, let the better reflection and the cleaner background break the tie.
Keep one winner per angle unless the brief explicitly calls for options. Delivering a single decisive pick per angle is what makes an automotive set feel curated rather than dumped.
Step 4: Drop Motion-Test and Bracket Frames You Do Not Need
Automotive work is full of frames that exist only as part of a technique, not as final images. Rolling shots leave you with long panning sequences where most frames are throwaways and only a couple nail the wheel spin and background streak. Rig shots produce a burst of safety frames around the one clean composite base. If you bracket exposures for a tricky lighting situation, those brackets are inputs to a later merge, not standalone selects.
Cull these deliberately. From a panning sequence, keep the one or two frames with the sharpest car and the best sense of motion, and reject the rest. For bracketed sets destined for exposure blending, keep the frames the blend actually needs and set them aside clearly, because true HDR bracket-merging is handled later in a dedicated exposure-blending tool, not during culling. The culling decision here is only which frames survive, not how they will be combined.
Step 5: Check Per-Vehicle Consistency Across the Set
Once you have a winner for every angle on every vehicle, step back and look at each car as a complete set rather than a pile of individual picks. Consistency is what separates professional automotive delivery from a random gallery. For each vehicle, confirm you have the full standard angle list the client expects and that nothing important is missing, a wheel shot dropped by accident, an interior angle you rejected too aggressively.
Then compare across vehicles. If you are delivering an inventory batch, the front three-quarter of car one should frame the vehicle the same way as the front three-quarter of car twenty. Culling is where you catch a car whose angle set is thin and flag it for a quick reshoot before editing, which is far cheaper than discovering the gap after delivery.
Step 6: How AI Culling Removes the Bottleneck
Everything above is sound manual practice, and on a small shoot you can do it by eye. At automotive volume, the sorting and comparing is where hours disappear. This is where AI culling earns its place. Instead of you opening every near-identical frame, the software analyzes the full set, flags blinks, blur, and closed eyes on any people in the shot, detects duplicates and near-duplicates, and pre-selects the sharpest frame from each tight group so your job shifts from searching to confirming.
Imagen’s AI photo culling software is built exactly for this kind of high-volume, near-identical work. It runs across RAW and JPEG together, so mixed automotive ingests do not need pre-sorting, and it learns your selection preferences over time, meaning the frames it surfaces increasingly match the calls you would make yourself. On rig-shot bursts and inventory rounds, that turns Step 3’s angle-by-angle comparison into a quick review of already-grouped candidates. You still make the final creative decision on reflections and mood, but the machine does the tedious first cut across thousands of frames.
Because the AI processing runs in the cloud from Imagen’s desktop app, culling starts as soon as your files upload, with no long imports to wait through. After culling, the same platform can batch grade your selects for consistent color and tone across the whole shoot, which keeps the per-vehicle look uniform that Step 5 asks for. You can try the full workflow in the new Studio, where you cull, edit and export in one project, on Imagen and see how much of the sorting it removes on your own catalog.
What AI Culling Costs and When It Pays Off
Imagen’s pricing follows what you export, so the math is easy to reason about against the hours you spend. Pay-as-you-go charges a monthly base fee plus a per-photo charge when you export, and a plan brings the per-photo rate down. Culling is included rather than billed as a separate service, and manual culling is always free. For a photographer clearing several inventory days a week, the trade is straightforward: a small per-image cost against the time it takes to hand-compare thousands of near-identical automotive frames.
The payoff grows with volume and repetition, which is precisely what automotive work has. The more standardized your angle set and the larger your bursts, the more of the culling decision the software can reliably pre-make, and the more of your day goes back to shooting and delivering instead of clicking through duplicates.
Common Culling Mistakes to Avoid
The biggest mistake is culling and selecting in one pass. Trying to reject throwaways and pick winners at the same time slows you to a crawl and invites second-guessing. Keep the reject pass and the select pass separate, as in Steps 2 and 3.
The second mistake is over-delivering. Handing a client six near-identical front three-quarters because you could not decide is not generosity, it reads as indecision. Commit to one winner per angle. The third mistake is culling without zooming on volume work, then discovering soft wheel shots after delivery. Build the 100 percent check into your select pass, or lean on a tool that flags softness for you. Finally, avoid culling across unrelated vehicles at once. Compare within a car and within an angle, or the eye fatigues and your standard slips.
A Repeatable Culling Checklist
Turn the steps above into a fixed routine you run the same way every time. Import and group by shoot, then by vehicle. Make a fast reject pass over the whole set. Group survivors by angle and pick the single sharpest frame per angle, zooming to 100 percent on the critical edges. Drop motion-test frames and set aside any brackets the later merge needs. Confirm each vehicle has its full angle set and that framing is consistent across cars. Run AI culling first on high-volume days to pre-group and pre-select, then confirm rather than search. Running the same checklist every shoot is what makes your culling fast, defensible, and consistent from one inventory day to the next.
What’s new in Imagen: Imagen has evolved into an intelligent, agentic Studio for professional photographers, with culling, editing, review and export living in one non-linear project. For automotive shoots, you can use AI culling to narrow near-identical frames, or skip it and cull manually for free, then carry your keepers straight into editing. The Studio is reaching photographers gradually as a beta.
Frequently asked questions
How long should culling a large automotive shoot take?
By hand, a big inventory day of several thousand frames can take hours of comparing near-identical angles. Grouping by vehicle and angle first, then running a fast reject pass, cuts that meaningfully. AI culling that pre-groups and pre-selects the sharpest frame from each burst turns most of the work into quick confirmation, so a large set becomes a short review rather than a full afternoon.
Should I cull RAW or JPEG for automotive work?
Cull whatever you shot, and you often shoot both. The important thing is that your culling tool can read RAW and JPEG together so a mixed ingest does not need pre-sorting. Imagen’s culling runs across RAW and JPEG in the same pass, so you can judge sharpness and exposure on the files you will actually deliver from.
How do I pick between two nearly identical frames of the same angle?
Start with sharpness at 100 percent on the badge, headlight, and nearest panel line. If both are equally sharp, let the cleaner paint reflection and the tidier background decide. On automotive work the winning frame is frequently the one with the smoothest highlight roll-off across the hood and the fewest stray reflections, not just the technically crispest capture.
Can AI culling learn my selection style?
Yes. Imagen’s culling learns your selection preferences over time, so the frames it surfaces increasingly reflect the calls you would make yourself. That matters most on repetitive automotive sets, where your standard for a good front three-quarter or wheel shot is consistent and the tool can align to it across thousands of frames.
