

How to Do Image Cropping for Headshot Photographers: A Step-by-Step Guide
Table of contents
- Why cropping matters more for headshots than for any other genre
- Step 1: Crop to the eyes before anything else
- Step 2: Choose the right aspect ratio for the end use
- Step 3: Get headroom, chin room, and shoulder room right
- Step 4: Decide how tight to go
- Step 5: Keep the whole set consistent
- How Imagen speeds up headshot cropping and editing
- Cropping tasks Imagen does not replace
- Common headshot cropping mistakes to avoid
- Frequently asked questions
Cropping a headshot is the quiet decision that shapes how a face reads. For headshot photographers, the goal is simple to state and surprisingly hard to hit consistently: frame the subject so the eyes land in the right spot, the crop flatters the jaw and shoulders, and every image in the set matches the ones beside it. The fastest reliable method is to crop to the eyes first, keep a consistent aspect ratio across the whole session, and leave enough headroom and shoulder room so the portrait breathes. Then apply that same logic to every frame instead of eyeballing each one.
This guide walks through headshot-specific cropping from start to finish: where to place the eyes, which ratios corporate and acting clients actually need, how tight is too tight, and how to keep 200 or 2,000 frames looking like one cohesive body of work. It also covers where the manual work becomes a bottleneck and how batch tools remove it, so you can spend your time on the shoot and the selects rather than nudging crop boxes one image at a time.
Why cropping matters more for headshots than for any other genre
A landscape can survive a loose crop. A headshot cannot. When the frame is filled almost entirely by a person’s face and shoulders, every millimeter of the crop is visible and every choice carries weight. Too much headroom makes the subject look small and lost. Too little makes the image feel cramped and anxious. Cut the shoulders at the wrong point and the person looks like they are sinking out of the frame.
Headshots also live in predictable, unforgiving places. LinkedIn profiles, corporate directories, acting agency rosters, law firm bio pages, and speaker cards all crop your image into a square or a tight rectangle whether you like it or not. If you deliver a portrait with the subject floating in the center, the platform’s automatic square crop can lop off the chin or shove the eyes to the very top. Cropping deliberately, with the final placements in mind, is what keeps your work looking intentional after it leaves your hands.
The other pressure unique to this genre is volume with uniformity. A corporate team shoot might produce headshots of 40 employees who all need to sit on the same About page. If one person’s crop is tight and centered while the next is loose and off to the side, the grid looks sloppy even when each individual image is technically fine. Consistency is not a nice-to-have here. It is the product.
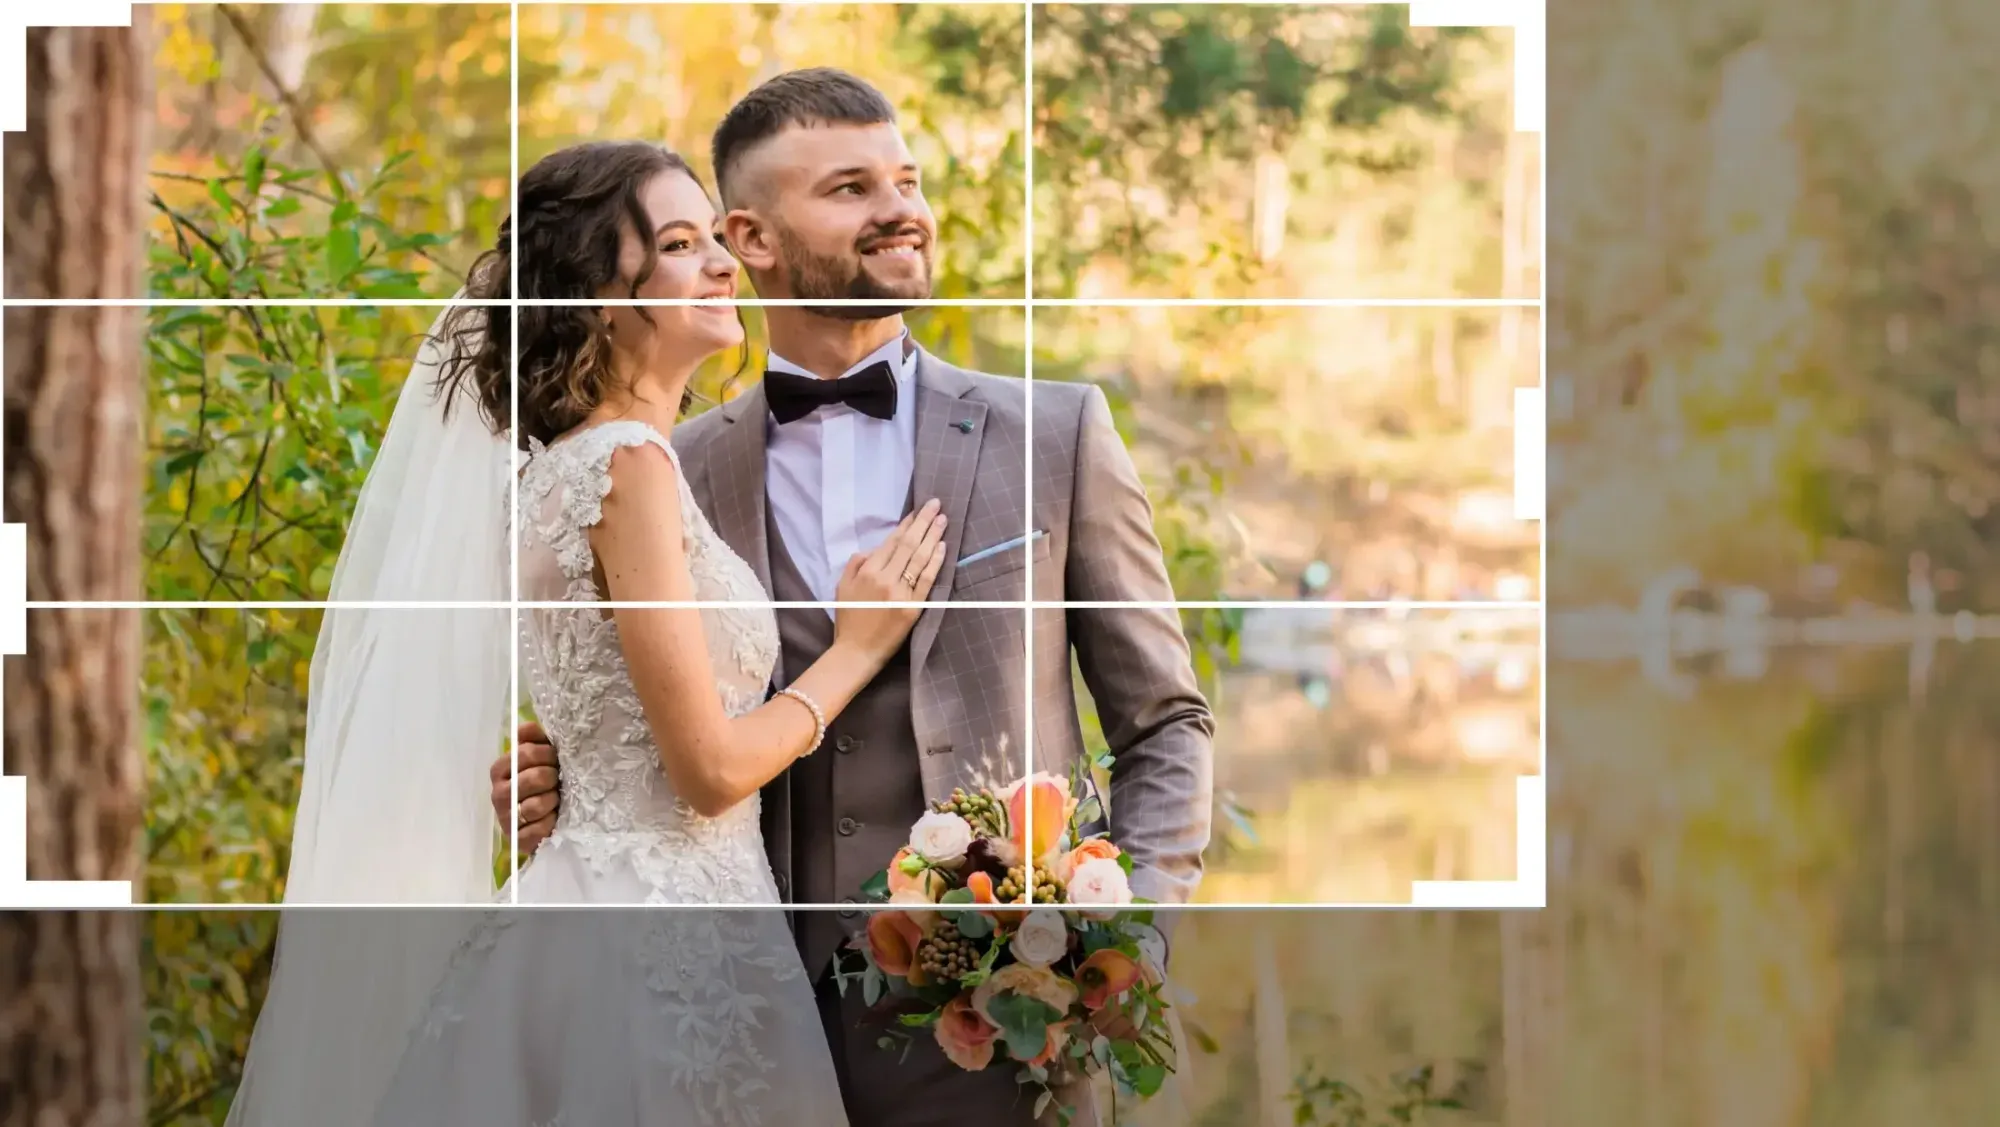
Step 1: Crop to the eyes before anything else
The eyes are the anchor of a headshot, so they should be the first thing you position, not the last. A widely used starting point places the eyes along the upper third of the frame, roughly a third of the way down from the top edge. This gives the face natural dominance while leaving comfortable headroom above.
Work in this order. Set your aspect ratio first so the crop box has the right shape. Slide the box until the eyes sit on or just above that upper-third line. Only then worry about the exact top and bottom edges. When the eyes are placed well, the rest of the crop tends to fall into place, because the viewer’s attention goes straight to them and forgives small variations elsewhere.
One caution specific to faces: watch the catchlights and the eye line together. If your subject is looking slightly off-camera, give a little more space on the side they are looking toward. A face crammed against the edge it is gazing into feels tense, while a touch of breathing room in the direction of the gaze feels calm and deliberate.
Step 2: Choose the right aspect ratio for the end use
Headshot clients rarely tell you the aspect ratio they need, but their platform decides it for them. Your job is to know the destinations and crop for them, ideally delivering more than one ratio from the same frame.
The common workhorses are the square (1:1) for social profiles and directory grids, the classic 4:5 vertical for LinkedIn and portrait web layouts, and the 8x10 (4:5 in print terms) for actor headshots, which is close to an industry default. Corporate clients often want a square and a vertical from the same session. Actors and performers almost always need the 8x10 with a specific amount of chest showing.
Shoot a little looser than your tightest intended crop so you have room to produce several ratios without running out of pixels. If you frame perfectly for an 8x10 in camera, you have nothing left to give a client who suddenly needs a wide banner crop for a conference page. A slightly loose capture is cheap insurance that pays off at delivery.
Step 3: Get headroom, chin room, and shoulder room right
Three spaces make or break a headshot crop. Headroom is the gap above the top of the head. For a standard business headshot, aim for a small, even margin, enough that the head is not touching the top edge but not so much that the subject shrinks. For a tighter, more editorial look, you can crop into the top of the hair, which reads as confident and modern when done on purpose.
Chin room and the bottom edge matter just as much. The classic mistake is cropping right at the chin or, worse, right at the neck, which decapitates the subject visually and makes them look choked by the frame. Crop through the chest or the upper shoulders instead, giving the head a base to sit on. A good rule of thumb is to never end a crop exactly at a joint or a natural line of the body, such as the neck, the shoulder seam, or the elbow.
Shoulder room is the horizontal breathing space. Leave enough that the shoulders anchor the frame, but not so much that the head becomes a small dot in a sea of background. When you are producing a square crop from a vertical capture, the shoulders are usually what you sacrifice, so frame with that trade in mind.
Step 4: Decide how tight to go
Tightness is a stylistic choice, and headshot photographers benefit from having two or three go-to tightness levels rather than improvising each time. A tighter crop, filling the frame with the face from mid-forehead to collarbone, projects intensity and works well for actors, executives, and personal-brand portraits. A looser crop that includes the full head and upper chest reads as approachable and is the safe default for corporate directories.
Whatever you choose, be consistent within a set. The problem is almost never that a single crop is slightly tight or slightly loose. The problem is when one image in a team of 30 is noticeably different from the rest. Pick a tightness target for the job, note it, and hold to it across every frame you deliver.
Also consider how the crop will survive a further crop. If a corporate client will run your 4:5 headshot through a system that squares it, a very tight crop leaves no margin for that second cut, and the automated square may clip the top of the head. Cropping with the next crop in mind is a headshot-specific habit worth building.
Step 5: Keep the whole set consistent
Consistency is where headshot cropping stops being an art decision and becomes a production problem. On a single-person branding shoot, you can crop by feel. On a team of 40, or across a full week of back-to-back corporate sessions, cropping each frame by hand invites drift. Your eye tires, your standard shifts, and by image 300 your crops no longer match image 3.
The disciplined manual approach is to define the crop rules up front, place the eyes on the same line every time, use the same aspect ratio, and hold the same tightness. That works, but it is slow and mentally draining at scale. This is exactly the point where headshot photographers start losing evenings to repetitive cropping instead of shooting or selling.
For high-volume headshot work, an automated cropping step that applies the same framing logic to every image is the difference between an afternoon and a full day. When the tool positions the face the same way across the entire set, your directory grid lines up, your actor batch matches, and you skip the tedium entirely.
How Imagen speeds up headshot cropping and editing
Imagen is an AI photo editing platform built for high-volume photographers, and its Crop Agent for headshots is designed for exactly this bottleneck. Instead of nudging a crop box across hundreds of frames, you let the Crop Agent detect the subject and apply consistent, headshot-appropriate framing across the whole batch, so the eyes land in the same place and the aspect ratio stays uniform from the first image to the last.
Cropping is only one part of the delivery, though, and Imagen handles the rest of the pipeline in the same desktop app. It learns your editing style through a personal AI profile, then applies consistent color and tone across an entire shoot, which is essential when 40 corporate headshots need to match under mixed office light. It works on RAW files, culls the frames you do not need, and turns around large sets fast. When a headshot needs a manual touch, the built-in editor (Beta) offers crop and straighten tools, sliders and presets. Pricing is usage-based: pay-as-you-go is a monthly base fee plus a charge for the photos you export, so a big team shoot is easy to budget.
The practical payoff for headshot photographers is time. The batch grade, the culling, and the automated crop together remove the repetitive work that used to eat an evening after every corporate session. You can explore Imagen’s new Studio, where you cull, edit and export in one project, for free and point it at a real headshot set from the Imagen homepage to see how the crop and the color hold up across your own frames before you pay on export.
Cropping tasks Imagen does not replace
It helps to be clear about where cropping ends and other work begins, so you reach for the right tool. Cropping and consistent batch grading are squarely in Imagen’s lane. A few adjacent tasks are separate steps handled by dedicated software rather than a crop or a color pass.
If a headshot needs a distracting object removed from behind the subject, or the background swapped entirely, that is a dedicated compositing tool, not a cropping decision. Straightening a subject who was leaning, or correcting keystone distortion from a low camera angle, is a geometry and perspective correction step in a dedicated editor. Rescuing a slightly soft frame is a job for a dedicated sharpening or deblur tool. And merging bracketed exposures into a single true HDR file is a separate bracket-merge step. Knowing which of these you actually need keeps your workflow lean, because most headshot sets need clean cropping and consistent color far more than they need heavy retouching.
Common headshot cropping mistakes to avoid
A short checklist of the errors that most often show up in headshot sets. Cropping at the neck or exactly at the chin, which visually decapitates the subject. Placing the eyes dead center, which leaves awkward, unflattering headroom. Cutting the crop off at a joint or shoulder seam instead of through a clean stretch of the body. Delivering a single ratio when the client’s platform needs a square and a vertical. And the big one at scale: letting crops drift so that no two headshots in a corporate set are framed the same way.
Most of these are easy to fix once you name them. Crop to the eyes, hold your ratio, leave deliberate headroom and shoulder room, cut through clean lines, and enforce consistency across the set with a batch step rather than your tiring eye. Do that and your headshots read as a professional, unified body of work no matter how many faces are in the folder.
What’s new in Imagen: Imagen is now an intelligent, agentic Studio for professional photographers, one project where you cull, edit, review and export in any order. For a team headshot shoot, you can apply an AI Profile across the set, fine-tune a frame in the built-in editor (Beta) with crop and straighten, and export finished files straight from Imagen. It is rolling out gradually.
Frequently asked questions
Where should the eyes be positioned in a headshot crop?
Place the eyes along the upper third of the frame, roughly a third of the way down from the top edge. This gives the face natural dominance and leaves comfortable, flattering headroom above the head. Position the eyes first, then adjust the top and bottom edges, because when the eyes are placed well the rest of the crop tends to follow.
What aspect ratio is best for professional headshots?
It depends on where the headshot will live. Corporate and social profiles usually want a square (1:1) and a 4:5 vertical from the same frame, while actor headshots use the 8x10 as a near-default. The safest habit is to shoot slightly loose and deliver more than one ratio, so a single frame can serve LinkedIn, a directory grid, and a print bio without running out of pixels.
How much headroom should a headshot have?
For a standard business headshot, leave a small, even margin above the head, enough that the hair is not touching the top edge but not so much that the subject shrinks in the frame. A tighter editorial look can crop into the top of the hair when done deliberately. Avoid placing the head dead center, which creates awkward, excessive headroom.
How do I keep crops consistent across a large team headshot shoot?
Define your crop rules before you start: the same eye placement, the same aspect ratio, and the same tightness for every frame. Cropping by hand across dozens or hundreds of images invites drift as your eye tires. For high volume, an automated cropping step such as Imagen’s Crop Agent applies the same framing logic to the entire batch, so every headshot in the set matches without manual nudging.
