7 Best RAW Photo Editors for Beginners in 2026
Table of contents
- Key Takeaways
- Selection Criteria: How We Chose the Best RAW Editors
- 1. Imagen: The Ultimate AI Post-Production Assistant
- 2. Adobe Lightroom: The Industry Standard
- 3. Skylum Luminar Neo: The Creative AI Specialist
- 4. Capture One Pro: The Color Mastery Tool
- 5. DxO PhotoLab: The Optical Correction King
- 6. ON1 Photo RAW: The All-in-One Powerhouse
- 7. Affinity Photo 2: The Budget Professional
- Comparison of Best RAW Editors for 2026
- Which RAW Editor Should You Choose?
- Frequently Asked Questions
- What is a RAW photo and why should I shoot in it?
- Do I need a powerful computer to edit RAW files?
- Can I edit RAW photos on my phone or tablet?
- What’s the difference between Lightroom and Lightroom Classic?
- Is open-source software like Darktable good for beginners?
- How many photos do I need for an Imagen Personal AI Profile?
- What is ‘non-destructive’ editing?
- Does using AI make me a ‘fake’ photographer?
Diving into RAW photography is a big step. You’ve got a camera that captures incredible detail, but those RAW files need specific software to bring them to life. The problem is that most professional photo editors feel like you need an engineering degree just to open them, and that’s a real barrier for anyone starting out.
This guide cuts through the complexity. We’re not just listing features here. We’re focusing on what actually matters for someone new to the process: a manageable learning curve, smart automation that helps you learn as you go, and pricing that doesn’t require a second mortgage. You’ll find the right tool to make your photos look exactly how you pictured them.
Key Takeaways
- AI is the New Standard: In 2026, 74% of photographers use AI tools. Beginners should look for editors that automate tedious tasks like culling and basic adjustments.
- Speed is Everything: Tools like Imagen can reduce editing time by up to 96%, a massive advantage when you’re learning and shooting a lot.
- Complexity Kills Creativity: A UX study found that 62% of beginners abandon a RAW editor within 30 days because it’s too complicated. Ease of use should be your top priority.
- Subscription vs. One-Time Purchase: While Adobe’s $9.99/month plan is popular, non-subscription options like Affinity Photo 2 ($69.99) offer incredible long-term value for those on a budget.
- Don’t Ignore Technical Quality: The best editors offer superior noise reduction. DxO PhotoLab claims its tech provides up to 2.5 stops of ISO improvement, which is crucial for low-light shots.
- AI Accuracy Matters: Look for AI that genuinely helps. Imagen’s Personal AI Profiles can match a photographer’s unique style with over 90% accuracy after learning from their past work.
- The All-in-One Temptation: Some tools like ON1 Photo RAW pack everything into one app, but can feel cluttered. Decide if you prefer a specialized tool or a ‘jack-of-all-trades’.
Selection Criteria: How We Chose the Best RAW Editors
Picking the right RAW editor isn’t just about which one has the most sliders and buttons. For a beginner, the wrong choice can lead to frustration, and often a quick return to shooting JPEGs. Our selection process for 2026 zeroes in on the factors that genuinely affect a new photographer’s growth.
Ease of Use vs. Power
This is the classic balancing act. A tool needs to be capable enough to handle modern RAW files, which can run over 100MB each, but not so intimidating that you give up in week one. The data backs this up: 62% of beginners drop professional software because of interface complexity. We prioritized editors with clear layouts, helpful tutorials, and AI features that do the heavy lifting for you.
You don’t need to understand every curve and histogram from day one. A good beginner’s tool guides you instead of demanding expertise upfront. It automates the boring parts so you can focus on the creative decisions that actually matter. That’s why AI adoption has climbed so fast. A striking 74% of photographers now use AI somewhere in their workflow, and for good reason: it massively shortens the path from a flat RAW file to a finished photo.
The Importance of Non-Destructive Editing
This one’s completely non-negotiable if you want room to experiment. Non-destructive editing means that no matter what changes you make, whether that’s adjusting exposure, shifting colors, or cropping the frame, your original RAW file never gets altered. The software simply keeps a running list of instructions on how to display the photo. That gives you the freedom to experiment, make mistakes, and revert back to your original shot. Every editor on this list works non-destructively, since it’s the only professional way to operate.
1. Imagen: The Ultimate AI Post-Production Assistant
Let’s be direct about this: Imagen isn’t a traditional photo editor where you push sliders by hand. It’s an AI-powered post-production assistant that works alongside Lightroom Classic to handle the editing for you, and its built-in editor (Beta) covers manual adjustments when you want them. For a beginner, that’s a genuinely different way of working. Instead of spending years learning color theory and mastering dozens of tools, you can reach professional, consistent results almost instantly.
It works by learning your unique style from photos you’ve already edited. You feed it your best work, and it builds a Personal AI Profile that then applies that style to thousands of new photos in minutes. According to Imagen’s internal data, this process can cut editing time by up to 96%. Picture editing a 1,000-photo wedding catalog in under 10 minutes. That’s the kind of power we’re talking about.
“AI isn’t about replacing the photographer’s creativity; it’s about eliminating the 90% of post-production that’s purely repetitive. Tools that can learn a specific editing style and apply it consistently are giving photographers back their most valuable asset: time. It allows them to focus on shooting and growing their business rather than being stuck behind a screen.”
Itamar Haim, AI Photography Workflow Specialist.
For a beginner who doesn’t have thousands of edited photos yet, Imagen offers pre-built Talent AI Profiles created by world-renowned photographers. You can pick a style you love, something like ‘cinematic’ or ‘light and airy’, and apply it to your photos to get a high-quality starting point right away. This doubles as a genuine learning tool, since you can see how a professional would edit your shot and then make your own tweaks in Lightroom afterward.
Key Features of Imagen
- Personal AI Profiles: The core technology. After training on at least 3,000 of your edited photos, the AI replicates your style with over 90% accuracy. It’s like having a personal editor who already knows exactly what you want.
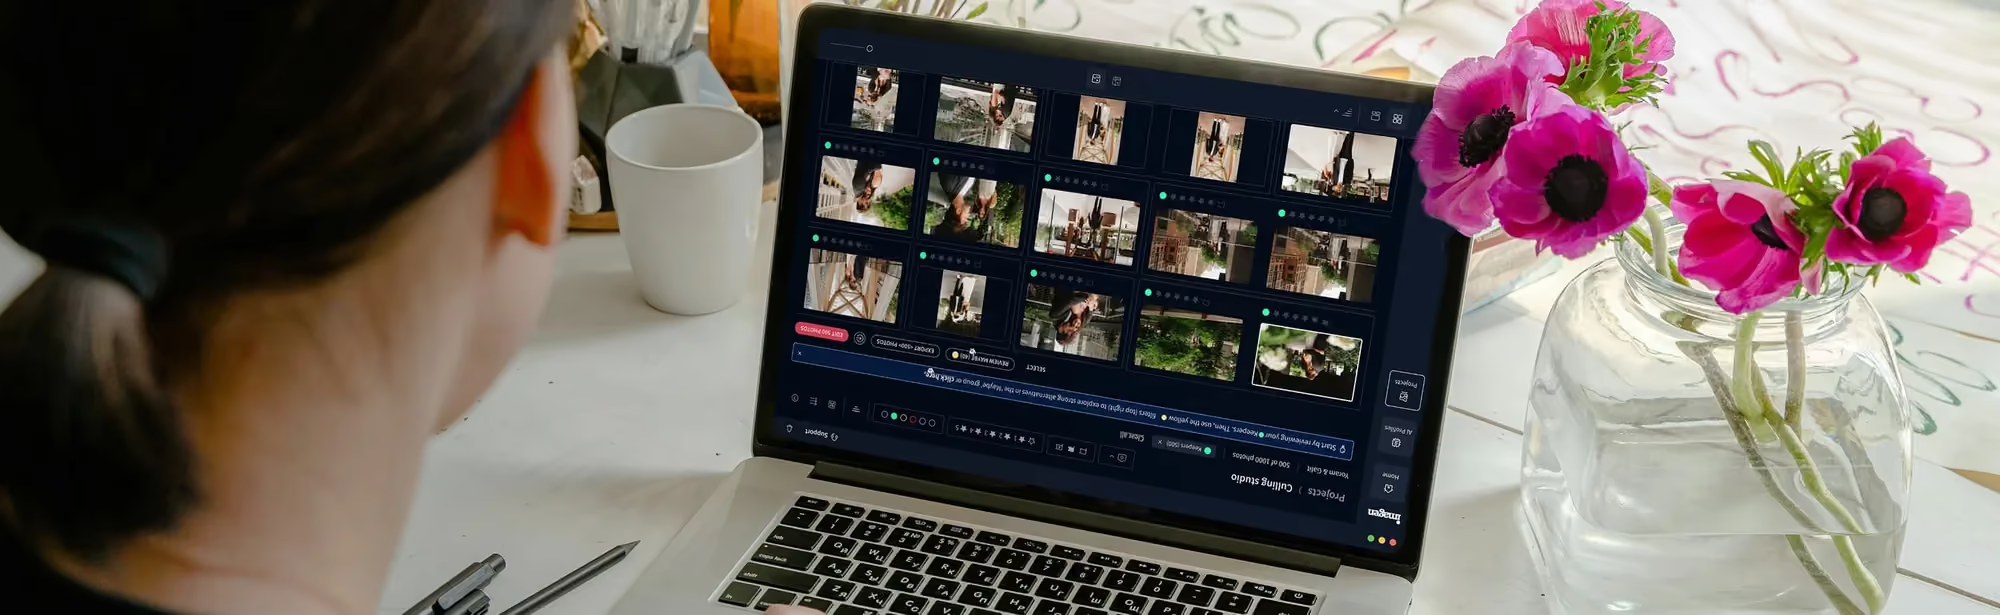
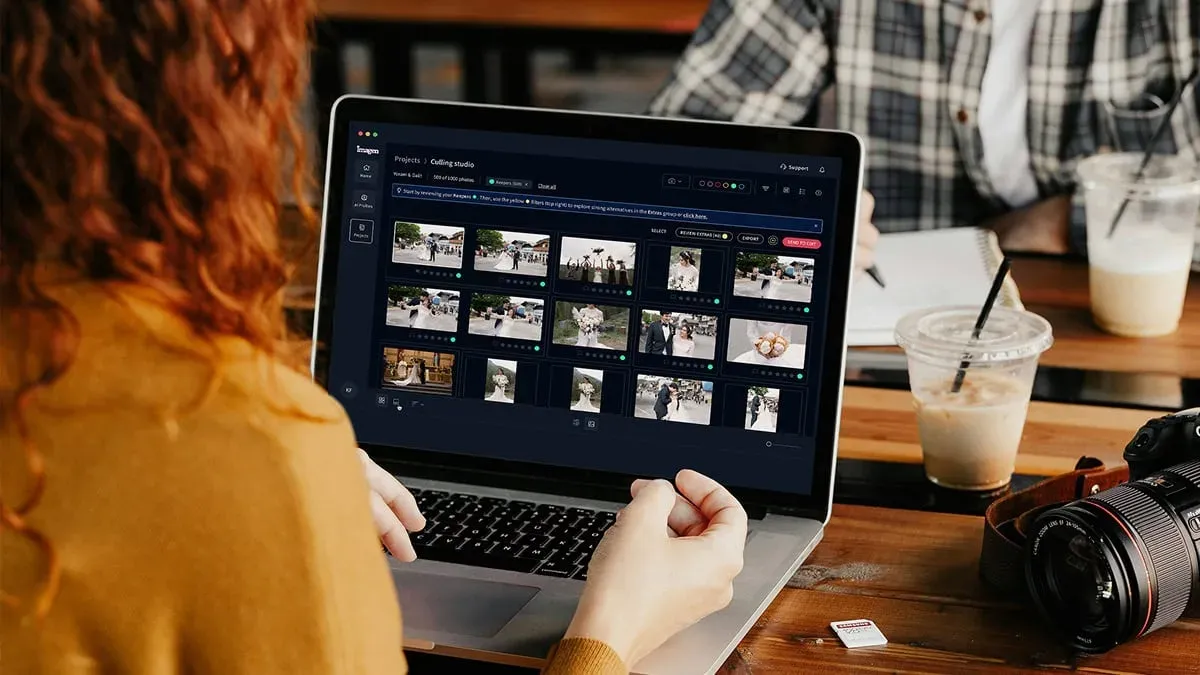
- AI Photo Culling: Before you even edit, Imagen can go through thousands of your photos and discard the blurry ones, the duplicates, and those with closed eyes. This AI photo culling feature alone saves hours of tedious work, and you can skip it and cull manually for free if you prefer.
- Automated AI Tools: Beyond color and tone, Imagen can automatically crop and straighten, handling the most common editing tasks for you, and its Assistant can find photos and act on them when you ask in plain language, with you steering.
- Smooth Lightroom Integration: It isn’t a standalone app you have to learn from scratch. It works directly with your Lightroom Classic catalog, so your existing workflow stays familiar.
Imagen Pricing
Imagen’s pricing model looks different from the rest of the field. It runs on pay-per-use, which suits beginners who might not be editing huge volumes every month. Here’s a quick breakdown from the Imagen pricing page:
- Pay-as-you-go: You pay a monthly base fee plus a charge for each photo you export, so you can try it out without a big upfront commitment.
- Subscription Plans: For higher volumes, there are monthly plans, listed on the pricing page, that offer a lower per-photo cost.
- Pay at Export: You pay at export, and you see every edit in the gallery first, so you can judge the impact on your workflow.
Verdict: If your goal is professional-looking photos without the steep learning curve of manual editing, Imagen is the best choice. It acts as a co-pilot that automates the technical grind, freeing you up to focus on shooting.
2. Adobe Lightroom: The Industry Standard
You can’t really talk about RAW editing without mentioning Adobe Lightroom. It earned the industry standard title for a reason: it combines photo organization with a powerful yet fairly intuitive set of editing tools. For beginners, Lightroom offers a clear path for growth, moving from basic slider adjustments to advanced masking and color grading.
The interface stays clean, centered around a series of panels in the ‘Develop’ module. You work your way down the panel, adjusting basics like exposure and contrast, then moving on to tone curves, colors, and effects. Its cloud ecosystem is also a major draw. You can start culling photos on your tablet, make a few quick edits on your phone, and watch all those changes sync automatically to your desktop for final polishing. This flexibility matters, especially since 58% of hobbyists now do at least some editing on mobile devices.
Key Features
- Intuitive Sliders: The core editing experience is based on simple sliders like ‘Exposure’, ‘Highlights’, and ‘Shadows’ that provide immediate visual feedback.
- Powerful AI Masking: Lightroom’s AI can automatically select a subject, sky, or background, allowing you to make targeted adjustments with a single click.
- Massive Preset Ecosystem: There are millions of free and paid presets available, which can give beginners a great starting point for finding a style they like.
- Cloud Syncing: The Adobe Photography Plan includes cloud storage, which syncs your photos and edits across desktop, mobile, and web.
Pricing
Adobe’s model runs subscription-only. The most popular option is the Creative Cloud Photography Plan, which costs $9.99/month as of 2026. This includes Lightroom, Lightroom Classic, Photoshop, and 20GB of cloud storage. A 1TB plan is also available for $19.99/month if you shoot a lot of volume.
Pros and Cons
- Pros: Excellent all-around feature set, huge community for tutorials and support, fantastic mobile apps, strong organizational tools.
- Cons: The subscription model means you never truly own the software, and the cost adds up over the years. The library module can feel a bit slow on large catalogs.
Verdict: Lightroom is the best choice for beginners who want a structured, all-in-one solution for both organizing and editing their photos, and who value a smooth cross-device workflow.
3. Skylum Luminar Neo: The Creative AI Specialist
What if you care less about perfect color accuracy and more about creating something visually dramatic? That’s where Skylum Luminar Neo comes in. This editor is built around fun, powerful, easy-to-use AI tools that produce striking results in just a few clicks. It’s designed for speed and creativity, making it a fantastic playground for beginners.
Picture this scenario: you’ve got a decent field photo, but the sky is a boring, washed-out white. In a traditional editor, replacing that sky would be a complex masking job. In Luminar Neo, you use the Sky AI tool instead. You click a button, choose a new sky from its library or upload your own, and the AI automatically masks and replaces it, even relighting the foreground to match. It genuinely feels like a shortcut most editors don’t offer.
The same principle applies to portraits. Tools like Skin AI and Face AI can smooth skin, brighten eyes, and even slim a face using simple sliders. It gamifies the whole editing process, encouraging experimentation. While professionals might find the effects heavy-handed at times, it’s an unbeatable way for a beginner to see the potential hiding in their RAW files without getting bogged down in technicalities.
Key Features
- Generative AI Tools: Features like GenErase can remove distracting objects (like power lines or tourists) and realistically fill in the background.
- One-Click AI Presets: The software analyzes your photo and suggests several ‘looks’ that would work well, giving you a great creative jumpstart.
- Advanced Portrait Tools: Automatically detects faces and provides simple sliders for enhancing eyes, lips, skin, and facial structure.
- Layers and Masking: Despite its simplicity, it still offers layers, allowing for more advanced compositing and blending as your skills grow.
Pricing
Skylum offers some flexibility here. You can get a Pro subscription for around $11.95/month, or you can purchase a Lifetime license for about $249 if you’d rather pay once. They frequently run promotions, so it’s worth watching for a sale before you commit.
Verdict: Luminar Neo is the best RAW editor for beginners and hobbyists who prioritize creative expression and want dramatic, eye-catching results fast.
4. Capture One Pro: The Color Mastery Tool
Ask professional portrait or product photographers what software they trust, and a lot of them will say Capture One Pro. It’s earned a legendary reputation for incredible color rendering and a leading RAW processing engine. Skin tones especially look more natural straight out of the camera compared to a lot of other editors. For a beginner who’s serious about mastering color, Capture One is an aspirational but genuinely powerful choice.
Here are a few tips for getting started with it:
- Start with the ‘Quick’ Tool Tab: Don’t get overwhelmed by the customizable interface right away. The ‘Quick’ tab holds all the key sliders for exposure, contrast, and white balance in one convenient place.
- Learn the Color Editor: This is Capture One’s crown jewel, honestly. Head to the ‘Color’ tab and experiment with the ‘Basic’ editor. Pick a color, say the blue in a sky, and adjust its hue, saturation, and lightness. It’s far more precise than Lightroom’s HSL panel ever gets.
- Explore the ‘Styles’: Similar to presets, Styles are pre-made adjustments that can give your photos a professional look fast. Use them as a starting point to see how different tools interact and build a final image.
Yeah, the learning curve here is steeper than Lightroom’s. The interface feels more modular and less intuitive at first glance, and you’ll probably get lost a few times. But its tools for tethered shooting (that’s shooting directly into your computer) and its granular control over color make it the top choice for studio work. The perpetual license runs $299, with a monthly subscription also available for $24/month if you’d rather test the waters first.
Verdict: Capture One Pro works best for the ambitious beginner, especially anyone focused on portrait photography or studio work, who’s willing to invest real time mastering truly professional-grade color tools.
5. DxO PhotoLab: The Optical Correction King
Every lens has flaws, and honestly, that’s just physics. They produce distortion, vignetting, and chromatic aberration, that ugly purple fringing you sometimes catch along high-contrast edges. DxO PhotoLab built its reputation on fixing these problems better than anyone else. It’s got an enormous database of camera and lens combinations, which lets it apply custom optical corrections that are shockingly precise. If you’re shooting with kit lenses or budget primes, this can make your gear look far more expensive than it really is.
But here’s the real superpower: noise reduction. Shoot in low light and you’ll inevitably crank your ISO, which introduces digital noise, or what people casually call ‘grain’. DxO’s DeepPRIME XD2 technology is widely considered the best in the business for cleaning that up. It uses a deep learning model to tell the difference between noise and fine detail, preserving sharpness while producing clean files. Can you believe DxO claims up to 2.5 stops of ISO improvement? That means a noisy shot at ISO 6400 can look as clean as one shot at ISO 1200.
Beginner’s Checklist for DxO PhotoLab
- Apply Lens Corrections First: Let the software automatically detect your gear and apply its profile. You’ll instantly see an improvement in sharpness and geometry.
- Trust DeepPRIME XD2: Got a high-ISO photo? Just switch on this feature. Don’t overthink the sliders; the default setting is almost always the right call.
- Use the U Point Tool: For local adjustments, DxO relies on ‘U Point’ technology. Click on an area, like a face, and it automatically selects similar surrounding pixels for you. You can then adjust brightness or contrast for just that area, no complex masking needed.
- Don’t Look for a Library: Unlike Lightroom, PhotoLab isn’t a photo organizer at heart. It’s a pure RAW processor through and through. You browse your computer’s folders directly, which actually simplifies things for plenty of beginners.
You’re looking at a one-time purchase of around $229 here, which makes it a solid investment for anyone who values technical image quality above everything else.
Verdict: DxO PhotoLab is a great fit for scene, architectural, or wildlife photographers who often shoot in tough light and want the highest possible level of image clarity and detail.
6. ON1 Photo RAW: The All-in-One Powerhouse
Tired of jumping between different apps for different tasks? One for organizing, one for RAW editing, another for layers and special effects? ON1 Photo RAW 2026 sets out to solve that by folding the features of Lightroom, Photoshop, and more into one cohesive platform. It’s a genuine ‘one-stop-shop’ for photo editing.
Here’s a step-by-step look at a typical beginner workflow inside ON1.
- Browse and Organize: You start in the ‘Browse’ module, which works a lot like a standard file browser. Here, you can rate, keyword, and organize your photos. The Keyword AI tool can even scan your photos automatically and add relevant tags like ‘mountain’ or ‘portrait’, which is a huge time-saver when you’re sorting thousands of images.
- Develop the RAW File: Next, you’ll move to the ‘Edit’ module. The ‘Develop’ pane on the right has all the familiar sliders for exposure, tone, and color. It also packs in powerful AI tools, including over 100 built-in AI masks for things like flora, water, and buildings.
- Add Creative Effects: This is where ON1 really shines, honestly. You can switch to the ‘Effects’ pane and add filters like ‘Glow’, ‘Dynamic Contrast’, or ‘Sun Flare’. Each one can be applied to its own layer and masked for precise control.
- Retouch and Composite: Need to do more detailed work? ON1 has a full-fledged layers system built right in. You can combine multiple photos, add text, or run advanced retouching without ever opening a separate program like Photoshop.
This all-in-one approach is both its biggest strength and, for some users, its biggest weakness. The sheer number of buttons and panes can feel cluttered to an absolute novice on day one. That said, for the beginner who wants a single application with a high ceiling for growth, it delivers real value, and it’s available as either a subscription or a perpetual license.
Verdict: ON1 Photo RAW is the best choice for beginners who want one piece of software to handle their entire workflow, from basic edits to complex composites, without paying for a subscription to multiple apps.
7. Affinity Photo 2: The Budget Professional
In a world dominated by subscriptions, Affinity Photo 2 stands out with a simple promise: professional-grade tools for a one-time price. Pay a flat fee of $69.99, and you get a full-featured RAW editor and raster graphics tool that rivals Photoshop in plenty of areas. If you’re a student, a hobbyist, or just allergic to monthly payments, its value is genuinely hard to beat.
Affinity Photo splits its functions into different ‘Personas’. For RAW editing, you’ll spend most of your time in the Develop Persona. Open a RAW file there, and you land in a clean interface that gives you all the key controls right up front. Here’s what that includes.
- Exposure and Tone controls
- Lens corrections
- Noise reduction
- Detail refinement
Once you’ve made your initial RAW adjustments, click ‘Develop’ to move into the main Photo Persona. This is where the real power lives. It’s a complete layer-based editor with advanced selection tools, brushes, retouching features like frequency separation, and even a full set of liquify tools. Think of it as more of a Photoshop alternative than a Lightroom alternative, though its RAW development capabilities hold up well enough for most beginners’ needs.
Now for the biggest trade-off here. You won’t get the one-click AI sky replacements of Luminar or the automated styling of AI photo editing from Imagen. This is a much more manual, hands-on tool, and you’ll push the sliders yourself every time. For many people, though, learning the craft this way is part of the appeal. Its iPad version is nearly identical to the desktop app too, which means true professional power on the go.
Verdict: Affinity Photo 2 is the hands-down best choice for budget-conscious beginners who want a powerful, traditional editor and are willing to trade AI convenience for a fantastic one-time price.
Comparison of Best RAW Editors for 2026
Choosing the right tool really depends on your priorities. Here’s a quick overview of how our top picks stack up against each other, to help you decide based on what matters most to you as a beginner.
| Editor | Pricing Model | AI Level | Ease of Use (for Beginners) | Best For |
|---|---|---|---|---|
| Imagen | Pay on export / Subscription | Very High (Automated Editing) | Easiest | Speed, consistency, and a hands-off workflow. |
| Adobe Lightroom | Subscription (from $9.99/mo) | Medium (AI Masking) | Easy | All-in-one organization and editing. |
| Luminar Neo | Subscription or Lifetime ($249) | High (Creative Effects) | Very Easy | Creative effects and fun, dramatic results. |
| Capture One Pro | Subscription or Lifetime ($299) | Low (Smart Adjustments) | Moderate | Professional color grading and portraits. |
| DxO PhotoLab | Lifetime (approx. $229) | Medium (Noise Reduction) | Moderate | Ultimate image clarity and technical quality. |
| Affinity Photo 2 | Lifetime ($69.99) | Very Low | Moderate | Budget-conscious users wanting pro power. |
Which RAW Editor Should You Choose?
After you’ve reviewed all the options, the choice comes down to your personal goals as a new photographer. There isn’t one single ‘best’ editor for everyone here. It’s about finding the best editor for you specifically. The photo editing software market is expected to hit $1.49 billion by 2030, and that growth comes directly from this kind of specialization across tools.
Best for Ultimate Speed and Consistency: Imagen
If your main goal is producing high-quality, consistently edited photos without spending countless hours on manual technique, pick Imagen, whose new Studio lets you cull, edit and export in one project. It learns how you edit and replicates that style, saving you from the repetitive tasks that burn out so many new photographers. This isn’t about replacing your creativity. It’s about automating the 90% of editing that’s purely mechanical, so you can spend your energy on the 10% that actually matters.
Best for Learning the Craft: Adobe Lightroom
Want a traditional editor that gives you a solid foundation and a clear path for growth? Go with Adobe Lightroom. Its logical interface, huge library of tutorials, and integrated organization make it a complete ecosystem for a budding photographer. Here, you’ll learn the fundamentals of RAW editing inside a structured environment that’s the standard across the entire industry.
Best for a Tight Budget: Affinity Photo 2
If cost is your primary concern, choose Affinity Photo 2. It delivers professional power for an unbelievably low one-time price. Sure, you won’t get the latest AI bells and whistles, but you’ll get a rock-solid RAW developer and a powerful pixel editor that handles almost any task you throw at it. This is the tool that proves you don’t need a monthly subscription to make amazing images.
What’s new in Imagen: Imagen is now an intelligent, agentic Studio for professional photographers, and the ready-made AI Profiles are a gentle way in when you have no edited catalog to train from. You cull, edit, review and export in one project, in any order, and the built-in editor (Beta) is there when you want to adjust something by hand. The Studio is rolling out gradually as a beta.
Frequently Asked Questions
What is a RAW photo and why should I shoot in it?
A RAW file is an uncompressed, unprocessed image file captured straight from your camera’s sensor. It holds far more data about color and dynamic range than a standard JPEG does, so you get much more flexibility to adjust exposure, white balance, and colors during editing without losing quality.
Do I need a powerful computer to edit RAW files?
Yes, RAW editing is more demanding than editing JPEGs. Modern RAW files run large. Get a computer with at least 16GB of RAM, a modern multi-core processor (think Intel i5/i7 or an Apple M-series chip), and a fast SSD for the smoothest experience.
Can I edit RAW photos on my phone or tablet?
Absolutely, and plenty of people do it daily. Apps like Adobe Lightroom Mobile offer strong RAW editing capabilities on both iOS and Android devices. Many photographers now use tablets for their initial edits and culling, as the 2026 Mobile Imaging Survey shows over half of hobbyists work mobile devices into their routine.
What’s the difference between Lightroom and Lightroom Classic?
Lightroom Classic is the traditional desktop-focused version, where your photos live locally on your hard drives. Lightroom (formerly Lightroom CC) is the newer, cloud-centric version that stores your original photos online, making them reachable across all your devices.
Is open-source software like Darktable good for beginners?
Darktable is a genuinely powerful and free open-source RAW editor. That said, its interface can feel very technical and unintuitive if you’re new to editing. It’s a great option if you’re on a zero-dollar budget and willing to put in the learning time, but the tools on this list offer a much smoother starting experience.
How many photos do I need for an Imagen Personal AI Profile?
Imagen recommends a minimum of 3,000 previously edited photos from your Lightroom catalog to train a strong Personal AI Profile. Provide more photos that represent your consistent style, and the AI gets more accurate as a result.
What is ‘non-destructive’ editing?
It means the editing software never changes your original RAW file, period. It simply creates a set of instructions (something like ‘increase exposure by 1 stop’) that get applied on top of the original. This lets you go back and change any setting at any time, or reset the photo completely, without any loss of quality.
Does using AI make me a ‘fake’ photographer?
No, not at all. AI tools are just that: tools. They handle the repetitive, technical aspects of editing, much like autofocus handled the technical aspect of focusing years ago. This frees you up to concentrate on composition, lighting, and creative direction, which are the true hallmarks of a great photographer.