As a professional photographer, you know that shooting is only half the battle. The other half? Post-production. And the first, often most grueling, step is culling. Sifting through thousands of photos from a wedding or a big event can feel like a mountain of a task. It’s tedious, time-consuming, and let’s be honest, it’s the part of the job most of us dread. Finding the right shots—the ones that are perfectly focused, well-composed, and capture the right emotion—is critical. But doing it manually can drain your creative energy and keep you chained to your desk for hours, if not days. This is where photo culling software comes in, and it’s a total game-changer.
Key Takeaways
- AI is Essential for Modern Culling: The best culling software leverages Artificial Intelligence to automate the most time-consuming parts of the process, like identifying blurry images, closed eyes, and grouping duplicates.
- Workflow Integration is King: Top-tier culling tools don’t just select photos; they fit seamlessly into your existing workflow, especially with programs like Adobe Lightroom Classic.
- You’re Still in Control: Modern culling software acts as your assistant, not your replacement. It does the heavy lifting, but the final creative decisions always rest with you, the photographer.
- Speed Equals Profit: Faster culling means faster delivery to clients, more time to shoot, and ultimately, a more profitable business. Shaving days off your post-production time is a significant competitive advantage.
- Beyond Culling: Leading solutions like Imagen offer an all-in-one platform where culling is just the first step, leading directly into AI-powered editing and cloud delivery for a completely streamlined post-production experience.
Why Culling Software is a Non-Negotiable Tool
Before we dive into the options, let’s talk about why dedicated culling software is so important. For years, many of us relied on Lightroom Classic’s library module to cull our images. While it’s a familiar environment, it was never built for speed-culling large volumes of photos. Generating previews can be slow, and the process of manually flagging, rating, and rejecting thousands of images is incredibly inefficient.
Modern culling software is designed for one purpose: to help you find your best images as quickly and accurately as possible. These tools use advanced algorithms and AI to do the heavy lifting for you. They can group similar photos, identify technical flaws like poor focus or exposure, and even recognize faces to ensure you don’t miss a great shot because of an accidental blink.
Think about it. What if you could cut your culling time by 80% or even 90%? That’s not just a few hours saved. For a busy wedding photographer, that could mean getting a whole week of your life back each month. It’s more time to shoot, more time with family, and more time to focus on growing your business. That’s the power of finding the right tool for the job.
The Top Photo Culling Software for Photographers
So, what are the best options out there? The market has grown significantly over the last few years, with several strong contenders vying for a spot in your workflow. We’ll break down the top players, starting with the one that has become an indispensable part of my own post-production process.
1. Imagen Culling
When it comes to a seamless, intelligent, and fully integrated workflow, Imagen is in a league of its own. What started as a revolutionary AI photo editing tool has evolved into a complete post-production platform, and its culling feature is a perfect example of this holistic approach. Imagen isn’t just a culling tool; it’s the first step in a workflow designed to get you from memory card to final gallery faster than ever before.

What really sets Imagen’s culling apart is that it feels like it was designed by photographers who have been in the trenches. It understands our pain points and addresses them with smart, practical solutions. The process is incredibly intuitive. You simply upload your project, set a few preferences, and let the AI get to work.
How Imagen Culling Works
Imagen’s AI mimics the way a human photographer would select images. It doesn’t just look for technically perfect shots; it understands context. Here’s a breakdown of its core features:
- Intelligent Grouping: The software automatically groups similar photos together. This is a lifesaver for those moments when you fire off a burst of 10 shots to capture the perfect expression. Instead of reviewing all ten, Imagen presents them as a single group and highlights what it believes is the best one. You can adjust the sensitivity of the grouping, from loose to very similar, giving you control over how the photos are organized.
- AI-Powered Selections: Within each group, Imagen’s AI analyzes each photo for critical flaws. It identifies blurry photos, detects closed eyes, and even has a unique feature to recognize kisses, so it knows that some closed-eye shots are actually keepers. This level of nuance is something you don’t find in many other tools. It rates the photos, giving you a clear starting point for your review.
- Complete Control for the Photographer: This is a big one. While the AI does a fantastic job, you always have the final say. The Culling Studio provides a clean, fast interface for you to review the AI’s selections. You can quickly compare images within a group, change the star or color ratings, and make adjustments. The keyboard shortcuts are the same as Lightroom’s, so the learning curve is practically non-existent.
- Cull with Edited Previews: This is a standout feature. You can apply one of your AI editing profiles to the photos while you cull. This means you’re not just looking at flat, unedited RAW files. You’re making your selections based on how the final images will actually look. It helps you visualize the final gallery and make better, more confident choices.
- Cull to an Exact Number: For photographers who need to deliver a specific number of images to a client (think volume headshots or school portraits), this feature is invaluable. You can set a target number or percentage, and Imagen’s AI will select the best shots to meet that requirement, saving an incredible amount of time.
The Integrated Workflow Advantage
The true power of Imagen Culling is that it doesn’t exist in a vacuum. It’s part of a larger ecosystem. Once you’ve finalized your selections in the Culling Studio, you can send them directly to be edited with your Personal AI Profile or a Talent AI Profile with a single click.
This creates a seamless flow:
- Upload: Drop your entire shoot into the Imagen desktop app.
- Cull: Let the AI do the initial heavy lifting, then quickly review and finalize your selections.
- Edit: Send your culled photos for AI editing, which takes just minutes.
- Download & Deliver: Download the edited photos back into your Lightroom Classic catalog, make any final tweaks, and deliver to your client.
This all-in-one approach eliminates the need to jump between multiple programs. You’re not exporting and importing lists or dealing with clunky workarounds. It’s a single, unified platform that also includes cloud storage for backing up your work. Because Imagen is a desktop app that uses the cloud for processing, it doesn’t tie up your computer’s resources. You can kick off a cull or an edit and continue working on other tasks.
For professional photographers who value efficiency and consistency, Imagen’s integrated culling and editing workflow is incredibly compelling. It’s more than just a tool; it’s a systematic approach to post-production that gives you back your most valuable asset: your time.
2. AfterShoot

AfterShoot is another prominent name in the AI culling software space. It is a standalone desktop application that focuses on automating the initial selection process for photographers. The software analyzes images for a variety of technical attributes and presents the user with a selection of keepers.
The user interface in AfterShoot is organized around a main dashboard where projects are managed. Upon importing a folder of images, the software begins its analysis. It sorts images into several categories based on its findings, such as “Selected,” “Duplicates,” and “Blurred.”
Technical Features
- AI-Powered Sorting: AfterShoot’s core functionality is its AI engine. It assesses images for focus, exposure, and composition. It also performs duplicate detection, grouping similar images together and selecting a top pick from each set.
- Face and Eye Detection: The software incorporates features to detect closed eyes and faces within an image. This allows it to flag photos where subjects are blinking. It also includes a “Moments” feature that attempts to identify photos with key interactions or expressions.
- Customizable Thresholds: Users can adjust the strictness of the AI’s filtering criteria. For example, you can set how sensitive the blur detection is, which provides a degree of control over the automated selections.
- Review and Export: Once the AI has completed its pass, the user can review the selections within the AfterShoot interface. Selections can be adjusted manually. The final picks can then be exported as star ratings or color labels, which can be read by Adobe Lightroom Classic, Capture One, or other DAM (Digital Asset Management) software. The software writes this information to XMP sidecar files or directly into the image metadata.
The workflow with AfterShoot typically involves importing photos into the app, running the AI cull, reviewing the results, and then importing the entire folder into Lightroom Classic, where the ratings applied by AfterShoot can be used to filter down to the final selection.
3. FilterPixel

FilterPixel is a cloud-based culling software that also utilizes AI to automate the initial photo selection process. It functions as a desktop application that uploads low-resolution previews to the cloud for analysis, which means the heavy processing does not occur on the user’s local machine.
The software is designed to identify and tag unwanted images, such as those that are out of focus, have closed eyes, or are poorly composed. It presents the culled session in a gallery view for final review and adjustment.
Technical Features
- Cloud-Based AI Analysis: By processing image data in the cloud, FilterPixel aims to reduce the performance impact on the photographer’s computer. The AI analyzes images for technical imperfections.
- Duplicate Grouping: Similar to other culling tools, FilterPixel groups visually similar images together. It then highlights the best option based on its analysis of sharpness and subject expression.
- Automated Tagging: Rather than just selecting keepers, FilterPixel focuses on tagging rejects. Images are automatically tagged as “Rejected” or “Unrated,” allowing the photographer to focus their review on the potentially good images.
- Integration and Export: After the review process is complete within FilterPixel, the culling decisions (ratings and tags) are synchronized back to the user’s editing software. It integrates with Adobe Lightroom Classic, Photo Mechanic, and Capture One by updating the metadata associated with the image files.
The workflow requires an active internet connection for the AI analysis to take place. The process involves selecting a folder of images for the app to analyze, waiting for the cloud processing to complete, reviewing the results, and then syncing those results back to a Lightroom catalog or folder.
4. Photo Mechanic
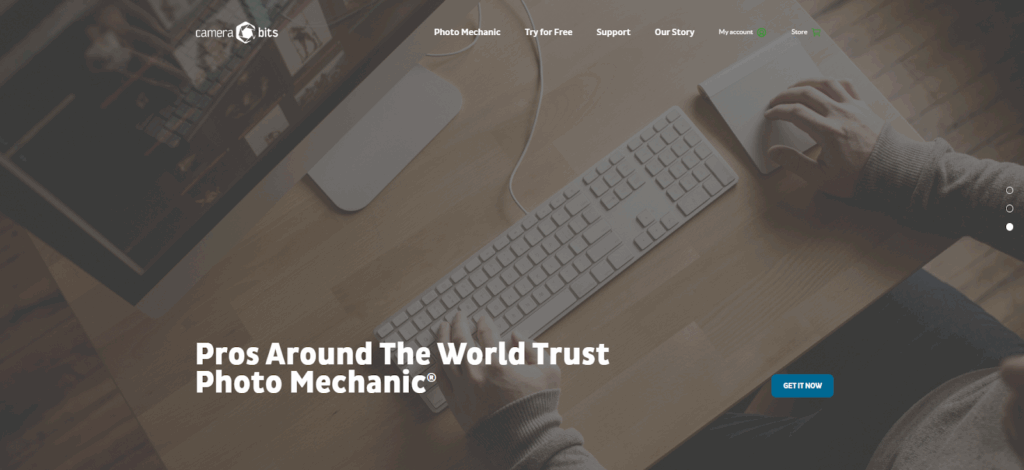
Photo Mechanic has been a staple in the workflows of photojournalists and sports photographers for many years, and for good reason. It is not an AI culling tool in the same vein as the others on this list. Instead, its primary strength is its incredible speed for manual culling and metadata management.
Photo Mechanic bypasses the slow preview generation of programs like Lightroom Classic by rendering the embedded JPEG previews within RAW files almost instantaneously. This allows for extremely fast, full-screen viewing of images, enabling a photographer to make rapid decisions.
Technical Features
- Rapid Preview Rendering: The core of Photo Mechanic is its speed. It reads the preview data directly from RAW files, allowing photographers to ingest and review thousands of photos from a memory card in a matter of minutes.
- Advanced Metadata Tools: It offers extensive tools for IPTC metadata entry. Users can apply captions, keywords, copyright information, and more to images in batches using templates and variables. This is crucial for photographers who need to deliver images with detailed metadata to clients or agencies.
- Tagging and Rating System: The culling process in Photo Mechanic is manual. The user moves through images and applies tags, star ratings, or color labels using keyboard shortcuts. The interface is optimized for this rapid, manual workflow.
- File Management: Beyond culling, it is a powerful file management tool. It can ingest photos from multiple memory cards simultaneously, rename files on the fly based on user-defined variables, and automatically back up photos to a secondary location during ingest.
The workflow for a Photo Mechanic user involves ingesting photos from a card, performing a fast manual cull by tagging the keepers, applying necessary metadata, and then moving only the selected images into their primary editing software like Lightroom Classic. It excels at the front end of the workflow, preparing a smaller, curated set of images for the editing stage.
How to Choose the Best Photo Culling Software for Your Business
With several strong options available, how do you decide which one is right for you? It comes down to understanding your priorities and workflow. Here are the key criteria to consider:
1. Accuracy and Intelligence of the AI
The whole point of using AI culling software is to trust its judgment. How well does it identify truly blurry shots versus artistic motion blur? Can it reliably detect closed eyes without flagging every downward glance?
- Look for nuance: A good AI understands context. Imagen’s ability to recognize kisses is a perfect example of this. It shows the AI has been trained on real-world photography scenarios, not just sterile test images.
- Test it with your work: The only way to know for sure is to try it. Use the free trials offered by these companies and run a few of your recent shoots through them. Compare the AI’s selections to your own. How close did it get? How much time did you have to spend correcting its choices?
2. Speed and Efficiency
Speed is twofold: how fast the software processes the images and how much time it saves you overall.
- Processing Time: How long does it take to analyze a shoot of 1,000 or 3,000 images? Some tools process locally, which can be resource-intensive, while others use the cloud.
- Workflow Efficiency: This is the more important metric. Does the software create a seamless process, or does it add extra steps? An integrated solution like Imagen, where you go straight from culling to editing in the same app, is inherently more efficient than a standalone tool that requires exporting and then re-importing into another program.
3. Integration with Your Existing Workflow
This is perhaps the most critical factor for a professional. The best tool in the world is useless if it disrupts your established process.
- Lightroom Classic Integration: If you, like most professional photographers, use Lightroom Classic as the hub of your post-production, the integration needs to be flawless. Does the software write ratings and flags directly back to your catalog? Is the process simple and reliable? Imagen’s approach of working directly with your Lightroom catalogs is a significant advantage here.
- End-to-End Solution: Consider the entire workflow. Do you want a point solution that only handles culling, or a platform that connects culling with editing and delivery? An all-in-one system reduces friction and the potential for errors.
4. The User Interface and Experience
You’re going to be spending a lot of time in this software. It needs to be intuitive and pleasant to use.
- Clarity and Simplicity: Is the interface clean and easy to navigate? Or is it cluttered with options you’ll never use?
- Keyboard Shortcuts: For speed, keyboard shortcuts are a must. Do they follow industry standards (like Lightroom’s P, X, and U keys)? A tool that uses familiar shortcuts will feel like an extension of your existing skills.
- Review Process: How easy is it to compare images and make adjustments? The ability to see images side-by-side and quickly zoom in to check focus is essential.
5. Cost and Value
Finally, consider the price. But don’t just look at the monthly subscription fee. Think about the value it provides.
- Subscription vs. Pay-per-use: Some tools are subscription-only, while others might offer different models.
- Return on Investment (ROI): This is the key calculation. If a tool costs $20 a month but saves you 20 hours of work, what is your hourly rate? The ROI is likely massive. The time you get back can be used for marketing, client communication, or simply taking a well-deserved break. The value of that recovered time almost always outweighs the cost of the software.
By evaluating each option against these criteria, you can make an informed decision that truly benefits your business and your sanity.
Guide to Choosing Lightroom Presets for Wedding Photography
While AI editing profiles like those in Imagen are the modern, more nuanced evolution of presets, many photographers still use traditional Lightroom presets as part of their creative process. Choosing the right ones, especially for something as important as wedding photography, is crucial for defining your style and ensuring consistency. Here’s a guide to making the right choice.
Criteria for Selecting Wedding Photography Presets
- Define Your Style First: Before you even start browsing, you need to know what you’re looking for. Are you aiming for a “light and airy” look? Or perhaps “dark and moody”? Maybe a clean, true-to-life color palette is more your brand. Write down keywords that describe your desired aesthetic. This will be your compass.
- Look for Versatility: Weddings are a marathon, not a sprint. You’ll be shooting in a dozen different lighting situations in a single day—from dark getting-ready rooms to harsh midday sun and dimly lit reception halls. A good preset pack should be versatile enough to handle all of these scenarios.
- Check for examples: Does the preset creator show examples in various lighting conditions? If they only show perfectly lit golden-hour portraits, be skeptical.
- Included variations: Often, quality preset packs will include several variations of the main look (e.g., a version with less contrast, a brighter version, a black and white version). This is a sign of a well-thought-out product.
- Prioritize Natural Skin Tones: This is non-negotiable for wedding photography. No client wants to look orange, green, or washed out. A good preset enhances the scene without destroying skin tones.
- Scrutinize before-and-afters: Look closely at the skin in the sample images. Does it look natural and healthy? Or does it look overly smoothed, tinted, or plastic-like?
- Test on your own images: The best way to check is to test a preset on photos you’ve taken. Many creators offer a sample preset for free, or have a generous return policy.
- Consider the Technical Foundation: A preset is more than just a color filter. A well-made preset will make intelligent adjustments to the tone curve, HSL panel, camera calibration, and more, without “breaking” the image.
- Avoid “crushed” blacks and “blown” highlights: A good preset should retain detail in the darkest and brightest parts of the image. If the examples show pure black shadows or pure white skies with no detail, it might be a poorly constructed preset that will be difficult to work with.
- Subtlety is key: The best presets provide a strong base that you can then tweak. They shouldn’t be a one-click-and-done solution that you can’t adjust. They should enhance your photo, not overpower it.
- Seek Out Education and Support: The best preset creators don’t just sell you a file; they sell you a system.
- Look for tutorials: Do they provide videos or guides on how to get the most out of their presets? Do they explain how to adjust for different lighting or camera brands?
- Community and support: Is there a Facebook group or an email support line where you can ask questions? This can be incredibly valuable when you’re trying to integrate a new preset into your workflow.
By following these criteria, you can move beyond trendy, fleeting looks and invest in a preset system that will become a cornerstone of your brand and help you produce beautiful, consistent work for your clients.
Final Thoughts: The Future of Post-Production is Here
The days of spending more time behind a computer than behind a camera are numbered. The evolution of AI-powered post-production software is one of the most significant advancements our industry has seen in years. These tools are not about replacing the artist; they are about empowering the artist.
By automating the most repetitive and least creative parts of our job, culling software gives us the freedom to focus on what truly matters: creating beautiful images, telling compelling stories, and serving our clients well. Whether you choose an all-in-one platform like Imagen or a specialized standalone tool, incorporating intelligent culling into your workflow is no longer a luxury—it’s a necessity for any professional photographer looking to stay competitive and reclaim their time.
Take the leap. Try out a few options, find the one that clicks with your workflow, and get ready to wonder how you ever managed without it. Your business, and your well-being, will thank you for it.
Frequently Asked Questions (FAQ)
1. Will AI culling software delete my photos? No, reputable culling software will not delete your original files. The culling process is non-destructive. The software applies ratings, flags, or color labels to your photos’ metadata. You are always the one who makes the final decision to delete rejected images from your hard drive, typically within Lightroom Classic or your file browser.
2. How much time can I realistically save with AI culling? The time savings are substantial. For a typical wedding with 3,000-5,000 images, manual culling can take anywhere from 4 to 8 hours. With an efficient AI tool, you can often complete the same task in under an hour, including your final review. This represents a time saving of 80-90%.
3. Is AI culling accurate enough for professional work? Yes, modern AI has become incredibly accurate. It excels at identifying technical flaws like missed focus and motion blur. While you should always perform a final review to ensure your creative and emotional favorites are selected, the AI does an excellent job of filtering out the vast majority of unusable shots, leaving you with a much smaller, higher-quality selection to review.
4. Do I need a powerful computer to run culling software? It depends on the software. Some applications like Photo Mechanic are incredibly lightweight and run well on older machines. AI-native apps that process locally can be more resource-intensive. However, solutions like Imagen perform the heavy AI processing in the cloud, so the desktop app remains fast and responsive without needing a high-end computer.
5. Can I use AI culling for genres other than weddings, like portraits or events? Absolutely. AI culling is beneficial for any type of photography that generates a high volume of images. Portrait sessions, family photos, corporate events, and sports photography are all excellent use cases. The AI’s ability to group duplicates and identify the sharpest faces is valuable across all these genres.
6. What’s the difference between culling and editing? Culling is the process of selection. It’s about reviewing all the photos you took and choosing the best ones to move forward with. Editing is the process of enhancement. It involves adjusting parameters like exposure, color, contrast, and cropping on the selected images to achieve your final artistic vision. Culling always comes before editing.
7. Can the AI learn my personal preferences for what makes a “good” photo? Currently, most AI culling tools are focused on objective technical criteria (sharpness, closed eyes, etc.) rather than subjective creative preferences. However, the field is rapidly advancing. The next frontier for AI may indeed involve learning a photographer’s subjective style for selection, much like how Imagen’s editing AI learns your unique editing style.
8. Is it better to use a standalone culling app or an integrated solution? This depends on your workflow preference. A standalone app can be a great addition if you only want to solve the culling part of your workflow. However, an integrated solution like Imagen offers significant efficiency gains by creating a seamless, single-platform experience from culling all the way through to AI editing and delivery, eliminating extra steps like exporting and importing.
9. How does the software handle photos with very shallow depth of field? This is a great question. High-quality AI is trained to differentiate between intentionally shallow depth of field (where the subject’s eye is sharp) and missed focus (where nothing critical is sharp). You can typically adjust the sensitivity of the blur detection to fine-tune how it handles these types of images.
10. What happens if I disagree with the AI’s selections? You are always in control. All AI culling tools provide an interface for you to review and override the AI’s suggestions. If the AI rejects a photo you love or selects one you don’t, you can change its rating with a single click. The goal of the AI is to be a time-saving assistant, not the final decision-maker.
11. Does using AI make me less of a professional photographer? Not at all. Using professional tools to make your business more efficient is a smart business practice. A carpenter isn’t less of a professional for using a power saw instead of a hand saw. AI culling and editing tools handle the repetitive, non-creative labor, freeing you up to focus on the artistic aspects of photography and providing better service to your clients.
12. How much does photo culling software cost? Pricing varies between tools. Most operate on a monthly or annual subscription model, often ranging from $10 to $30 per month. Some, like Imagen, have a pay-per-use model for editing, with culling being part of a subscription plan. It’s best to evaluate the cost based on the return on investment in time saved.
13. Do I still need Lightroom Classic if I use a culling tool? Yes. Culling software is not a replacement for a digital asset manager and editing program like Lightroom Classic. Culling tools are designed to work with Lightroom.
