In 2013, when Adobe announced the addition of Smart Previews, it changed things drastically for photographers everywhere.
Smart Previews changed the way millions of photographers work with their photos, daily.
Simply put, they are compressed versions of your RAW files. They are 2,550 pixels on the longest side, and between 25 and 50 times smaller than the original RAW file.
They are stored alongside your Lightroom catalog, no matter where your originals reside.
By using Smart Previews, it means that your original, RAW files can live on an external drive while your smart previews live on your internal SSD.
With your external drive disconnected, you can edit, apply attributes, and practically do anything to your photos within Lightroom as if the drive was connected.
That is the magic of Smart Previews within Lightroom.
They also help speed up your processes in Lightroom because everything you do is on a smaller version of your original.
The moment you reconnect, your external drive, all those edits instantly apply to the original in the same non-destructive format Lightroom has always been known for.
There are a few ways to implement and work with Smart Previews in your catalog.
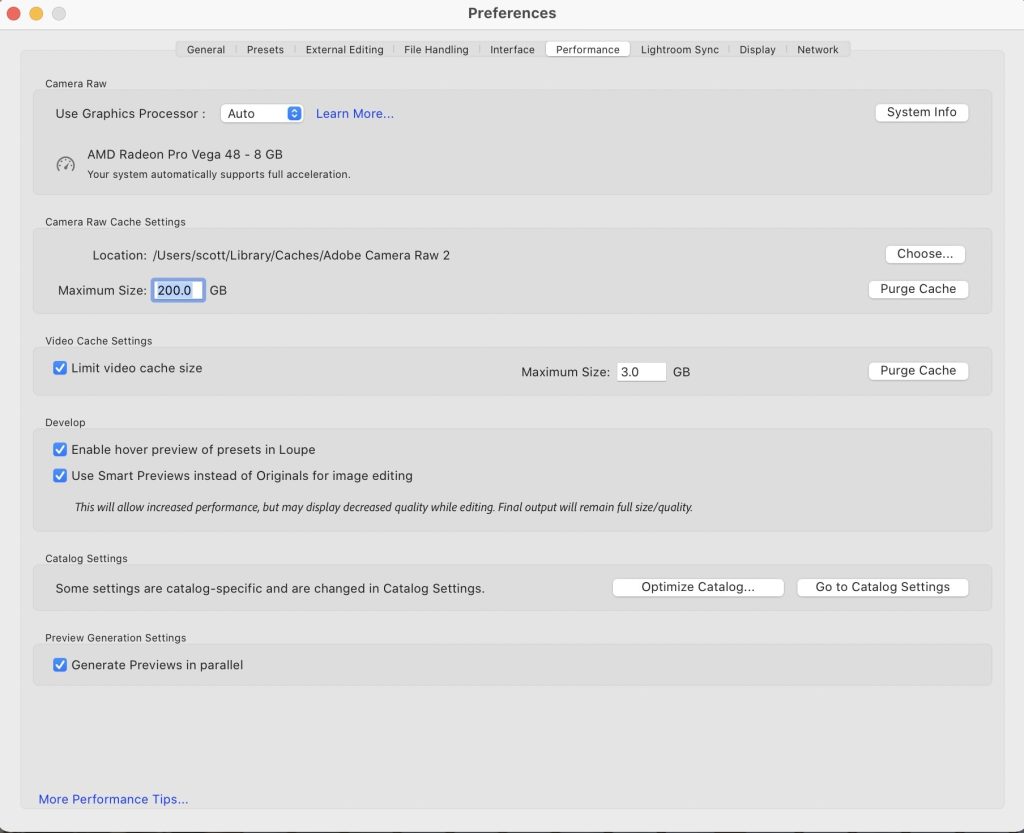
- Within Preferences >> Performance >> Develop >> Edit Smart Previews
- Import >> Build Smart Previews
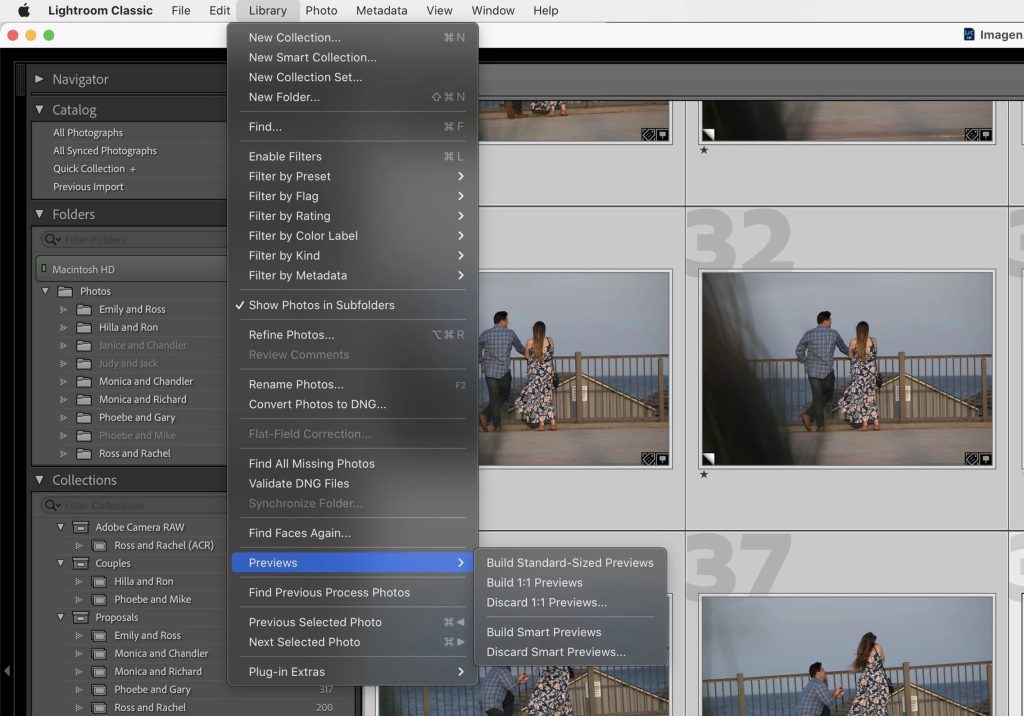
- Library Menu >> Previews >> Build Smart Previews


Imagen also uses smart previews, which can lead to faster transmission speeds to our servers, and in turn faster turnaround times for your edits.
We love what Adobe has done for photographers with the innovation of Smart Previews and are happy to use them in making your photo editing experience even better.
