
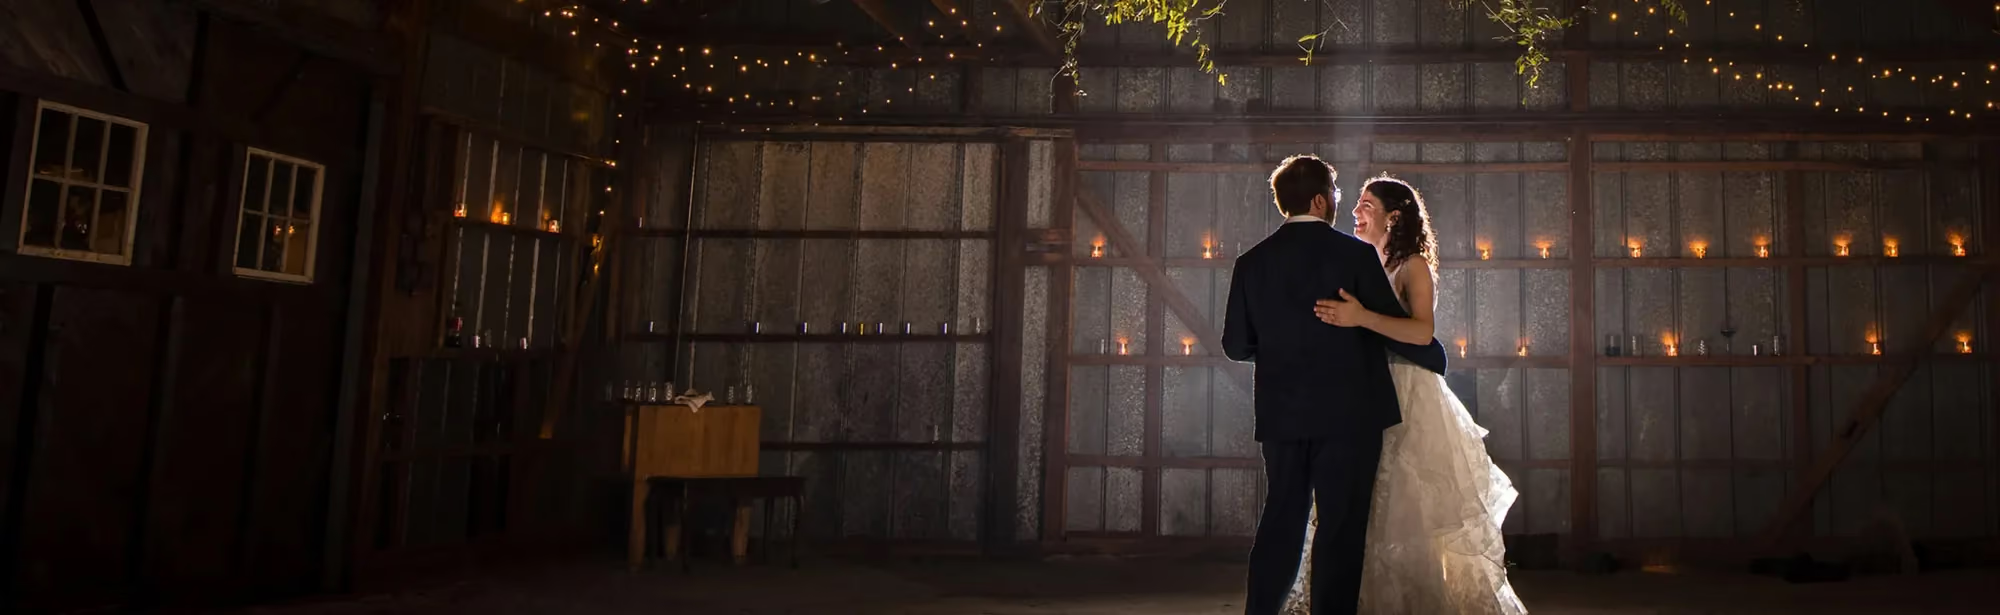
The Ultimate Guide to Wedding Photography Edits in 2026
Table of contents
- Key Takeaways
- Foundations: The 2026 Wedding Editing Philosophy
- Phase 1: The High-Speed Culling Workflow
- Phase 2: Intermediate Color Correction and Consistency
- Phase 3: Advanced AI Integration with Imagen
- Phase 4: Advanced Retouching and The Human Touch
- Phase 5: Delivery, Archiving, and ROI
- Future-Proofing: Staying Ahead of 2027 Trends
- Frequently Asked Questions
- Is AI photo editing safe for my proprietary editing style?
- Do I need an internet connection to use AI editing tools?
- How many photos do I need to train a custom Personal AI Profile?
- Can AI handle mixed lighting situations, like indoor receptions?
- Should I cull my photos before uploading them to an AI editor?
- How much does AI editing cost compared to hiring a virtual assistant?
- Will AI editing completely replace the need for Adobe Lightroom?
- What’s the difference between an AI Profile and a preset?
- Keep exploring
You just wrapped an 8-hour wedding shoot, and now you’re staring down 3,500 RAW files. Here’s the exhausting part: an entire week glued to a monitor, nudging exposure sliders, and chasing down color casts.
Ready to reclaim your evenings? Try Imagen and explore its new Studio, where you cull, edit and export in one project.
It doesn’t have to stay this way. Right now, the sharpest wedding photographers lean on automated systems that edit full galleries in minutes instead of days.
Key Takeaways
- AI photo editing slashes your post-production time by 96%, turning a grueling 10-hour session into a quick 20-minute pass.
- More than 65% of working photographers now rely on automated post-production workflows just to stay profitable.
- Deliver a full wedding gallery in under 14 days, and referral rates climb by 35%.
- Couples this year lean toward “true-to-life” and “editorial minimalist” styles, and demand for that look has jumped 40%.
- Automating basic color correction with Imagen saves you hundreds of dollars over traditional outsourcing.
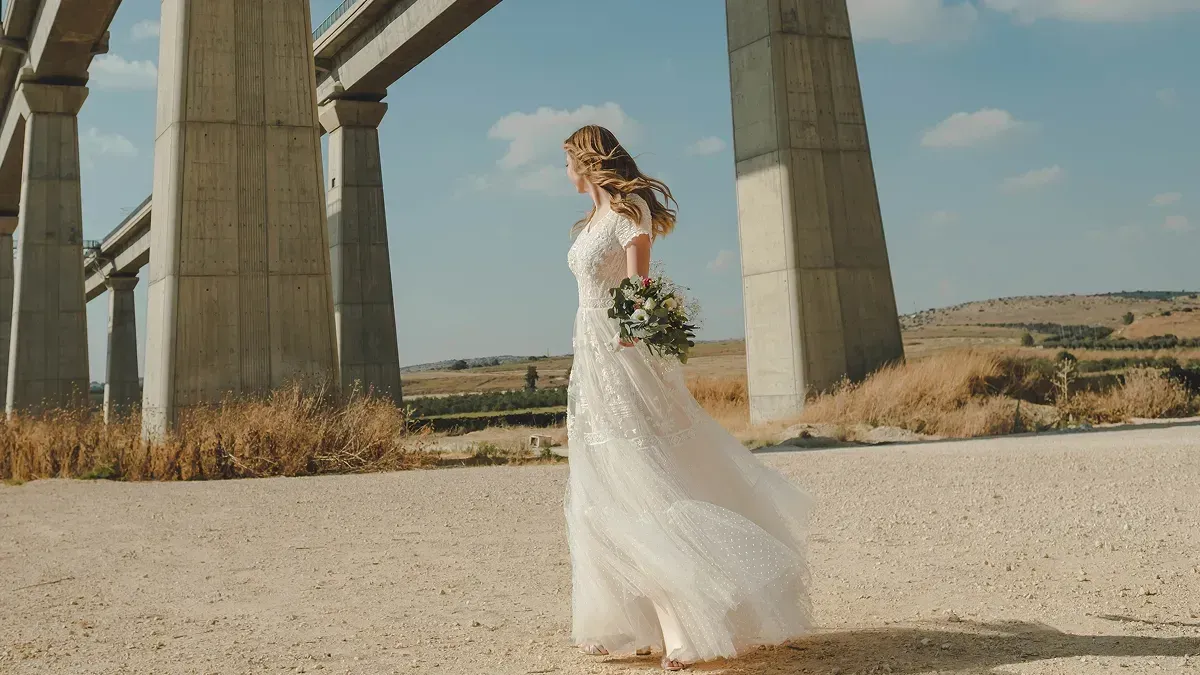
Foundations: The 2026 Wedding Editing Philosophy
So where does the wedding photography market actually stand in 2026? The global market is projected to reach $24.5 billion by 2026, growing at a CAGR of 4.8%. But you won’t capture your share of that pie if you’re chained to a computer screen for 40 hours a week. Honestly, editing isn’t about manual labor anymore. It’s about creative direction now.
The industry has shifted, and it’s shifted fast. Today’s clients have no interest in the heavy, overly processed look of years past. Gen Z couples alone are driving a 40% jump in demand for “true-to-life” and “editorial minimalist” styles. They want photos that read as authentic, vibrant, and elegant, the kind of imagery you’d expect from a high-end fashion spread. So editing isn’t about fixing mistakes anymore. It’s about setting one clear, consistent creative direction across thousands of frames.
How do you pull off that clean, high-end look without losing your mind in the process? You build a solid digital foundation first. After 15 years shooting weddings, I’ll tell you this: it’s the one thing that separates amateurs from the high-earning pros. Let’s start with your raw files.
The RAW Advantage
Why do 92% of professional wedding photographers shoot exclusively in RAW format? The answer comes down to dynamic range. RAW files retain 12-14 stops of light data, giving you the latitude to save overexposed wedding dresses and pull details back from deep shadow. When you’re fighting harsh midday sun during an outdoor ceremony, those RAW files become your safety net. You simply can’t nail consistent, clean skin tones without that raw data underneath you.
But shooting RAW is only half the battle here. Sloppy capture settings turn your post-production into a nightmare fast. Are you exposing for your highlights? Are you keeping ISO as low as possible to keep digital noise down? Every one of these choices affects how your files respond once you start applying your Wedding photography edits.
Setting Your Creative North Star
Before you touch a single slider, nail down a clear visual goal. Are you chasing bright and airy, or does a classic film aesthetic suit you better? Setting that visual anchor early keeps your work instantly recognizable, wedding after wedding. Skip this step, and your galleries will end up looking messy and disjointed.
Consistent style builds a memorable brand, and a memorable brand commands premium prices. Let’s bake your style into your workflow from day one. Here are the core principles behind the 2026 wedding aesthetic:
- Color Fidelity - Keep white dresses white, never blue or yellow.
- Skin Tone Accuracy - Natural, warm tones that read as healthy and real.
- Shadow Detail - Soft, visible texture in the groom’s dark tuxedo.
- Highlight Recovery - Protecting the intricate lace texture on the wedding gown.
- Timeless Contrast - Clean blacks and whites that never look overly HDR or washed out.
But how do you hold onto that look across thousands of photos? That’s exactly where a structured culling workflow earns its keep.
Phase 1: The High-Speed Culling Workflow
Every great edit starts with a brutal cull. Let’s be honest, nobody wants to scroll through 10 nearly identical photos of a bridesmaid laughing. A standard 8-hour wedding produces somewhere between 2,500 and 4,500 RAW images, yet your client only wants to see the absolute best. Your job is trimming that mountain down to a curated 400-800 final photos.
Do this by hand, and you’ll burn hours squinting at eyes and checking focus, one frame at a time. Modern tools let you automate the painful parts instead. Here’s how to structure your selection process and save your sanity.
Step 1: Initial Import and Metadata Tagging
Before you run any automated filters, get your files organized. Import your RAW photos straight into Lightroom Classic or Adobe Camera Raw. Group them by scene: preparation, first look, ceremony, portraits, and reception. This structure alone makes the rest of the workflow far easier to manage. Trust me, a little organization up front prevents major headaches later.
Once everything’s imported, apply a basic metadata template. It should include your copyright information, contact details, and initial camera profiles. This keeps your catalog clean and searchable, which matters a lot once you’re managing dozens of weddings a year.
Step 2: AI-Assisted Selection
This is where the real time savings kick in. Instead of zooming into every single photo to check for closed eyes, use AI photo culling. The platform groups your bursts automatically, flags blurry shots, and catches the exact moment the bride or groom blinked. It’s like having a tireless digital assistant working at lightning speed.
Here’s the step-by-step process:
- Upload your raw folder straight into the Imagen desktop app.
- Choose your culling parameters, filtering for sharpness, composition, and open eyes.
- Let the AI scan your photos at high speed, working through up to 1,000 images in under 10 minutes.
- Review the suggested selections right inside the dashboard, confirming the software caught the moments that matter.
- Export the selected files back into your catalog, already tagged with color labels.
Step 3: The Final Human Pass
AI is fantastic at catching technical flaws, but it doesn’t understand raw emotion, not yet anyway. Once the AI has filtered out the technical duds, work through what’s left by hand. Look for those split-second, candid moments: a tear rolling down a father’s cheek, or a secret glance between the couple. These are the emotional winners that turn a good gallery into an unforgettable one.
Pro tip: Don’t look back once you’ve rejected a photo. Keep moving forward, since your first instinct is usually right. If a photo doesn’t make you feel something within two seconds, your client won’t feel it either. Let it go.
Phase 2: Intermediate Color Correction and Consistency
Color consistency is the hallmark of a true pro, and honestly, it’s one of those things clients notice even if they can’t say why. There’s nothing worse than scrolling through a gallery where skin tones swing from orange to magenta shot to shot. You’re juggling constantly shifting light all day: harsh afternoon sun during portraits, mixed fluorescent light in the prep room, and warm tungsten glow at the reception.
So how do you keep one cohesive style across all these wildly different scenarios? You master color correction, plain and simple. Let’s dig into the technical settings that make it happen.
White Balance Synchronization
The secret to color harmony starts with your white balance. If you’re shooting with multiple camera bodies, their sensors won’t render color identically, even when they’re the exact same brand. But don’t worry, here’s how you lock down consistency:
- Use a Gray Card - Snap a shot of a neutral card in every new lighting scene to set your baseline.
- Sync Settings - Batch-apply your white balance adjustments across every photo shot in the same light.
- Target Skin Tones - Grab the eye-dropper tool on a neutral patch of skin, then fine-tune by hand.
- Kelvin Mode - Shoot in Kelvin mode on location so your cameras stay locked to the same temperature.
Lock your Kelvin temperature in-camera, and you’ll dodge the erratic shifts automatic white balance loves to cause. It makes batch-editing way faster too, because your starting point stays identical across hundreds of shots. Try 5500K for direct sunlight, 4500K for that late afternoon golden hour, and 3200K for tungsten indoor light.
Tone Curve Mastery
Want that highly coveted 2026 “Editorial Minimalist” look? You need to master the tone curve. Avoid harsh contrasts. Instead, build a subtle S-curve that adds depth while lifting the blacks slightly for a matte shadow effect. This softens the transitions and gives your photos that high-end, film-like feel.
Here’s a breakdown of tone curve settings for a soft editorial feel:
- Highlights - Pull them down slightly so the white gown detail doesn’t blow out.
- Lights - Boost them gently to brighten the overall scene.
- Darks - Keep them near the diagonal line for natural mid-tones.
- Shadows - Nudge the bottom-left point up slightly to soften your deepest blacks.
This gentle curve keeps your dynamic range wide open. It steers you away from the muddy, heavily clipped shadows that dominated the early 2020s, giving you a clean aesthetic that’ll still look modern decades from now.
HSL Adjustments for Wedding Palettes
Managing colors like grass greens and bridesmaid dresses can turn into a nightmare fast. Electric green grass just looks cheap and distracting on camera. Use the HSL panel to nudge greens toward yellow and desaturate them slightly. Suddenly your outdoor portraits look far more expensive and elegant.
Here’s how to manage the HSL panel:
- Reds and Oranges - Adjust these sliders carefully so skin tones read warm but still natural. Keep orange saturation moderate.
- Yellows - Push yellows toward orange to warm up skin, or pull back saturation to clean up outdoor backgrounds.
- Greens - Desaturate greens by 15-25% and push the hue slider toward yellow for a softer, dreamier world.
These small adjustments add up to one unified color palette. Once the background colors calm down, the couple naturally becomes the focal point of every frame.
Phase 3: Advanced AI Integration with Imagen
Let’s talk about scaling your business for a second. You can’t grow if you’re burning 40 hours editing every single wedding. Manual editing outsourcing services typically charge between $0.25 and $0.55 per image, and if you deliver 800 images, that’s up to $440 gone per wedding. That eats into your profit margins fast.
This is where AI photo editing comes into the picture. The platform uses AI profiles to learn your exact editing style straight from your past Lightroom catalogs. It then applies those edits automatically, cutting your post-production time by roughly 96%. Here’s how different photographers put this into practice.
“Automation isn’t about replacing the photographer’s eye. It’s about giving them their life back. When you automate the tedious exposure and color adjustments, you finally have time to focus on high-level art and business growth.”
Itamar Haim, SEO Expert and Digital Strategist specializing in search optimization and content marketing.
Scenario A: The High-Volume Studio
Picture running a studio that books three weddings every single weekend. That’s over 10,000 RAW files to manage each week. Doing that by hand is a one-way ticket to burnout. But check out this workflow instead:
- The studio imports every RAW file into Lightroom Classic.
- They upload the catalog to Imagen and apply a pre-built Talent AI profile, then start reviewing the edited photos as they arrive in batches.
- The platform processes 1,000 photos in under 10 minutes, adjusting white balance, exposure, and tone curves automatically along the way.
- They download the edits, make a few quick final tweaks, and save days of painful labor.
That kind of speed lets high-volume studios keep a consistent style without hiring a huge team of in-house editors. It keeps overhead low and profit margins nice and high.
Scenario B: The Boutique Artist
If you’re running a high-end boutique studio, your brand lives and dies on a highly specific, unique style. You might figure AI could never match your look. But here’s how you can actually make it work:
- Upload 5,000 of your previously edited photos into Imagen.
- The platform trains a Personal AI Profile built entirely around your unique aesthetic.
- The AI studies how you handle different lighting situations and matches your style with striking accuracy.
- You end up with a personal editing assistant that works at lightning speed while keeping your signature look fully intact.
That means you never have to compromise on your artistic vision. The AI handles the heavy lifting, and you spend your energy on the final 5% of creative styling that really counts.
Scenario C: The “Sneak Peek” Sprint
Client expectations right now are higher than they’ve ever been. Research shows 78% of couples expect a “sneak peek” gallery within 48 hours of their wedding day. Here’s how you can beat that deadline without breaking a sweat:
- Right after the reception wraps, pick 50 of your favorite photos.
- Run those photos through your Personal AI Profile on Imagen.
- Deliver a fully edited, gorgeous sneak peek gallery to the couple before they’ve even woken up the next morning.
- You’ll blow past their expectations and spark immediate social media shares, which helps drive more bookings your way.
This kind of quick turnaround is one of the easiest ways to stand out in a crowded market. When clients share high-quality, professional photos while their wedding’s still trending on social media, your business rides that wave for maximum exposure.
Phase 4: Advanced Retouching and The Human Touch
Once the AI has handled the heavy lifting of color correction, move on to the final details. Don’t retouch every single photo in an 800-image gallery. That wastes time you don’t have. Instead, focus your energy on the hero portraits: close-ups of the couple, family formals, and key moments.
Manual high-end skin retouching and object removal take an average of 12 minutes per image. Use that time wisely. Here’s how to approach this final stage step by step.
The Portrait Perfection Checklist
When you edit close-up portraits, keep a strict checklist so the look stays natural. Don’t over-process. Couples today hate the “plastic skin” look. Use this checklist to perfect your portrait edits:
- [ ] Apply frequency separation (splitting your image into low-frequency color layers and high-frequency texture layers) to remove temporary blemishes while keeping natural skin texture intact.
- [ ] Brighten the eyes slightly with a subtle adjustment brush. Don’t overdo it, or they’ll end up looking unnatural.
- [ ] Soften dark under-eye circles by lowering the opacity on your healing tool.
- [ ] Remove distracting stray hairs across the face with the spot removal tool.
- [ ] Whiten teeth slightly by desaturating yellows and bumping exposure up by 0.2 stops.
- [ ] Smooth out harsh clothing wrinkles with a light healing brush.
Keep your edits subtle, and you preserve the authenticity of the moment. Your clients should look like the best version of themselves, not a digital painting.
Generative Fill for Distraction Removal
Sometimes an incredible photo gets ruined by an ugly exit sign, a stray trash can, or a photobomber. AI generative fill tools now let you paint over these distractions and replace them with natural backgrounds in seconds. This saves you from spending hours cloning out complex objects in Photoshop by hand. Here’s a list of common distractions worth removing:
- Emergency exit signs glowing red over the dance floor.
- Plastic water bottles sitting on the head table.
- Distracting wires and cables running along the background walls.
- Photobombers who sneak into the grand exit or other key moments.
Removing these small details makes a massive difference in the overall quality of your work. It turns a simple snapshot into a clean piece of art.
Local Adjustments and Masking
Modern editing relies heavily on local masks. You can isolate your subjects from the background easily to make them pop. But how do you do this without it looking fake? Here’s the deal:
- Subject Masking - Boost exposure on the couple by 0.2 to 0.4 stops to pull the eye straight to them.
- Background Masking - Lower the texture or exposure on the background slightly to build a dreamy, soft depth of field.
- Sky Selections - Darken overexposed skies and add a touch of warmth to pull sunset details back in.
These local adjustments guide the viewer’s eye through the image. They create depth and dimension that flat global adjustments simply can’t match.
Phase 5: Delivery, Archiving, and ROI
Editing isn’t just a creative task. It’s a major part of your business model. Fast delivery times lead directly to higher customer satisfaction and more word-of-mouth bookings. Photographers who deliver galleries in under 14 days see a 35% higher referral rate than those who take six weeks or longer.
Let’s break down the financial and operational impact of different workflows.
Comparison of Delivery Timelines
Here’s how your choice of delivery timeline affects client satisfaction and your business growth. Skip prioritizing speed, and you’re leaving money sitting on the table.
| Delivery Window | Client Reaction | Referral Impact | Operational Stress |
|---|---|---|---|
| 24 to 48 Hours | Blown away, instant social sharing | Maximum (35% increase) | Low (when using AI automation) |
| 1 to 2 Weeks | Very happy, exceeds expectations | High referral potential | Manageable with solid workflows |
| 4 to 6 Weeks | Average, excitement has faded | Neutral referral rate | High backlog stress |
| 8+ Weeks | Frustrated, potential negative reviews | Damages brand reputation | Overwhelming backlog |
The Cost of Post-Production
Let’s break down the actual costs of three different editing workflows. For this comparison, assume a business shooting 25 weddings a year, generating 2,000 photos per wedding, for 50,000 photos total.
| Workflow Type | Time Spent per Wedding | Annual Software/Service Cost | Cost per Photo |
|---|---|---|---|
| DIY Manual Editing | 15 Hours | $120 (Adobe Subscription) | $0.00 (But massive time cost) |
| Manual Outsourcing | 2 Hours | $15,000 to $25,000 | $0.30 to $0.50 |
| AI Editing (Imagen) | 20 Minutes | Imagen plan cost (pay-as-you-go or Limitless) | Pay-as-you-go, billed on the photos you export |
As you can see, AI-powered editing with Imagen delivers a massive return on investment. You save thousands of dollars compared to outsourcing, and you reclaim hundreds of hours of your own time in the process.
One more note on storage. A single wedding with 3,000 RAW files needs about 135GB of storage space. To keep your files safe, set up secure, automated backup systems. Imagen’s Cloud storage is on the roadmap, so for now use external drives, a NAS, or a cloud service to back up your Lightroom catalogs and RAW files automatically, protecting your business from sudden hardware failures.
Future-Proofing: Staying Ahead of 2027 Trends
The wedding industry never stands still. If you want to keep your business profitable, adapt to new technologies and changing customer tastes as they come. Let’s look at how to future-proof your post-production workflow for 2027.
Stay ahead of the curve, and you can offer services your competitors simply can’t match. It positions you as a forward-thinking artist who understands exactly where the market is headed.
Embracing Video-First Editing
With short-form video exploding across social media, modern couples expect more than static photos. They want video clips that match the colors of their photography gallery too. Many photo editing workflows now let you apply your custom color profiles directly to video footage. This keeps your brand looking completely consistent across every media type.
Here are a few quick tips for matching your video and photo styles:
- Use 3D LUTs that mimic your signature Lightroom tone curve.
- Keep your white balance consistent between your photo and video camera settings on set, every time.
- Export short, color-graded video clips to fold into your initial photo “sneak peeks.”
- Sync your background music beats with visual transitions to boost emotional impact even further.
Offering these short video assets alongside your standard photo packages is an excellent way to raise your average booking value. It meets the client’s need for instant, shareable video content without forcing you to hire a full video crew.
Hardware Upgrades for 2026/2027
Modern AI features require serious computing power. If your computer is five years old or more, expect frustrating lag when you use AI-driven masking or denoising tools. To run these tools smoothly, invest in the right hardware now.
Here are the hardware standards you should aim for:
- Processor - Apple M3/M4 Pro or a latest-generation Intel Core i7/i9.
- RAM - At least 32GB for handling large RAW catalogs.
- Storage - Ultra-fast NVMe SSDs for your active catalog and cache files.
- Graphics Card - A dedicated GPU with at least 8GB of VRAM to power AI denoising.
- Monitor - A color-accurate display with 100% sRGB and at least 95% DCI-P3 coverage.
Pro tip: Don’t skimp on RAM. When you run complex AI masks across hundreds of photos in Lightroom, RAM becomes the primary bottleneck that determines your export speed.
What’s new in Imagen: Imagen is now an intelligent, agentic Studio for professional photographers, so a wedding gallery no longer has to move from tool to tool. You cull, edit, review and export in one project, in whatever order suits the day. Your Personal AI Profile edits in your own style, and the edited photos arrive in batches, so you can start reviewing the first frames while the rest finish. The Studio is rolling out gradually as a beta.
Frequently Asked Questions
Is AI photo editing safe for my proprietary editing style?
Yes, absolutely. Quality platforms like Imagen build private, secure Personal AI Profiles accessible only from your own account. Your custom editing style stays yours. It won’t be shared with or used by other photographers.
Do I need an internet connection to use AI editing tools?
Yes. Most AI platforms process images in the cloud, which protects your local system from heavy computing stress. You’ll need a reliable broadband connection to upload your Lightroom catalogs and download the finished edits.
How many photos do I need to train a custom Personal AI Profile?
You typically need at least 5,000 previously edited RAW photos to train a highly accurate Personal AI Profile. This gives the AI enough data to understand how you handle different lighting situations, exposure levels, and color mixes.
Can AI handle mixed lighting situations, like indoor receptions?
Yes. Modern AI photo editing platforms analyze each image individually instead of slapping on one blanket preset. The tool recognizes tungsten reception lighting and applies precise, localized color corrections to balance the scene.
Should I cull my photos before uploading them to an AI editor?
Yes, culling first is always the smart approach. It saves you processing costs and keeps your workflow clean from the start. Use automated culling features to speed through this step before you move into the color correction phase.
How much does AI editing cost compared to hiring a virtual assistant?
AI editing is incredibly cost-effective on pay-as-you-go or subscription models. Traditional manual editors charge between $0.25 and $0.55 per photo, which makes AI dramatically cheaper.
Will AI editing completely replace the need for Adobe Lightroom?
No, it will not. AI tools are built to integrate directly with your existing Lightroom Classic or Adobe Camera Raw workflow. The AI handles the initial exposure, white balance, and tone curve adjustments, and leaves you fully in control of the final artistic tweaks.
What’s the difference between an AI Profile and a preset?
A preset applies the exact same slider values to every photo, no matter its original exposure or lighting. An AI Profile analyzes each photo individually instead, adjusting the sliders dynamically to reach a consistent, matching look across your entire gallery.
