

Wedding Ceremony Photo Editing Workflow: AI Tools and Tips for 2026
Table of contents
- Key Takeaways
- Why the Ceremony Is the Hardest Part of a Wedding to Edit
- Step 1: Import, Back Up, and Cull the Ceremony Take
- Step 2: Set Your Base Look and Batch It Across the Ceremony
- Step 3: Balance Exposure and White Balance Scene by Scene
- Step 4: Finish Individual Frames and Retouch the Key Moments
- Step 5: Export, Proof, and Deliver the Gallery
- Where Imagen Fits, and Two Tools That Pair Well
- Frequently Asked Questions
- The Bottom Line on a Faster Ceremony Workflow
A reliable wedding ceremony photo editing workflow moves your files from card to finished gallery in a clear, repeatable order: ingest and back up, cull the take, set one base look, batch it across the whole ceremony, then finish and retouch the frames that matter. The fastest way to do this in 2026 is to pair your normal Lightroom or Capture One process with an AI editor that learns your personal style and applies it consistently across the full shoot, so the slow, repetitive corrections happen automatically while you keep control of the creative calls. This guide walks through every stage of that production line, shows where AI removes the bottlenecks, and names a few real tools that fit alongside it.
Key Takeaways
- Consistency across the ceremony beats any single perfect frame. Guests and couples read the gallery as one story, so every image needs the same color, tone, and exposure.
- Culling is the real time sink. A ceremony can generate 800 to 2,000 frames, and cutting that down is often slower than the editing itself.
- A style-learning AI editor studies your past edits and applies your look across the entire set, which turns hours of batch work into minutes.
- Imagen folds culling, style-matched editing, and retouching into one connected workflow, so you edit real ceremony photos in your own style at volume.
- Keep a clear order of operations. Ingest, cull, base look, batch, finish, and deliver, in that sequence, protects both speed and quality.
Why the Ceremony Is the Hardest Part of a Wedding to Edit
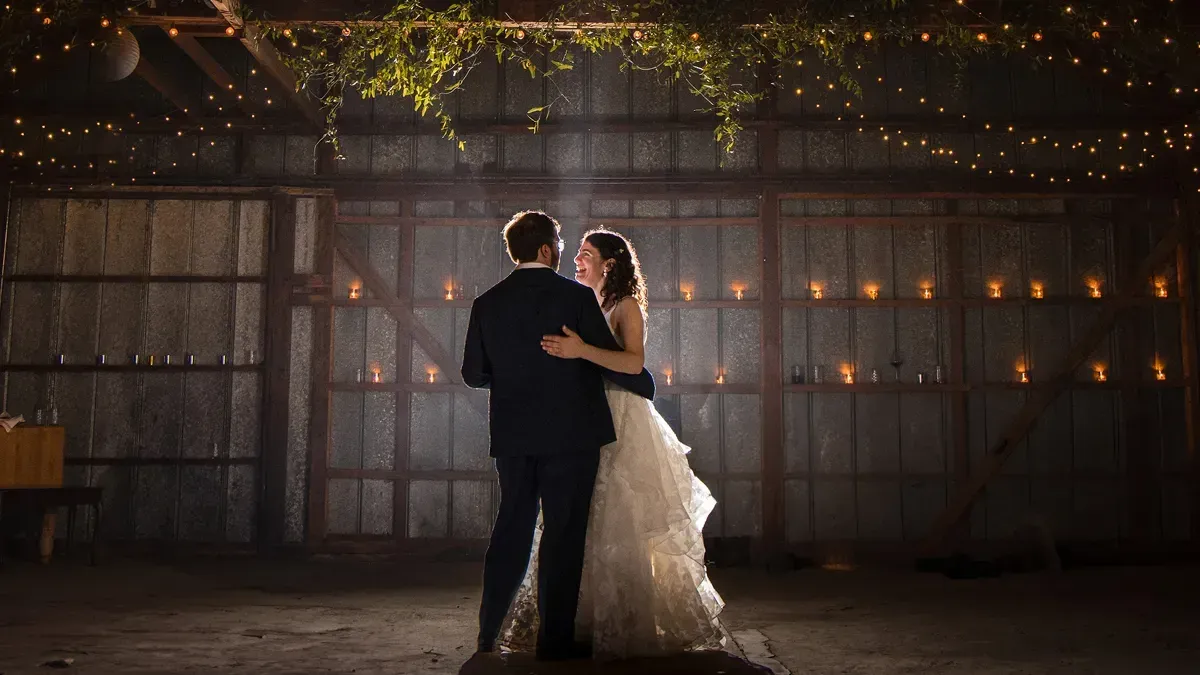
The ceremony is short, it does not repeat, and the light rarely cooperates. You might move from a dim indoor sanctuary to harsh midday sun on an outdoor lawn, sometimes within the same 20 minutes. Backlit couples, mixed color temperatures from windows and tungsten fixtures, and fast emotional moments all land in one sequence that you cannot reshoot. That combination makes the ceremony the section where editing decisions matter most and where inconsistency shows up the fastest.
Volume compounds the problem. A single ceremony can leave you with well over a thousand frames, and the couple expects the processional, the vows, the ring exchange, and the first kiss to look like one cohesive set. Editing each frame in isolation almost guarantees drift in color and brightness. A structured workflow, backed by tools that hold your look steady across the whole take, is what keeps a large ceremony gallery clean and on brand. For the broader creative context, our AI wedding ceremony photo editing guide is a useful companion to the production steps below.
Step 1: Import, Back Up, and Cull the Ceremony Take
Start every job by protecting the files. Copy both cards to at least two locations before you touch a single slider, because raw ceremony footage is irreplaceable. A common setup keeps one working copy on a fast local drive and one backup on an external drive or cloud archive. Import into your catalog of choice, add the couple’s name and the date, and flag the ceremony as its own section so it stays separate from getting-ready and reception frames.
Then cull, because this is where most photographers lose their evening. Reviewing 1,500 near-identical frames of a processional by hand is slow and tiring. AI culling reads the full take, groups similar shots, and flags the sharp, well-composed frames while catching closed eyes and obvious duplicates. Imagen includes AI culling in the same project as its editing, so you review a shorter shortlist instead of scrubbing the entire take, and you can skip it and cull manually for free whenever you prefer. If you prefer a dedicated culling step first, Aftershoot is another real option that focuses on AI culling before you hand selects to your editor.
- Copy both memory cards to two separate drives before editing.
- Import into Lightroom or Capture One and tag the ceremony as its own section.
- Run AI culling to flag selects and drop blinks and duplicates.
- Do a quick human pass to confirm the emotional peak frames survived the cut.
Step 2: Set Your Base Look and Batch It Across the Ceremony
Once you have your selects, define the base look for the ceremony. This is your signature: how you handle skin tones, how warm or cool your whites read, how much contrast and how you roll off highlights. Traditionally you would build this on a hero frame, save it as a preset, and sync it across the set, then fix every frame where the preset misses because the light changed.
A style-learning AI editor changes that middle step. Imagen studies your own past edits from your Lightroom or Capture One catalog, builds a Personal AI Profile of how you edit, and applies that style across the full ceremony automatically. It is not a generator and it does not invent scenes or swap faces. It edits the real photos you shot, matching your exposure, color, and tone choices frame by frame so the processional and the vows already share your look before you open a single image. Edited photos come back in batches as they process, so you can start reviewing the early frames of the processional while the rest finish. That is the stage where a good workflow saves the most time, since holding a uniform style across a thousand frames by hand is where the hours disappear.
Step 3: Balance Exposure and White Balance Scene by Scene
Even with a batched base look, a ceremony usually contains two or three distinct lighting scenes. The processional under the doorway, the couple at the altar, and a backlit exit each have their own exposure and color needs. Group your selects by scene and confirm that white balance stays consistent within each group. Whites should read neutral, skin should look natural rather than orange or gray, and the couple should stay properly exposed even when the background blows toward a bright window or sky.
Work in this order for each scene: set exposure on the faces first, correct white balance so the whites are clean, then check that shadows keep detail without going muddy. Because the AI pass has already carried your style across the whole take, your job here is targeted correction on the scenes that shifted, not a rebuild of every frame. That is a much shorter list of decisions, and it keeps the whole ceremony reading as one continuous set rather than a patchwork of rooms.
Step 4: Finish Individual Frames and Retouch the Key Moments
With the set consistent, turn to the frames the couple will enlarge and print. The first kiss, the ring exchange, the reaction from a parent, and the recessional deserve individual attention. This is where you clean up distractions, refine skin, brighten eyes, and make sure the hero moments are flawless without looking over-processed. Keep retouching honest and light, because a ceremony gallery should look like the day, not like a fashion shoot.
Imagen includes AI retouching in the same connected workflow, so skin and portrait finishing run across the gallery instead of forcing you into a separate app for every frame, and the built-in editor (Beta) adds manual sliders, crop and straighten, and presets for quick touch-ups, although it is an early release and not every tool is inside it yet. For signature images that call for granular control, many photographers still open Adobe Photoshop for compositing, complex removals, or precise dodge and burn. A practical stack anchors on the style-learning editor for the whole set and reserves the manual tool for the handful of frames that truly need it. That keeps your per-frame time low while leaving room for craft on the images that carry the album.
- Identify the hero frames: first kiss, vows, ring exchange, recessional.
- Apply AI retouching across the gallery for consistent skin and tone.
- Remove stray distractions like exit signs or a phone in the aisle.
- Open Photoshop only for the few frames that need compositing or fine hand work.
Step 5: Export, Proof, and Deliver the Gallery
Export settings depend on where the photos will live. For an online gallery, deliver high-quality JPEGs at around 2,048 to 3,000 pixels on the long edge with sRGB color, which looks sharp on screens and loads quickly. For print orders, export full-resolution files in the color space your lab requests. Keep your naming consistent so the ceremony sequence stays in order, since couples relive the day in the order it happened.
Before you send anything, proof the full ceremony as a filmstrip and watch for drift in brightness or color from one frame to the next. A consistent set is the payoff of the whole workflow, and a two-minute scroll catches the one frame that slipped. The ceremony usually ships as part of a larger wedding gallery, so align your look with the rest of the day. Our guide to the best AI wedding reception photo editing software covers the matching approach for the party that follows.
Where Imagen Fits, and Two Tools That Pair Well
Imagen sits at the center of the ceremony workflow because it connects the three slowest stages. It culls the take, edits the full set in your personal style learned from your catalog, and retouches across the gallery, all in one place. Pricing is pay-as-you-go: you pay for the photos you export, and exploring the tools is free. That model tracks the seasonal rhythm of a wedding calendar, since your cost follows the photos you actually export.
Two other real tools pair naturally with it. Adobe Lightroom remains the industry-standard catalog and manual editor, and it is where many photographers organize files, build presets, and finish select frames by hand; it runs on a subscription model. Aftershoot is a solid choice if you want a dedicated AI culling and editing step focused on learning your past edits, and it uses its own subscription approach. You can compare more options and read deeper breakdowns across the Imagen valuable tips hub, which collects workflow guides for every stage of a wedding.
| Stage | What it solves | How Imagen helps |
|---|---|---|
| Culling | Cutting 1,500 frames to the selects takes hours by hand. | AI culling flags sharp keepers and drops blinks and duplicates. |
| Base look | A batched preset misses whenever the light shifts. | Imagen applies your learned personal style across the whole set. |
| Retouching | Per-frame skin work forces app switching and eats time. | AI retouching runs consistently across the full gallery. |
| Delivery | Color and brightness can drift between frames. | A consistent style pass keeps the ceremony reading as one set. |
What’s new in Imagen: Imagen is now an intelligent, agentic Studio for professional photographers, built as one project where you cull, edit, review, and export together, in any order. For a ceremony, edited frames arrive in batches as they process, so you can start reviewing the processional while the vows finish. Your Personal AI Profile, learned from your past edits, carries your look across the set. The Studio is rolling out gradually as a beta.
Frequently Asked Questions
What is the ideal order for a wedding ceremony photo editing workflow?
The reliable order is ingest and back up, cull the take, set one base look, batch that look across the ceremony, balance exposure and white balance by scene, retouch the hero frames, then export and proof. Following the same sequence every time protects both speed and consistency, and it makes the whole gallery read as one story.
How does AI keep a large ceremony gallery consistent?
A style-learning editor studies your past edits, builds a profile of how you handle color, tone, and exposure, and applies that same look across every selected frame. Instead of syncing a preset and fixing each miss by hand, you get a set that already matches your style, so the processional, the vows, and the exit share one consistent gallery look.
Does Imagen replace Lightroom for wedding ceremonies?
It works alongside it rather than replacing it outright. Many photographers keep Lightroom for cataloging and final manual touches, then let Imagen handle culling, style-matched batch editing, and retouching across the full set. Imagen learns your style directly from your Lightroom or Capture One catalog, so the two fit into one connected process. You can send AI edits back to Lightroom Classic as XMP, or export finished JPG, TIFF, or PNG files straight from Imagen.
How much does it cost to edit a ceremony with Imagen?
Imagen uses pay-as-you-go pricing, so you pay for what you export, and exploring the tools is free. That means you can run a real ceremony through the workflow before you commit to anything, and part of your editing cost tracks your actual wedding volume through the year.
The Bottom Line on a Faster Ceremony Workflow
A great ceremony gallery comes from a clear production line: back up the files, cull with intent, set one base look, batch it across the take, correct scene by scene, retouch the moments that matter, and proof before delivery. The tools you choose decide how fast and how consistently you can run that line at wedding volume. Imagen strengthens the slow stages by culling the take, editing the full set in your own learned style, and retouching across the gallery, all in one connected workflow on the real photos you shot. Try Imagen free in its new Studio, where you cull, edit, and export in one project, and see your next ceremony edited in your own style.
