
The Ultimate Guide to Real Estate Video Editing in 2026
Table of contents
- Key Takeaways
- Establishing Architectural Flow in Your Cuts
- Technical Rig Specs for Post-Production
- Video Formats and Aspect Ratio Strategy
- Platform Showdown: Selecting Your Editing Software
- The Master Workflow for Timeline Organization
- Controlling Motion with Stabilization and Speed Ramps
- Solving the Mixed Lighting Nightmare
- Advanced Audio Engineering and Ambient Soundscapes
- AI-Driven Tools and Real Estate Photo Integration
- Virtual Staging in Motion
- Technical Quality Audits and Platform Exporting
- Scaling Your Editing Business: In-House vs Outsourced
- Strategic Distribution and Local Search Optimization
- Frequently Asked Questions
- What is the best frame rate for real estate video?
- How long should a standard real estate video be?
- Do I need a drone for real estate video editing?
- Can I use copyrighted music in real estate videos?
- What is the minimum bitrate for a 4K real estate export?
- How can I make my interior video shots look brighter?
- What is the difference between active and passive video staging?
- How fast can AI edit my real estate listing photos?
Buyers aren’t looking at flat photos anymore. They want to walk through a home virtually before they ever book a viewing, which makes cinematic media the true currency of modern real estate.
If you aren’t producing high-end walkthroughs that rival luxury indie films, you’re losing listings to editors who do. Let’s look at how to build a faster workflow and win clients using the latest tools.
On the photo side of every listing, you can start your free trial with Imagen. No installation required, 250 photos free, and no credit card.
Key Takeaways
- Video listings gain far more inquiries than image-only listings, which makes video essential for top-tier agents.
- Many real estate clients expect a finished video within 48 hours, so you’ve got to build a fast workflow.
- Vertical videos (9:16 format) see a notably higher completion rate on mobile than horizontal options.
- Standardizing your export at 60-100 Mbps for 4K footage keeps architectural details crisp on all platforms.
- AI-driven editing systems can cut a large share of your rough cut building time.
- Hybrid teams that pair video with AI photo editing platforms like Imagen reach the fastest listing turnarounds.
Establishing Architectural Flow in Your Cuts
Look, you can’t just throw random clips together and hope for the best. It doesn’t work that way. Buyers want to experience the home in a logical sequence. It’s like walking through a physical front door. You’ve got to start with the front exterior. Then, you’ll open the front door and reveal the entryway. Don’t jump straight from the garage to the primary suite, because that path confuses people.
And what about pacing? Keep each shot between 2 and 4 seconds long. That’s the sweet spot. If a shot drags on for 6 seconds, people get bored and scroll away. Most home buyers want to see clean video tours of properties before they ever visit. But they won’t watch a boring, slow slideshow. So, you’ve got to keep the cuts tight and clean.
You’ve also got to talk about transition zones. Hallways, stairs, and doorways are tricky. Don’t just cut abruptly between them. You can use a whip-pan or a smooth push-in to lead the camera through a doorway. It feels natural, and it keeps the viewer’s eyes locked onto the screen.
Technical Rig Specs for Post-Production
You can’t edit heavy 4K camera files on a cheap laptop, and that limit is hard. High-contrast architectural shots need deep dynamic range. That means massive, color-rich files that’ll crash your system if it isn’t powerful enough. If your system lags every time you apply a color grade, you’ll never hit your deadlines.
Many real estate clients expect a finished video within 48 hours of the shoot. You don’t have time to wait for slow renders. That’s why you’ve got to invest in a proper post-production machine. Here’s what your system needs to handle the heavy workload:
- Processor (CPU) - Apple M3 Max or Intel Core i9 with at least 16 cores. It’s the brain of your edit.
- System Memory (RAM) - 64GB of RAM is the sweet spot. Don’t settle for 16GB if you’re editing 10-bit footage.
- Graphics Card (GPU) - Dedicated Nvidia RTX 4090 or Apple 40-core GPU. It keeps your live previews running at full resolution.
- Storage Setup - A 2TB internal NVMe SSD for software, plus a 4TB external SSD for active project files.
- Color-Calibrated Monitor - An IPS screen covering at least 99% sRGB color space.
And don’t forget your backup strategy. We’ve seen too many editors lose active projects due to a drive failure, and it wrecks their week. Always keep an automated cloud backup running in the background. That’s the only way to protect your business.
Video Formats and Aspect Ratio Strategy
Are you editing for the local MLS or for social media channels? They’re completely different worlds. You can’t use the same video format for both. MLS platforms require horizontal 16:9 videos. They must be clean, professional, and completely free of agent branding. But social media platforms thrive on vertical 9:16 video.
So, how do you handle both? You’ve got to plan your shots during production. Frame your key subjects in the center of the screen. That way, you’ll have enough room to crop the sides for a vertical reel without losing the focus of the shot.
Look at the numbers. Video streaming and downloads account for the vast majority of global internet traffic. Much of that’s mobile viewing. Vertical videos see a notably higher completion rate compared to horizontal cuts on mobile screens, and that gap is real. That’s why we’ve got to deliver both formats for every single listing.
Don’t just upload the horizontal version with black bars on top and bottom, because it looks sloppy. Take the extra 10 minutes to build a dedicated vertical sequence. Adjust your crops. Re-position your keyframing so the viewer’s eye is always drawn to the main focal points, like a custom marble fireplace or a built-in espresso machine.
We’ve also got to consider platform limits. Instagram Reels caps videos at 90 seconds, while TikTok allows longer uploads. But don’t let that tempt you to make longer videos. Keep your social teasers under 30 seconds. They’re meant to hook the audience, not show the entire floor plan.
Platform Showdown: Selecting Your Editing Software
Choosing the right tool isn’t about finding the absolute best software. It’s about finding what works for your speed and budget. If you’re editing high-end estates, you’ll need professional grade desktop apps. If you’re on the go, a mobile app might be all you need.
Let’s compare the main options on the market. It’s the easiest way to see what fits your business:
| Software | Platform | Pricing Model | Best Feature |
|---|---|---|---|
| Adobe Premiere Pro | Desktop | $22.99/mo subscription | Industry standard integration |
| DaVinci Resolve | Desktop | Free or $295 flat fee | Advanced color grading |
| CapCut Pro | Mobile/Desktop | $7.99/mo subscription | AI captioning & templates |
| LumaFusion | iPad/iOS | $29.99 flat fee | Mobile multi-track timeline |
If you want deep control, DaVinci Resolve is a strong pick. Its color engine handles mixed lighting very well. Honestly, it manages tricky lighting more smoothly than many editors expect. But Premiere is still the king when you’ve got to sync up with other Adobe tools like After Effects.
For quick turnarounds, CapCut Pro is a solid option because it’s fast. Its AI features can save you a ton of time on basic cuts and auto-captions. But keep it away from high-end luxury listings where clients expect flawless color matching. It doesn’t have the color depth you need for that work. LumaFusion sits right in the middle, giving you a powerful multi-track editor on your iPad.
The Master Workflow for Timeline Organization
A messy timeline will ruin your speed. You’ve got to be organized from day one. If you’re spending 20 minutes looking for a specific drone clip, you’re losing money outright. The team created a structured system that makes every edit predictable and fast.
Here’s our step-by-step master workflow for building a clean edit:
- Sort by focal point - Group all drone shots, master bedrooms, and kitchens into color-coded folders.
- Sync the audio - Drop your music track onto the timeline and mark the major beats before adding video.
- Build the primary sequence - Lay down the main walk-through clips in chronological order from front to back.
- Insert detail B-roll - Place close-up shots of high-end finishes directly above the primary walk-through track.
- Apply color corrections - Balance the exposure and match the white balance across different cameras.
Honestly, don’t skip the organization step. We’ve seen editors dump all their files into a single bin, and it turns into a real mess. Take the extra five minutes to name your folders and color-code your tracks. It’ll save you hours of frustration down the road.
And remember: always choose your music before you make a single cut. The track’s beat dictates your pacing. If you try to force a music track onto a pre-cut video, it’ll feel awkward and it won’t flow well. Find a track that matches the home’s personality first.
Controlling Motion with Stabilization and Speed Ramps
Shaky video looks cheap. It’s the easiest way to lose a listing client. Even if you’re using a physical gimbal, you’ll still get micro-jitters from your footsteps. You’ve got to fix this in post-production, and it’s a non-negotiable step.
Apply a warp stabilizer tool to your walking shots. But don’t overdo it. Keep the stabilization strength low, around 5% to 10%. If you set it too high, you’ll get weird warping artifacts in the corners of your screen. That result looks terrible on a client’s screen.
Now let’s talk about speed ramping. It’s a fantastic technique for moving through uninteresting parts of a home. Think about long hallways, stairs, or large open spaces. Here’s how you do it:
- Identify transition zones - Find the exact moment you enter a hallway or start climbing stairs.
- Set spatial keyframes - Add speed keyframes at the start and end of the transition area.
- Boost speed ratios - Speed up the middle section to about 500% or 800% of normal speed.
- Smooth the curve - Use bezier curves to ease in and out of the high-speed motion.
This technique keeps your video’s energy high. It shows how the spaces connect without making the viewer sit through ten seconds of walking down a dark hallway. It’s all about keeping their attention.
Pro Tip: Always shoot your walking clips at 60fps if you plan to speed ramp. It gives the stabilization software more frames to analyze, resulting in a much smoother final movement.
Solving the Mixed Lighting Nightmare
Mixed lighting is the ultimate enemy of real estate media, and it’s a huge problem. You’ll often find yourself editing a kitchen that has warm light bulbs overhead, but cool, bright daylight pouring in from the windows. If you don’t fix this, the room will look messy and unappealing.
Many architectural photographers name mixed lighting as their biggest technical challenge. Here’s how we solve this on our editing timeline:
- Set white balance for daylight - Keep your main white point balanced to 5600K to keep outdoor window views looking natural.
- Apply secondary masks - Draw a mask around the warm light fixture areas to isolate them from the rest of the room.
- Desaturate the warm tones - Lower the saturation of the yellow and orange channels inside that mask to clean up the glow.
- Balance with blue midtones - Push a tiny bit of blue color into the shadows to neutralize the warm light spill on white walls.
This process takes some practice, but it’s the only way to get clean, natural results. Don’t just slap a generic LUT on mixed lighting footage, because it won’t work. You’ve got to color-correct the scene manually before you apply any creative grading.
Keep your color scope monitor open while you edit. It doesn’t lie to you the way tired eyes do. Your eyes will get tired and adjust to the color shift, but the scopes will always show you the true color balance. That’s how you maintain absolute consistency across all your clips.
Advanced Audio Engineering and Ambient Soundscapes
Most editors ignore audio, and that’s a massive mistake. Audio is half of the viewing experience. If your video has great visuals but flat, boring sound, it won’t feel like a luxury tour. It’ll feel like a cheap slideshow.
You’ve got to design a rich soundscape that makes the viewer feel like they’re actually in the room. Don’t just use background music. Mix in subtle ambient sound layers to bring the property to life.
Here are the key audio layers we mix into our real estate projects:
- Outdoor wind rustle - Add a faint breeze sound to drone shots to make them feel natural.
- Fireplace crackling - Layer a soft fireplace sound over close-ups of the hearth.
- Kitchen mechanical clicks - Put in the sound of a luxury refrigerator door closing or a stove turning on.
- Pool water ripples - Use a soft water movement sound for backyard spa areas.
Keep your levels balanced. Your background music should never compete with a voiceover. We like to keep our background music peaking around -18dB, while the voiceover sits comfortably between -6dB and -10dB. It stays clean and professional.
And use audio transitions. Don’t let your sounds start or stop abruptly. Apply short constant power fades between your audio clips to prevent pops and clicks. It’s a simple step that makes a huge difference in the overall quality of your video.
AI-Driven Tools and Real Estate Photo Integration
The AI video editing market is growing quickly, and AI is a real time-saver for busy editors. If you aren’t building modern tools into your 2026 workflow, you’re wasting valuable hours in the editing bay.
One of our favorite techniques integrates high-end still photos into the video timeline. It’s a great way to show off fine details that are hard to capture on video. This is where photo editing platforms sync neatly with your video pipeline.
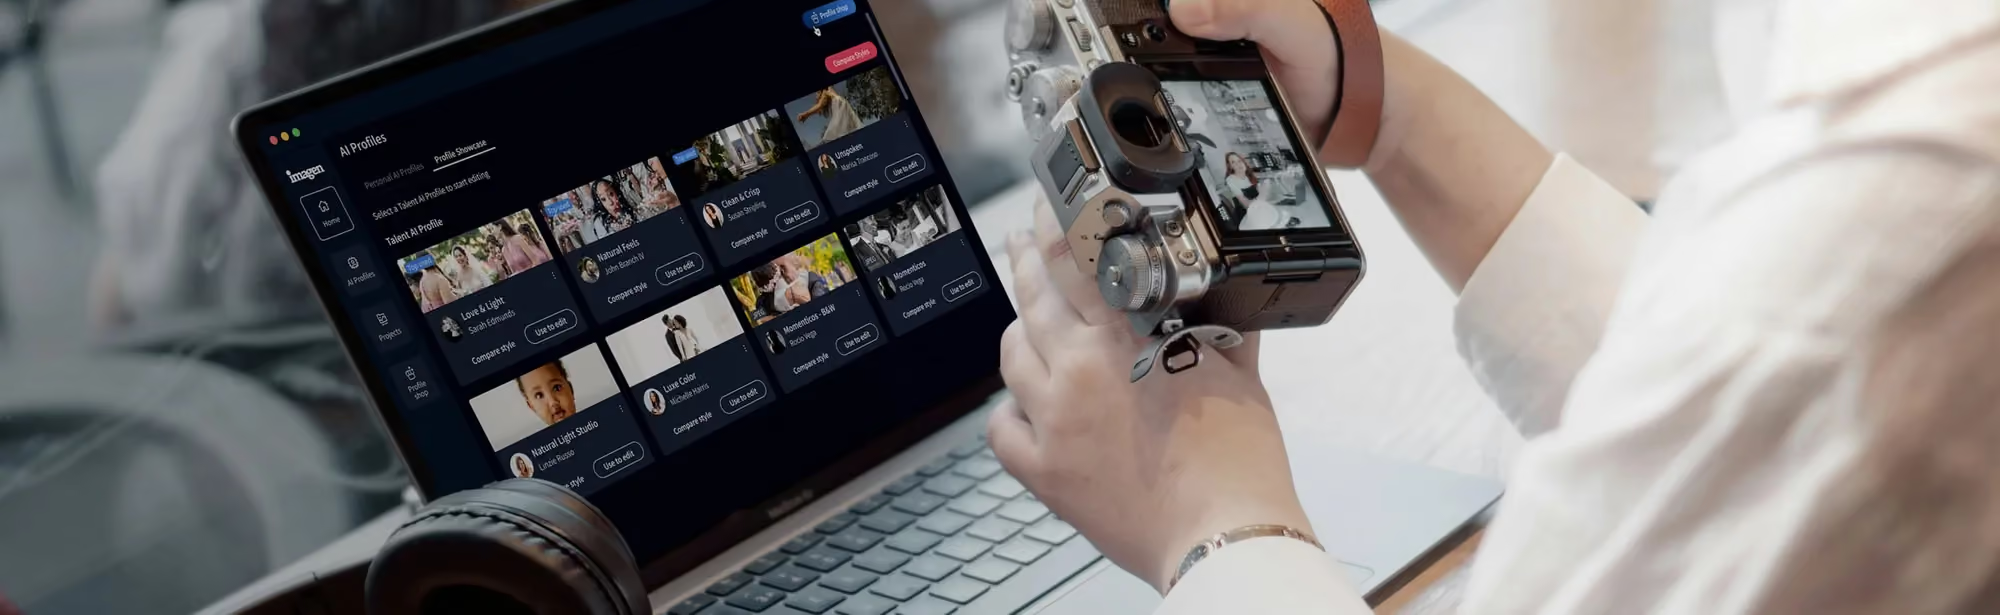
With Imagen, you can batch-edit the photo side of every listing right in your browser. Imagen edits stills, not video, so it handles your photography while your editor handles the footage. There’s no installation and no Lightroom dependency, which keeps your still workflow fast and consistent.
Real estate video editing isn’t just about cutting clips together; it’s about pacing, lighting, and consistency. AI tools don’t replace the editor’s eye, but they allow us to correct errors and match colors across frames in a fraction of the time, keeping our 48-hour turnarounds highly profitable.
Itamar Haim, SEO Expert and Digital Strategist specializing in search optimization and content marketing.
Imagen’s AI photo editing runs on Image2Image, a color-correction model trained on real estate photography. It takes each raw photo and returns an advertising-quality edit in one step, consistent across every image in the listing. When a single frame needs extra work, the AI Assistant handles the exceptions in plain language, so you can remove wires, convert a shot to twilight, blur license plates, or add virtual staging.
Image2Image handles the batch and the AI Assistant handles the exceptions, so your stills match the color grade of your video without hours of manual sliders. Every listing includes 3 human revisions, output up to 6K, RAW and JPEG support, and an AI-disclosure watermark for compliance with rules like California AB 723. You can try it on a real job with 250 photos free and no credit card, and the first batch finishes in under 10 minutes. Pricing is pay-as-you-go at $0.32 per photo, with 30% off your first month at $0.22, and you can cancel anytime.
Pro Tip: When you drop a still photo into a video timeline, apply a slow, subtle zoom effect. It’s called the Ken Burns effect, and it keeps the image dynamic so it doesn’t look like a static slide.
Virtual Staging in Motion
Selling an empty home is tough. It’s hard for buyers to visualize how furniture fits into a space. They look at empty, cold rooms and can’t imagine living there. Physical staging is expensive, sometimes costing thousands of dollars per month, while virtual staging typically runs a fraction of that per image.
That’s why virtual staging has become so popular. But in 2026, we aren’t just staging flat photos anymore. We’re virtually staging videos in motion.
Using 3D camera tracking, you can place realistic virtual furniture directly into your moving video clips. Think about a slow camera glide through an empty living room. With motion staging, we can add a modern sofa, a stylish coffee table, and a warm rug that stay perfectly locked in place as the camera moves.
This technique is very effective. Many top agents use some form of virtual staging to sell empty properties. It helps buyers understand the scale of the rooms, and it makes empty homes feel warm and inviting without the massive cost of physical staging.
Make sure your 3D tracks are perfect. If the virtual furniture slides or floats on the floor, it looks fake and instantly ruins the illusion. Take the time to refine your camera tracking points before you drop in your 3D models.
Technical Quality Audits and Platform Exporting
There’s nothing worse than exporting a massive video file and realizing it looks terrible on your phone. You’ve got to perform a rigorous technical audit before sending anything to your client. Real estate listings that include high-quality video see a sharp jump in inquiries, but only if the video looks professional.
Before you hit render, walk through this quality checklist:
- Analyze frame rates - Ensure there are no dropped frames during your speed ramps.
- Check the audio peaks - Confirm your music track stays below -18dB during voiceovers.
- Verify the vertical crop - Make sure no key features are cut off in the 9:16 version.
- Test the color profile - Export a short clip to verify the colors match on an iPhone screen.
- Remove metadata clutter - Clean out any temporary project tags from the final file metadata.
- Inspect title text spelling - Double-check the property address and agent contact info.
Let’s talk about export settings. Don’t use a single generic preset for everything. Each platform has its own compression system.
For YouTube and professional portfolios, export your files in 4K at a high bitrate of 60-100 Mbps. It keeps architectural details sharp. But for Instagram and TikTok, downscale your video to 1080p and limit the bitrate to 15-20 Mbps. If you don’t do this, the social media platforms will compress your file anyway, and it’ll end up looking blurry and low-quality.
Scaling Your Editing Business: In-House vs Outsourced
As your business grows, you’ll face a big choice. Should you keep editing everything yourself, or should you hand the work off to someone else? Honestly, there’s no single right answer. It depends on your budget and how many listings you shoot.
Let’s look at the pros and cons of both approaches so you can make a smart decision:
- In-House Editing Pros - You’ve absolute creative control over every transition, and there’s no delay in making quick client revisions.
- In-House Editing Cons - It eats up hours of your day that could be spent shooting more properties or finding new clients.
- Outsourcing Pros - You can easily scale your business to handle 10 or more listings a week without burning out.
- Outsourcing Cons - You might experience slower turnarounds and occasional style mismatches if your team isn’t aligned.
If you only shoot a few luxury homes a month, keeping your editing in-house is usually best. It gives you complete creative control. You can spend extra time perfecting every transition and color grade.
But if you’re shooting 10 or more properties a week, you’ve got to outsource. It’s the only way to scale without burning out. Many high-performing agents now expect video for every listing, which means your workload is only going to grow.
Pro Tip: If you decide to outsource, build a style guide for your editors. Include your preferred fonts, color LUTs, and music styles. It ensures your videos look consistent, no matter who edits them.
Strategic Distribution and Local Search Optimization
A great video is useless if nobody sees it. You can’t just upload your video to YouTube and hope for the best. You’ve got to optimize it so it ranks well in local search results. Video content on social media generates far more shares than text and images combined, so distribution is key.
Here’s how we set up our video SEO for every listing:
- Target localized keywords - Put the neighborhood name, zip code, and city in your video title and description.
- Write unique video tags - Use tags like “luxury home tour” and “modern kitchen design” along with the local city name.
- Upload custom SRT captions - Don’t rely on auto-generated captions, because they’re often full of spelling mistakes.
Don’t forget your video thumbnail. It’s the single most important factor for your click-through rate. If your thumbnail is blurry or dark, people won’t click on it.
Use a bright, high-resolution photo of the home’s best feature. It’s usually the front exterior or a stunning kitchen. If you’re managing multiple listings, Imagen’s AI photo editing for real estate is a fast way to polish your thumbnail images right in the browser. It keeps your still workflow quick and consistent, with no installation required.
Start your free trial. No installation required. Upload a real job and watch Imagen process your listing photos in minutes.
Frequently Asked Questions
What is the best frame rate for real estate video?
Shoot and edit your main walkthrough footage at 24fps or 30fps for a natural, cinematic look. Use 60fps or 120fps only when you want to capture slow-motion details like water features or fireplace flames.
How long should a standard real estate video be?
A standard MLS walkthrough video runs between 60 and 90 seconds long. Social media reels and teasers run much shorter, ideally between 15 and 30 seconds, to maintain viewer engagement.
Do I need a drone for real estate video editing?
Yes, aerial footage is highly recommended, especially for luxury properties. Many top-performing agents use drone footage in their listings because it shows the property’s boundaries and proximity to local amenities.
Can I use copyrighted music in real estate videos?
No, never use copyrighted music without a license. Instead, use royalty-free music platforms like Epidemic Sound or Artlist to find high-quality tracks that won’t result in copyright claims or video takedowns.
What is the minimum bitrate for a 4K real estate export?
For high-quality architectural video, export at a minimum bitrate of 60 to 100 Mbps for 4K resolution at 30fps. This ensures high-contrast details and fine textures remain crisp on all devices.
How can I make my interior video shots look brighter?
Use your editor’s Lumetri Color or DaVinci wheels to lift the shadows and midtones while keeping your highlights under control. Correcting mixed lighting by balancing the white point is essential for bright, natural-looking rooms.
What is the difference between active and passive video staging?
Active staging uses 3D camera tracking to place moving virtual furniture into your video clips. Passive staging only applies 2D furniture overlays to still photos, which makes active video staging far more engaging for modern buyers.
How fast can AI edit my real estate listing photos?
Using real estate photography tools like Imagen, you can edit hundreds of photos in minutes right in your browser. Image2Image returns advertising-quality edits that stay consistent across the whole listing, with no installation required.
