
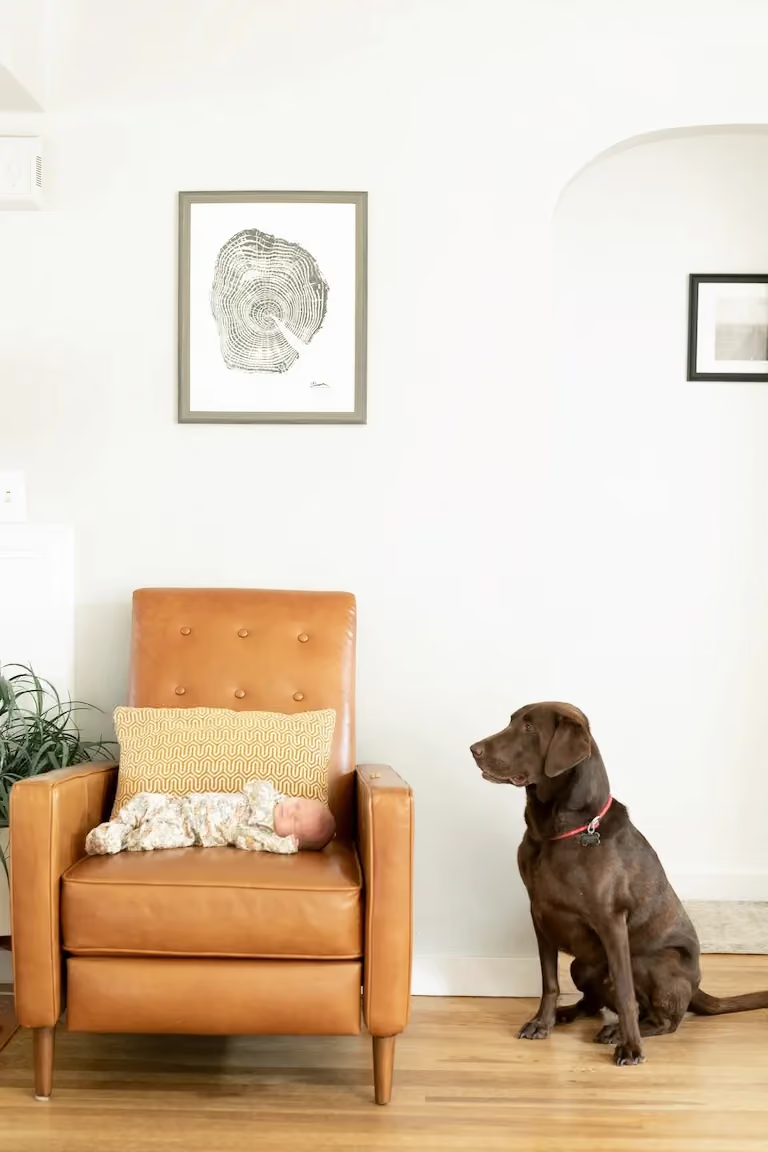
15 Heartwarming Newborn Hospital Photography Ideas for 2026
Table of contents
- Key Takeaways
- 1. Sibling Introductions and the First Connection
- 2. Capturing the Hospital ID Bracelet Details
- 3. Cozy Skin-to-Skin Portraits During the Golden Hour
- 4. Wide Angle Bassinet Views and Clinical Environment Shots
- 5. Close-up Macro Shots of Feet and Tiny Fingers
- 6. The Swaddling Process Sequence as a Storyboard
- 7. Partner or Father’s First Quiet Hold
- 8. Creating Dramatic Window Light Silhouettes
- 9. The Going Home Wardrobe Transition
- 10. Multi-Generational Portraiture in Tight Quarters
- Comparison of Top 5 Newborn Hospital Ideas
- Recommendation
- Frequently Asked Questions
- What’s the best camera lens for newborn hospital photography?
- Is it safe to photograph newborns in a hospital room?
- How do you handle the terrible, yellow overhead lights?
- Should I offer video alongside photos in 2026?
- How far in advance do parents book Fresh 48 sessions?
- What should the baby wear during their first hospital photo shoot?
- How long do hospital photo sessions usually take?
- How do you avoid getting overwhelmed by messy hospital backgrounds?
- Keep exploring
Hospital rooms aren’t photography studios. The lighting runs harsh and the space stays cramped, yet the raw emotion inside those first hours is completely unmatched.
Ready to speed up your workflow? Try Imagen’s new Studio, where you cull, edit and export in one project, and see the difference for yourself. You pay at export, and you see every edit in the gallery first.
If you want to capture these fleeting moments, you need a solid set of newborn hospital photography ideas. We picked these 10 options for emotional depth, lighting safety, and current storytelling style.
Key Takeaways
- 82% of millennial and Gen Z parents lean toward unposed, lifestyle portraits rather than traditional studio-style hospital photography in 2026.
- Hospital stays run short, just 48 hours for vaginal deliveries and 72 to 96 hours after a C-section, so fast scheduling matters.
- Successful photographers book “Fresh 48” clients 6 to 8 months in advance, since births rarely stick to a due date.
- Low-light hospital rooms (typically 200-300 lux) call for fast f/1.2 or f/1.4 prime lenses plus AI-driven noise reduction.
- Printed albums and physical keepsakes can lift total newborn session revenue by 30% per client.
- By 2026, an estimated 85% of professional newborn photographers will lean on AI-powered culling and editing tools to handle high-volume workflows.
1. Sibling Introductions and the First Connection
Meeting a new baby is a monumental moment for an older child. Capture that exact second in the hospital room and you gain unmatched emotional value for the gallery. Position yourself near the bed before the sibling walks in, since that placement is what catches the first, wide-eyed look of wonder.
And here’s the thing: you can’t stage this moment. You have to stay ready for whatever reaction comes, immediate tears, intense curiosity, or a flash of hesitation. It’s a high-pressure shot, but nail it and it becomes the centerpiece of the whole gallery.
To pull this off, prepare the room beforehand. Clear away plastic water cups, medical wrappers, and any random bags sitting on the bedside table. A stray plastic pitcher in the frame will pull focus from the older sibling’s face the moment they lean over the baby. Ask the parent holding the baby to keep their face turned toward the door, so you catch both expressions at once.
Set your camera to high-speed continuous shooting mode for this one. Kids move fast, especially when they’re excited or nervous about a strange medical room. Skip a shutter speed of at least 1/250th of a second and you’ll end up with a blurry hand or a smeared smile. An aperture around f/2.2 keeps both faces reasonably sharp while the background stays soft.
Sibling behavior varies more than you’d expect. Sometimes a toddler won’t even look at the baby and instead makes a beeline for the hospital bed buttons. Don’t worry if that happens. That’s real life, and it makes a great photo. A sibling climbing the motorized bed rails while the parents laugh is just as authentic as the tender moment you planned for. These honest, unvarnished portraits are what parents choose for their physical albums, again and again. They don’t want a forced smile. They want to remember how chaotic and sweet the actual day was.
2. Capturing the Hospital ID Bracelet Details
Tiny details tell the biggest stories. The paper or plastic hospital bracelet on the baby’s ankle or wrist anchors the whole gallery in the actual moment of birth. It’s a quiet, macro shot that contrasts beautifully against the wider family images.
So how do you make a sterile plastic band look beautiful? Start with the light. Position the baby’s limb so natural window light skims across the texture of the band without throwing a blinding glare off the plastic.
Here’s how to capture this exact detail without stressing out the baby:
- Check the light direction - Start by looking at how window light enters the room. Pull the rolling bassinet close to the window pane so you’re working with soft, directional side light instead of harsh overhead fluorescents.
- Position the parent’s hand - Have the mother or father gently hold the baby’s ankle or wrist. This steadies the limb, and it also gives an immediate sense of scale that shows just how tiny the newborn really is.
- Dial in your camera settings - Use a wide aperture, something like f/2.0 or f/2.8. That gives you a shallow depth of field, blurring the wrinkled hospital sheets and putting all the attention on the printed details.
- Focus on the text - Lock your focus point carefully on the printed ink of the baby’s last name or birth time. If the plastic reflects too much light, tilt the arm slightly away from the window until the letters read clearly.
But don’t rush this shot. Babies twitch and flex their tiny toes constantly, and that easily throws off your focus point at such a narrow depth of field. Keep your focus tracking on continuous mode and fire off multiple frames so at least one comes out tack-sharp.
If the hospital room’s walls are painted an ugly medical beige or green, this shot saves the day. Crop in tight on the foot and the bracelet and the room’s clinical background disappears entirely. It’s a smart way to get a clean, professional-looking shot in a space that doesn’t look professional at all.
3. Cozy Skin-to-Skin Portraits During the Golden Hour
The quiet connection of skin-to-skin contact, often called the Golden Hour, produces the most close portraits of the whole hospital stay. Focus on the raw, genuine emotion of early motherhood here. Forget perfect hair or makeup. This is about the deep relief and quiet joy of holding that baby close.
But hospital rooms aren’t known for studio-grade lighting. You’re usually fighting yellow overhead fluorescents and dim window light at the same time. Since hospital rooms typically offer only 200-300 lux of light, open your lens all the way and embrace a high ISO setting.
With shots this dim, advanced post-production becomes your best friend. Don’t worry about noise or color casts while you’re in the room. You can fix those later during your editing pass. Focus instead on the mother’s closed eyes and the baby’s tiny ear resting against her chest.
Here are the real benefits and challenges of capturing this quiet moment:
- Zero posing required - Skin-to-skin is beautiful because it’s entirely natural. You don’t need to touch the baby or adjust their limbs. The mother’s natural hold already creates perfect, organic shapes.
- High emotional value - Parents consistently rate these close photos as their absolute favorites in the whole gallery, since the images bring back the physical sensation of those first hours.
- Challenging lighting - You’ll often shoot at ISO 3200 or higher, which introduces digital noise. Clean black-and-white edits, though, turn that noise into beautiful, film-like grain.
- Modesty concerns - Communicate clearly with the mother before you start shooting. Use the hospital blanket or gown strategically, so she stays fully covered and comfortable while the baby’s back still shows.
To make this shot work, stay incredibly quiet. Turn off your camera’s fake shutter sound and switch to silent shooting mode if your body supports it. A loud mechanical click has no business interrupting the quiet hum of the room during such a sacred moment.
Hospital rooms aren’t known for studio-grade lighting; you’re often fighting yellow overhead fluorescent lamps and dim window light. Using fast prime lenses at ISO 3200 and relying on smart editing workflows to correct color cast isn’t just helpful; it’s survival for the modern Fresh 48 photographer.
Itamar Haim, SEO Expert and Digital Strategist specializing in search optimization and content marketing.
These dim shots benefit greatly from tools like AI photo editing by Imagen, which automatically optimizes exposure and color balance across tricky hospital rooms. It’s a real time-saver for photographers who need to deliver beautiful galleries fast.
4. Wide Angle Bassinet Views and Clinical Environment Shots
That clear plastic rolling bassinet? It’s practically a hospital icon. A wide-angle shot of the baby resting inside it instantly sets the scene for the whole story. Your viewer knows exactly where this moment happened, and that’s what makes it such a useful documentary shot.
Take a look at the lines of the room first. If the medical staff says it’s okay, pull the bassinet closer to the window so soft, directional light falls across the baby’s face. Simple, clean, classic, that’s really all you need here. You won’t need any fancy props to make it look stunning.
When you frame this wide shot, try including these details since they really boost the storytelling:
- The striped hospital blanket - Everyone recognizes that classic pink and blue stripe. It says new baby and hospital birth instantly.
- The stats card - That little paper card taped to the bassinet holds the baby’s weight, birth time, and family name. Keep it legible in your wider frame.
- The clinical background - Don’t try to hide every medical monitor or the plain white wall. Leaving these things softly blurred in the background actually adds great context to the story.
But please, don’t just stand over the bassinet and shoot straight down. Every parent already does that with their phone. Kneel instead, until your lens sits level with the top edge of the plastic tub. That lower angle makes the baby look like the hero of the shot, and it shows off the bassinet’s structural details beautifully.
Do you have exceptionally bright window light? Use the plastic sides of the bassinet to create gorgeous, soft reflections. Angle your camera slightly so it catches the glow, and you’ll get a dreamy, almost ethereal light around the sleeping newborn. It’s a fun way to turn basic hospital equipment into an artistic frame.
5. Close-up Macro Shots of Feet and Tiny Fingers
Parents can’t get over how tiny their baby’s feet and hands are, and honestly, neither can we. Zooming in on these tiny details gives you a perfect contrast against the wider family shots. Think texture, tiny nails, and soft peeling skin. That’s the whole appeal here.
Here’s a tip: skip trying to get the baby fully awake or posed for this one. Wait until they’re sound asleep, gently pull back the blanket, and let the details do the talking. The best macro shots happen when the newborn is totally relaxed and still.
Follow these steps for a perfectly sharp macro detail shot:
- Wait for deep sleep - Hold off until the baby settles into a deep sleep cycle. If they’re dreaming or twitching, your macro lens will struggle to lock onto such a tiny target.
- Isolate the limb - Gently slide the striped blanket away from one foot. You don’t need to unswaddle the whole baby. Keeping the rest of their body warm and cozy is what keeps them asleep through the process.
- Use manual focus if needed - Autofocus tends to hunt back and forth on extreme close-ups. Switch to manual focus instead, and slowly rock your body forward and back until the tiny toenails come in razor-sharp.
- Include a parent’s finger - Have a parent rest their finger next to the baby’s foot. It adds instant emotional weight and proves just how tiny those feet really are.
You don’t need a dedicated macro lens if you don’t own one, by the way. A standard 50mm f/1.8 can get surprisingly close, especially if you crop the image a bit in post. What really matters is keeping your shutter speed high enough to avoid camera shake from handholding.
And please don’t edit out the peeling skin on the ankles or wrists! That peeling skin is a beautiful, temporary sign of a true newborn. It disappears within a couple of weeks, which makes it one of the most precious details you’ll ever document in the hospital.
6. The Swaddling Process Sequence as a Storyboard
Watching new parents try to recreate the snug, perfect swaddle the hospital nurses make look so easy is a true rite of passage. Capture the process chronologically and you get an amazing sequence for their final gallery. It highlights the sweet teamwork between partners during those sleepless first hours.
But don’t rush them! Let them struggle a little. The laughter and shared sighs make for some of the most authentic candid photos you’ll ever take, way better than asking them to look at the camera and fake a smile.
Here’s how to document this swaddling storyboard effectively:
- The flat layout - Capture the parent spreading the blanket flat across the clinical mattress. This wide shot shows off the blanket’s pattern and the parent’s focused hands.
- The baby’s placement - Shoot from overhead as the parent gently lays the baby down on the cloth. The size contrast between the giant bed and the tiny infant is incredibly striking.
- The wrap and tuck - Take continuous shots as the parent folds the corners over. Watch for the concentration on dad’s face, or the mother’s gentle touch, as they tuck the fabric under the baby’s back.
- The finished burrito - Close out the sequence with a shot of the fully swaddled baby, secure and content. Don’t miss the parent’s sigh of relief when they finally get it right.
So why does this sequence work so well? It tells a full story, beginning, middle, and end. When parents scroll through these photos later in their digital gallery, they’ll instantly remember the nervous laughter of figuring out parenting together.
Set your camera to silent shutter mode so you don’t distract them from the task at hand. Stay a fly on the wall here. Let them focus entirely on their new baby while you quietly document everything as it unfolds.
7. Partner or Father’s First Quiet Hold
There’s a distinct emotional weight when a partner or father holds their tiny newborn for the first time. The size contrast alone highlights just how vulnerable the baby is. It’s often one of the quietest, most thoughtful parts of the whole session.
And honestly, you don’t need fancy posing here at all. Just have him sit near the window, look down at his baby, and let the quiet of the room do the work. Those images always come out strong, with real emotional weight.
To capture this connection from the best angles, try these composition methods:
- The over-the-shoulder view - Stand slightly behind the partner and shoot over their shoulder. This angle lets the viewer see exactly what the parent sees, and that builds instant empathy.
- The profile shot - Position yourself perpendicular to the window. You’ll capture the parent’s facial profile and the baby’s whole body outlined in soft, natural light.
- The hand-on-head close-up - Zoom in on the partner’s hand cradling the baby’s head. That huge size difference between a man’s palm and a newborn’s skull tells a story all on its own.
Watch out for the partner stiffening up when you point the camera their way. A lot of dads get nervous and hold the baby like fragile glass, staring blankly ahead. Tell them to bring the baby up to their chest, take a deep breath, and close their eyes for a second. That one cue instantly relaxes their shoulders and gets you a far more personal, natural portrait.
The contrast between rugged ink and smooth newborn skin is visually stunning. It adds a nice layer of personal identity to the family’s photo collection.
8. Creating Dramatic Window Light Silhouettes
If the hospital room is messy or the light is genuinely terrible, use the window silhouette technique. Expose for the bright sky outside, and the family and bassinet turn into striking, artistic silhouettes. This approach turns a clinical space into high art.
Don’t try to light up the whole room. Embrace the shadows instead. This method creates a high-contrast, minimalist look that feels genuinely high-end.
To pull off this dramatic silhouette shot, keep these guidelines in mind:
- Positioning is everything - Place the parents and the bassinet directly in front of the largest window in the room. They need to block the light source completely to create a clean outline.
- Expose for the highlights - Set your camera’s metering mode to spot metering and measure the light coming from the window. This forces the subjects in the foreground into deep, dark shadows automatically.
- Look for clean profiles - Have the parents turn their heads to the side so you can capture their distinct profiles. Face the camera directly, and the silhouettes turn into dark, unidentifiable shapes.
- Turn off all room lights - This step matters. Leave the yellow overhead lights on, and they’ll ruin the silhouette by throwing unwanted warm light onto your subjects’ backs.
What if it’s a gloomy, overcast day? You can still get a beautiful silhouette. Lower your exposure compensation manually until the details of the room fade into blackness. This trick works in almost any weather condition.
Don’t worry if you lose the details in the baby’s face. A silhouette works because it’s symbolic. It focuses on the shape of connection, the curve of a protective hand, and the overall outline of a new family. It becomes a true piece of wall art.
9. The Going Home Wardrobe Transition
The switch from the generic hospital gown to the baby’s first real outfit marks a major milestone. This is the outfit they’ll wear when they see their home for the very first time. Document this styling process to add a celebratory, energetic note at the end of your session.
Remember this: those tiny clothes are often much too large. The way the baby swims inside the newborn outfit is a precious detail you don’t want to miss. It shows exactly how tiny they are at this point in time.
When you prepare to shoot the going-home outfit sequence, look for these key details:
- The clothing layout - Photograph the outfit lying flat on the clinical mattress before the baby gets dressed. It works as a beautiful intro shot for this final chapter of the gallery.
- The buttoning struggle - Capture the parents working through those tiny snaps or buttons. This moment gives you authentic, candid interactions as they laugh about how small the clothes are.
- The car seat bucket - Take a shot of the baby safely buckled into the infant car seat inside the hospital room. This classic bucket shot tells everyone the adventure is about to start.
How do you handle the timing here? Hospital discharge times are notoriously unpredictable. Coordinate closely with the parents so you arrive about an hour before they’re scheduled to leave. This gives you plenty of time to capture the outfit change without feeling rushed by the medical staff.
Don’t worry if the outfit gets a little messy during the change. If the baby spits up or needs a quick diaper swap, keep shooting. These real-life moments are exactly what parents will laugh about ten years from now, looking back at this day.
10. Multi-Generational Portraiture in Tight Quarters
When grandparents walk into the hospital room, the entire space fills with generations of love. Document their raw reactions as they see their grandchild for the first time, because that moment is pure gold. It’s a fleeting burst of joy that spans multiple generations, and it adds a truly priceless image to any gallery.
Position yourself to catch both the grandparents’ faces and the parents’ pride in the same frame. This is a fast-moving interaction, but it’s absolutely worth the effort. You can’t replicate that kind of genuine emotion with posed studio shots.
To manage the physical challenge of shooting multiple people in a tiny hospital room, apply these practical strategies:
- Use a wider focal length - Switch to a 24mm or 35mm lens. This lets you fit grandparents, parents, and the baby into the frame without backing yourself into the bathroom door.
- Focus on the hands - Capture a close-up of three generations of hands touching. Place the baby’s tiny hand inside the mother’s hand, then let the grandmother’s hand cradle both. This is a classic, high-impact shot.
- Control the crowd - Gently guide the grandparents to stand near the window side of the bed. This puts them in the best light in the room and keeps their expressions bright and clear.
Remember to stay out of the way of the medical staff. If a nurse or doctor needs to enter the room to check on the mother or baby, step back immediately. Respect for the hospital team’s work is the number one rule of being a professional Fresh 48 photographer.
When you edit these multi-generational photos, try a classic, warm black-and-white tone. This removes the visual distraction of different clothing colors and helps the viewer focus entirely on the emotional connections between family members.
Comparison of Top 5 Newborn Hospital Ideas
We put together this comparison table to help you plan your next hospital session. Use it to see at a glance which ideas offer the highest emotional value and which gear you will need to pull them off.
| Idea | Difficulty Level | Emotional Impact | Best Lens Choice | Core Focus Point |
|---|---|---|---|---|
| Sibling Intro | High | Extreme | 35mm f/1.4 | First physical touch |
| ID Bracelet | Low | Medium | 50mm f/1.2 or Macro | Printed text details |
| Skin-to-Skin | Medium | High | 50mm f/1.4 | Mother’s facial expression |
| Bassinet Wide | Low | Medium | 24mm or 35mm | Striped blanket texture |
| Exit Walkout | High | High | 24mm Wide Angle | Long hallway perspective |
Recommendation
If you’re a professional photographer shooting Fresh 48 sessions in 2026, you already know that speed and consistency matter most. Clients share photos faster than ever. In fact, 68% of parents post newborn photos online within 48 hours. To stay competitive, you can’t spend days manually culling and editing high-ISO hospital shots.
We recommend integrating Imagen into your creative business workflow. Its smart, automated post-production features change the way you manage high-volume shoots. By applying AI photo culling, you instantly separate the sharp, emotive shots from the blurry, out-of-focus duplicates that happen during fast-moving moments like sibling introductions. AI culling is optional, since you can also cull manually for free.
From there, apply your custom editing style with AI profiles. It processes 1,500 photos in under 10 minutes and keeps skin tones natural, even under rough hospital lighting. Using AI photo editing means you can deliver complete galleries to anxious parents within hours of birth instead of weeks. Edited photos arrive in batches as they process, so you can start reviewing early frames while the rest finish. Check the flexible Imagen pricing tiers, which include a pay-as-you-go option, and see how easily it fits your regular business overhead.
What’s new in Imagen: Imagen is now an intelligent, agentic Studio for professional photographers, one project where you cull, edit, review and export in any order. After a fast session, use AI culling to narrow the set, apply an AI Profile in your style, and review early frames as edited photos arrive in batches while the rest finish. The Studio is rolling out gradually as a beta.
Frequently Asked Questions
What’s the best camera lens for newborn hospital photography?
We recommend a fast prime lens, something like a 35mm f/1.4 or a 50mm f/1.2. These lenses let in a large amount of light, which matters because flash isn’t allowed in quiet postpartum rooms.
Is it safe to photograph newborns in a hospital room?
Yes, it’s safe, as long as you prioritize the infant’s health above all else. Over 40% of top-tier photographers now hold safety certifications, which reassures parents that they understand medical environments and clean hygiene practices.
How do you handle the terrible, yellow overhead lights?
Turn them off right away and rely on the window light instead. If you must shoot in a dim room, use a high ISO and fix the yellow color cast later with automated white balance tools in your editing workflow.
Should I offer video alongside photos in 2026?
Yes, you should offer it. Around 55% of parents in 2026 request hybrid sessions that include short vertical video clips for Instagram Reels or TikTok alongside their still photos.
How far in advance do parents book Fresh 48 sessions?
About 74% of successful newborn photographers report that parents book hospital sessions 6 to 8 months ahead, to secure their spot around an unpredictable due date.
What should the baby wear during their first hospital photo shoot?
The classic striped hospital blanket, paired with a simple white diaper or onesie, usually works best. This keeps the focus on the baby’s tiny features instead of on distracting patterns.
How long do hospital photo sessions usually take?
Sessions run fairly short, typically between 45 and 90 minutes. That gives you plenty of time to get the key shots without tiring out the new mother and baby.
How do you avoid getting overwhelmed by messy hospital backgrounds?
Get in close and use a very shallow depth of field. Shoot at f/1.4 or f/1.8, and messy IV poles, trash bins, and plastic food trays turn into beautiful, soft background blur.
