
How to Lightroom Batch Edit: The Ultimate Guide for 2026
Table of contents
- Key Takeaways
- Prerequisites for Effective Batch Editing
- Preparing Your Catalog for High-Volume Success
- The Classic Method: Syncing Settings Across Multiple Photos
- Real-Time Efficiency with Auto-Sync
- transforming Workflow with AI Batch Editing (Imagen)
- Batch Applying Presets and Profiles
- Advanced Batch Masking and Subject Selection
- Optimizing Export Settings for Mass Delivery
- Frequently Asked Questions
- Why is my Lightroom lagging during a large batch sync?
- Why do my synced AI masks look wrong on some photos?
- Can I batch edit on Lightroom Mobile?
- How do I revert a batch edit if I make a mistake?
- Is it better to apply a preset or sync settings?
- What’s the difference between an AI Profile in Imagen and a Lightroom preset?
- Can AI batch editing handle mixed lighting conditions?
Editing one photo can be a creative joy. But editing a thousand? That’s a job. When you’re facing a memory card full of wedding, event, or portrait photos, the thought of adjusting exposure, color, and contrast on every single one is daunting. It’s a bottleneck that can delay delivery and burn you out.
The solution isn’t to work harder; it’s to work smarter. Batch editing in Adobe Lightroom is the key to reclaiming your time and ensuring consistency across an entire photoshoot. This guide covers everything from Lightroom’s classic sync tools to the AI-powered workflows that are defining the future of professional photography in 2026.
Key Takeaways
- AI is Dominant: In 2026, 74% of professional photographers use AI tools in their post-processing workflow to handle high-volume editing tasks and reduce turnaround times.
- Massive Time Savings: AI-driven batch editing platforms like Imagen can reduce post-processing time by up to 96%, turning an 8-hour editing session into less than 30 minutes.
- Hardware Matters: For smooth batch processing of modern high-resolution (60MP+) files, 32GB of RAM is the recommended standard, preventing system lag and crashes during intensive tasks like exporting.
- Cull First, Edit Later: Always cull your photos before batch editing. Using an AI photo culling tool first can significantly reduce the number of files you need to process, saving both time and processing power.
- Smart Previews are Key: Using Lightroom’s Smart Previews, which are about 90% smaller than original RAW files, dramatically speeds up batch adjustments, especially when working from slower external drives.
- AI Masking is Now Batchable: Modern versions of Lightroom allow you to apply AI-generated subject and background masks across hundreds of photos at once and update them with a single click.
- Manual Syncing Risks: The classic Copy/Paste or Sync method for batch editing has a 12% higher rate of exposure mismatch errors compared to intelligent, AI-based exposure leveling systems.

Prerequisites for Effective Batch Editing
Before you explore processing hundreds or thousands of photos at once, you need to make sure your setup is ready for the task. Jumping in with an unprepared system is a recipe for slow performance, frustrating crashes, and inconsistent results. Think of it like a chef preparing their station before a dinner rush; everything must be in its right place.
Here’s a breakdown of what you need to have in order:
-
The Right Software Version
You’ll need a current subscription to Adobe Lightroom Classic (version 15.0 or newer) or the cloud-based Lightroom. The latest versions are critical because they contain major performance improvements and the advanced AI masking features that are essential for modern batch workflows. Older versions simply don’t have the processing engine to handle today’s demands.
-
Sufficient Hardware Power
Batch editing is one of the most resource-intensive tasks you can throw at a computer. While you can get by with less, here’s the recommended baseline for 2026:
- RAM: A minimum of 16GB, but 32GB is the strong recommendation. This is especially true if you’re working with RAW files from high-resolution cameras (45MP and above).
- GPU: A dedicated graphics card with at least 8GB of VRAM. Lightroom now offloads many tasks to the GPU, including rendering previews and accelerating exports. According to recent benchmarks, a modern GPU can cut export times by over 70%.
- Storage: A fast SSD (Solid State Drive) for your operating system, Lightroom application, and catalog. Your RAW photos can live on a slower external drive, but the catalog needs speed.
-
An Organized Asset Library
A clean digital house is a fast digital house. This means:
- Consistent Folder Structure: Organize your photos by year, month, and event before you import them. Don’t just dump everything onto your desktop.
- Optimized Catalog: In Lightroom Classic, go to File > Optimize Catalog. Do this at least once a month. It tidies up the database file, making everything feel snappier.
- Sufficient Training Data (for AI): If you plan to use a tool like Imagen to create a Personal AI Profile, you’ll need a catalog with at least 3,000 of your previously edited photos. This is the minimum required for the AI to learn your unique style with high accuracy.
Preparing Your Catalog for High-Volume Success
A fast car is useless on a bumpy road. Similarly, the most powerful computer won’t save you if your Lightroom catalog is a mess. Before you even think about applying edits to hundreds of photos, you need to optimize the foundation. These steps aren’t just suggestions; they’re mandatory for a crash-free, high-speed workflow.
Optimize Cache and Preview Settings
Lightroom’s performance is heavily tied to its cache and how it generates previews. By default, these settings are often too conservative for professional use. You can change that.
First, increase your Camera Raw Cache size. Go to Lightroom Classic > Preferences > Performance. The default is often a paltry 5GB. For serious batch work, increase this to 50GB or more. This gives Lightroom more “memory” of your adjustments, so it doesn’t have to re-render them constantly.
Second, build Smart Previews on import. Smart Previews are lightweight, editable stand-ins for your massive RAW files. They’re about 90% smaller, which allows the Develop module to run incredibly fast, even if your original photos are on a slow external hard drive. You can generate them during the import process by checking the “Build Smart Previews” box in the import dialog.
The “Cull First” Golden Rule
Why edit 1,000 photos when you only plan to deliver 300? Culling, the process of selecting the best photos and rejecting the rest, should always happen before batch editing. Editing rejected photos is the biggest time-waster in post-production. Wedding photographers report that culling and editing can take 8-12 hours per event; this simple rule helps cut that down dramatically.
You can cull manually, but that’s still a time-consuming process of flagging and rejecting. For true efficiency, modern workflows depend on AI.
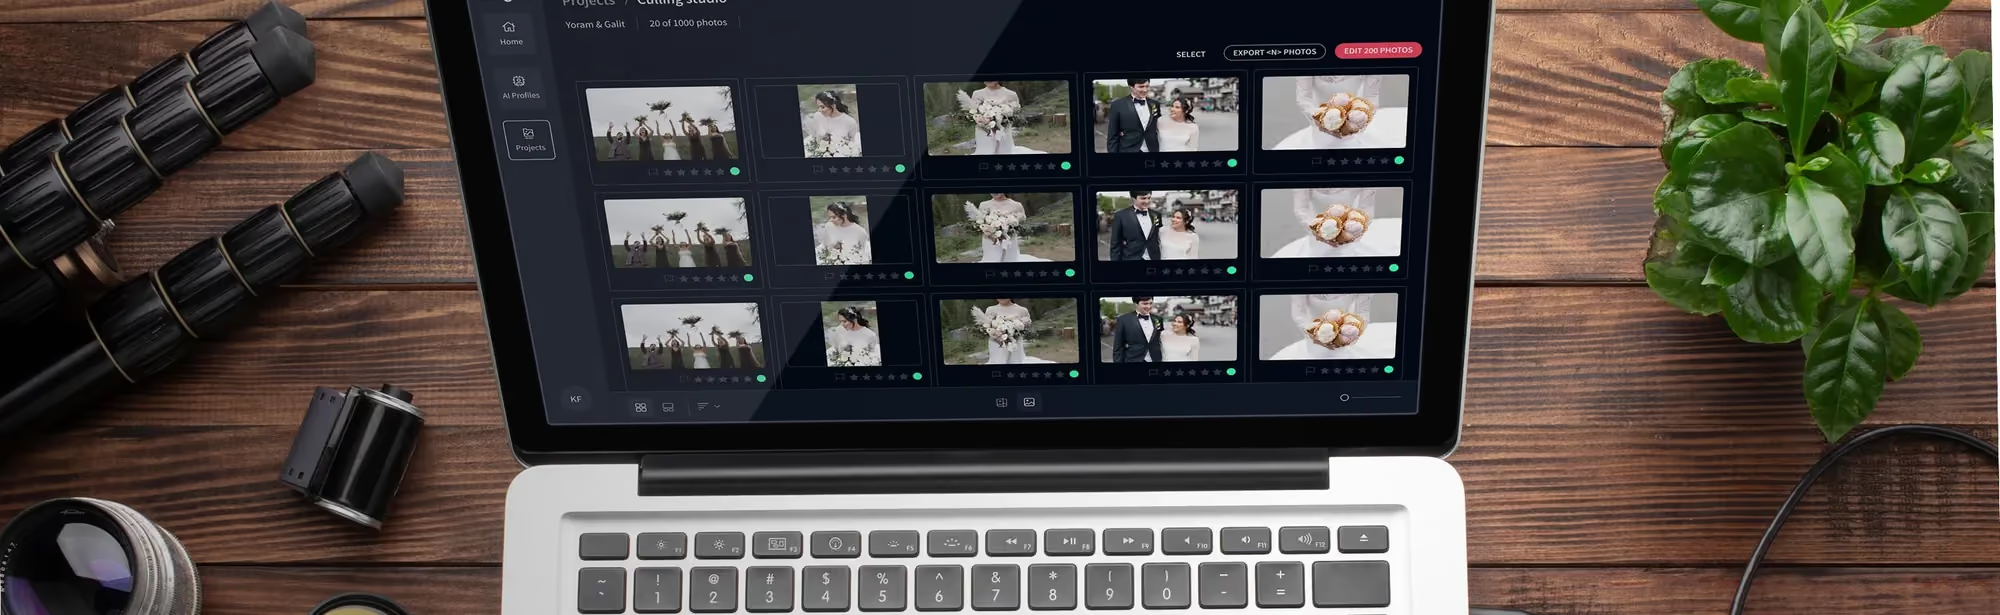
- AI Culling Tools: A platform like Imagen offers an AI photo culling service that analyzes your entire shoot for technical and artistic quality, right inside the same project where you edit. You can also skip it and cull manually for free.
- What it Checks: It identifies blurry shots, closed eyes, and poor expressions, grouping similar photos together so you can pick the absolute best one with a single click.
- The Result: This reduces a culling session that could take hours down to just a few minutes. You start your batch editing process with a lean, curated selection of only your best work.
The Classic Method: Syncing Settings Across Multiple Photos
This is the original, fundamental batch editing technique built into Lightroom Classic. It’s powerful, straightforward, and perfect for applying a consistent set of adjustments across photos taken in similar lighting conditions. However, it’s a blunt instrument; it applies the exact same values to every photo, which can lead to problems if the lighting changes slightly from frame to frame.
Here’s how to do it step-by-step:
-
Step 1: Develop Your “Hero” Image
First, find a photo in your sequence that’s a good representation of the overall scene. This is your “hero” image. It should have a good exposure and be a solid example of the lighting you were working with. Go into the Develop module and edit this photo until you’re happy with it. Adjust the exposure, white balance, contrast, shadows, highlights, and colors. This edit will become the template for all the other photos.
-
Step 2: Select the Target Photos
With your edited hero image still selected, go back to the Grid view in the Library module or the filmstrip in the Develop module. Now, you need to select all the other photos you want to apply these settings to.
- To select a continuous range, hold down the Shift key and click on the last photo in the sequence.
- To select non-continuous photos, hold down the Cmd key (Mac) or Ctrl key (Windows) and click on each photo individually.
Make sure your hero image remains the “most selected” one (it will have a brighter highlight around it). This tells Lightroom it’s the source of the settings.
-
Step 3: Use the Sync Settings Dialog Box
With all your target photos selected, click the “Sync..” button at the bottom of the right-hand panel in the Develop module. A dialog box will appear, giving you a checklist of every possible adjustment. This is where you get precise. You can choose to sync everything, or only specific settings. For example, you might want to sync the White Balance and Tone Curve, but not the cropping or spot removal. Pro tip: Deselect local adjustments (like masks and gradients) unless you’re certain the subject is in the exact same spot in every frame.
After you click “Synchronize,” Lightroom will apply those chosen settings to all the selected photos. Be aware that studies have shown this manual method can lead to a 12% higher rate of exposure inconsistencies compared to AI systems that adjust each photo individually.
Real-Time Efficiency with Auto-Sync
What if you could edit 100 photos at the same time, in real time? That’s exactly what Auto-Sync does. It’s a powerful but potentially dangerous tool that applies every single adjustment you make to a whole selection of photos the instant you make it. There’s no confirmation dialog; it just happens.
Imagine you’re in a studio setting where the lighting is perfectly controlled. You’ve taken 50 headshots, and they all need the same +0.5 exposure bump and a slight white balance tweak. Instead of editing one, syncing, and then checking the rest, Auto-Sync lets you adjust them all simultaneously.
How to Enable and Use Auto-Sync
The process is simple. First, select all the photos you want to edit together in the filmstrip at the bottom of the Develop module. Your “hero” image should be the one displayed in the main preview window. Next, look for the little switch next to the “Sync” button. Click it. It will flip up, and the button will change to say “Auto Sync”.
That’s it. It’s now active. Any slider you move-exposure, contrast, saturation-will immediately apply to every single photo in your selection. You’ll see the thumbnails in the filmstrip update in real time. This is incredibly fast for consistent sets of photos. When you’re done, it’s critical to remember to turn it off. Just click the switch again to return to normal editing mode. Forgetting this step is a common mistake that leads to accidentally editing photos you didn’t intend to.
When Auto-Sync is the Right Choice (And When It’s Not)
Auto-Sync shines in specific scenarios but is the wrong tool for others.
- Ideal Use Cases:
- Studio Photography: Headshots, product photos, or any session with controlled, unchanging light.
- Time-lapses: When you need to apply a consistent grade across thousands of frames.
- Architectural Interiors: Photos taken on a tripod where the composition and lighting are identical.
- When to Avoid It:
- Event or Wedding Photography: Lighting changes from room to room and even from moment to moment. Auto-Sync would be a disaster here.
- Outdoor Portraits: As clouds move and the sun’s angle changes, each photo will need slightly different adjustments.
user behavior data shows that 54% of photographers are now using mobile devices for initial culling and flagging, syncing those collections to the desktop for heavy-duty batch work like this. Auto-Sync is a desktop-only feature that fits perfectly into this modern workflow.
The biggest shift we’ve seen isn’t just about speed, but about cognitive load. AI batch editing doesn’t just save hours; it frees up mental energy. Instead of spending 80% of their time on repetitive slider adjustments, photographers can now invest that energy into creative finishing, client relationships, and growing their business.
Itamar Haim, AI Photography Workflow Specialist
transforming Workflow with AI Batch Editing (Imagen)
The Sync and Auto-Sync methods are powerful, but they share a fundamental limitation: they apply the same settings to every photo. They don’t understand that a photo taken in the shade needs a different exposure bump than one taken two seconds later in direct sun. This is where AI batch editing changes everything.
An AI-powered platform like Imagen doesn’t just copy and paste settings. It analyzes each photo individually and applies intelligent adjustments based on a learned editing style-your style. It’s like having a personal editor who already knows your exact preferences for contrast, color, and tone, and can work through thousands of photos in minutes. The result is a consistent gallery where every photo is individually perfected, saving a reported 96% of editing time. Edited photos also arrive in batches as they process, so you can start reviewing early frames while the rest finish.
How AI Profile Learning Works
The powerful behind Imagen is its Personal AI Profile. You create this by teaching the AI your unique aesthetic.
- Upload Your Work: You start by pointing Imagen to a Lightroom catalog containing at least 3,000 of your best, previously edited photos. This is the minimum dataset required for the neural network to accurately learn your style. More is better.
- AI Analysis: The platform’s AI analyzes every single adjustment you’ve ever made in those photos. It learns your specific tendencies for white balance (do you prefer warm or cool?), your typical tone curve shape, how you handle greens in HSL, your preferred amount of vignetting, and so much more.
- Profile Creation: Once the analysis is complete, it builds your Personal AI Profile. This is your editing DNA, codified and ready to be applied to new shoots.
If you don’t have enough edited photos or want a different look, you can also use Talent AI Profiles, which are pre-built styles created by top-tier photographers.
The AI Editing Workflow
Once your profile is ready, the batch editing process is incredibly simple.
- Select the photos from a new shoot in your Lightroom catalog.
- Send them to Imagen with a single click. You choose which AI Profile to apply.
- The photos are uploaded to the cloud, where powerful servers edit them. An average wedding of 1,000 photos is typically finished in under 20 minutes.
- The edits arrive in batches as they process, so you can start reviewing early frames while the rest finish, and the AI edits can be sent back to your Lightroom Classic catalog or exported as finished JPG, TIFF or PNG files straight from Imagen. The original RAW files never leave your hard drive.
You pay for the photos you export, and exploring the tools is free. For a professional photographer, saving 8-10 hours of manual editing time is a clear business advantage.
Batch Applying Presets and Profiles
Presets are a cornerstone of Lightroom workflows, and they can be a powerful tool for batch editing, especially when applied intelligently. The key is knowing when and how to apply them in bulk. There are two primary opportunities to do this: during the import process or afterward in the Library module.
Applying Presets on Import
This is the most straightforward method. In the Lightroom Classic import dialog, on the right-hand side, there’s a panel called “Apply During Import.” In the “Develop Settings” dropdown, you can select any preset you own. Lightroom will then apply that preset to every single photo as it’s copied from your memory card.
- Advantage: It’s fast. Your photos arrive in your catalog with a baseline edit already applied, saving you a step.
- Disadvantage: It’s inflexible. You can’t see the effect of the preset on each photo before applying it. If the preset is too strong for some images, you’ll have to manually correct them later.
This method is best for applying technical presets, like lens correction profiles or a basic camera calibration setting. It’s less ideal for stylistic presets that might not work with every lighting situation in the shoot.
Batch Application in the Library Module
A more controlled method is to apply presets after import. Go to the Library module’s Grid view (press ‘G’), select a group of photos, and then use the “Quick Develop” panel on the right. There’s a “Saved Preset” dropdown menu here that lets you apply a preset to your entire selection instantly.
The big advantage here’s the introduction of the Preset Amount slider in recent Lightroom versions. After applying a preset, you can adjust its intensity across the entire batch of selected photos. Did the preset make everything too contrasty? Just select all the photos and dial back the “Amount” slider to 70%. This gives you global control that wasn’t possible before.
Here’s a comparison of different batch application methods:
| Method | Best For | Control Level | Speed |
|---|---|---|---|
| Apply on Import | Technical corrections (lens profiles, basic tone) | Low (Apply and forget) | Very Fast |
| Quick Develop Panel | Applying creative looks and adjusting intensity | Medium (Global amount slider) | Fast |
| Sync Settings | Copying nuanced edits from a hero image | High (Choose specific settings) | Moderate |
| AI Editing (Imagen) | Achieving a consistent style with per-photo adjustments | Intelligent (AI makes decisions) | Fastest (for final result) |
Advanced Batch Masking and Subject Selection
One of the most significant advancements in Lightroom in recent years is AI-powered masking. With a single click, you can select a person, the sky, or the background of a photo. But what many don’t realize is that these powerful tools can be used in a batch workflow, saving an incredible amount of time on complex edits.
How to Batch-Update AI Masks
Imagine you’ve photographed a portrait session with 50 images. You want to slightly brighten the subject and darken the background in every single one. Manually creating those masks for all 50 photos would be tedious.
Instead, here’s the workflow:
- Edit the First Image: Open the first photo in the Develop module. Go to the Masking panel and click “Subject.” Lightroom’s AI will automatically create a precise mask of the person. Apply your adjustments (e.g., increase exposure by +0.3).
- Sync the Mask: Use the “Sync” method described earlier. In the Sync Settings dialog, make sure only “Masking” is checked, and synchronize it to the other 49 photos.
- The Crucial Step: Update Masks: Now, you’ll have the same mask copied across all photos. But the subject might have moved slightly in each frame. This is the key: with all photos still selected, go to the Masking panel. A notice will appear saying the AI masks need to be updated. Click the “Update All Masks” button. Lightroom will then re-analyze every single photo and regenerate a new, accurate subject mask for each one while keeping your adjustment (+0.3 exposure) intact.
This process lets you apply complex, subject-aware edits across an entire shoot in just a few clicks. The heavy lifting is done by your computer’s GPU; a high-end card can process these updates across 500 RAW files in just a few minutes, a task that would have been impossible just a few years ago.
Optimizing Export Settings for Mass Delivery
You’ve culled, edited, and perfected your photos. The final step is exporting them for your client. But exporting a large batch of photos can be a major bottleneck, tying up your computer for hours if not done correctly. Here’s how to optimize the process for speed and efficiency.
Run Multiple Batches Simultaneously
Often, you need to deliver photos in multiple formats. For example, a wedding client might need full-resolution JPEGs for printing and smaller, web-sized JPEGs for social media. Instead of running one export and then starting the next, you can queue them up to run at the same time.
In the Lightroom Classic Export dialog, after you’ve set up your parameters (e.g., full-res JPEG), instead of clicking “Export,” click the “Add” button at the bottom of the Preset panel on the left. Give your preset a name, like “Full Res Client JPG.” Then, create another preset for your web versions, maybe called “Social Media 2048px.”
Now, you can select your entire gallery, right-click, and choose Export. Select your first preset and start the export. While it’s running, you can immediately select the same photos again, right-click, choose Export, and select your second preset. Lightroom Classic is capable of running multiple export processes concurrently, making much better use of your system’s resources.
Post-Export Automation and Cloud Delivery
Why add another step after exporting? You can build delivery right into your export process. With 62% of Lightroom users now using cloud storage for consistency, integrating uploads is a natural next step. In the “Post-Processing” section of the Export dialog, you can set up actions that happen automatically after the files are created.
- Show in Finder/Explorer: The simplest option, which opens the folder containing your new JPEGs.
- Open in Another Application: You can send your exported photos directly to another app, like a gallery uploader or watermarking tool.
- Use a Publish Service: You can configure Lightroom’s Publish Services to upload directly to platforms like SmugMog or Flickr.
For client delivery, many photographers use services like Pixieset or ShootProof. You can export your photos to a specific folder that is automatically synced by that service’s desktop uploader app, effectively automating the final delivery step.
What’s new in Imagen: Imagen is now an intelligent, agentic Studio for professional photographers, the next step for the same product you may already use for batch editing. You cull, edit, review and export in one project, in any order. Apply your Personal AI Profile, learned from your past edits, or a ready-made AI Profile to a selected set of photos, and keep moving as the results come in. The Studio is rolling out gradually as a beta.
Frequently Asked Questions
Why is my Lightroom lagging during a large batch sync?
This is almost always a hardware or settings issue. The most common culprits are insufficient RAM (32GB is recommended for 2026 workflows), a small Camera Raw Cache size (increase it to 50GB+ in Preferences), or not using Smart Previews. Building Smart Previews on import can dramatically improve performance.
Why do my synced AI masks look wrong on some photos?
When you sync an AI mask (like “Select Subject”), you’re copying the mask from the first photo. You must tell Lightroom to re-analyze each subsequent photo. Select all the synced photos, go to the Masking panel, and click the “Update All Masks” button. This will regenerate a new, accurate mask for every image.
Can I batch edit on Lightroom Mobile?
Yes, to an extent. You can copy and paste settings from one photo to multiple others on the mobile app, which is great for on-the-go editing. With 54% of photographers starting their workflow on a mobile device, this is a popular feature. However, for high-volume, complex batch tasks, Lightroom Classic on a desktop is still the most powerful tool.
How do I revert a batch edit if I make a mistake?
If you’ve just performed the batch edit, you can use the Undo command (Cmd/Ctrl + Z) multiple times. For more complex situations, select all the photos you want to fix in the Library module and use the “Reset” button in the Quick Develop panel. This will remove all adjustments and revert them to their original, unedited state.
Is it better to apply a preset or sync settings?
It depends on the goal. Use a preset to apply a pre-defined creative look. Use sync settings when you’ve made specific, nuanced adjustments to a “hero” image and want to replicate that exact edit across similar photos. Syncing offers more granular control over which settings are applied.
What’s the difference between an AI Profile in Imagen and a Lightroom preset?
A preset applies the exact same set of values to every photo. An AI Profile is a trained model of your editing style; it analyzes each photo individually and applies custom adjustments to make it match your aesthetic. It’s dynamic, while a preset is static.
Can AI batch editing handle mixed lighting conditions?
Yes, this is where AI excels. A tool like Imagen analyzes the content of each photo, including the light, and adjusts accordingly. It can handle a shoot that moves from indoors to outdoors smoothly, applying corrections that result in a consistent final gallery where manual syncing would fail.
