

How to Do Photo Culling for Family Photographers: A Step-by-Step Guide
Table of contents
- Why culling deserves its own workflow step
- Step 1: Back up before you delete anything
- Step 2: Do a fast technical pass first
- Step 3: Group the near-duplicates and pick one expression
- Step 4: Let AI culling handle the tedious detection
- Step 5: Choose your final gallery count with intention
- Step 6: Move straight from culling into consistent editing
- Common culling mistakes family photographers make
- How long culling should take (and how to speed it up)
- Frequently asked questions
Family sessions produce a very specific kind of chaos on your memory card. A toddler who blinks the second the shutter fires, a grandparent looking away, three siblings where only two are smiling at once, and a burst of nearly identical frames because you kept shooting until someone finally cooperated. Culling is the process of sorting through all of that to keep the frames worth editing and set the rest aside. Do it well and the rest of your workflow gets faster, calmer, and more consistent.
Here is the short version, answer-first: work in passes rather than trying to judge everything at once, reject the technically broken frames first, then choose the best expression from each cluster of near-duplicates, and lean on AI culling to flag blinks, blur, and duplicates so your eyes are free for the moments that actually matter. Below is a step-by-step method built specifically for family photographers, plus the settings, mindset, and tools that make it repeatable session after session.
Why culling deserves its own workflow step
For a lot of family photographers, culling is the invisible tax on every shoot. A one-hour extended-family session can easily return 800 to 1,500 frames, and a full day of mini-sessions can push that into the thousands. If you edit before you cull, you burn hours polishing photos that will never make the gallery. If you cull carelessly, you either deliver bloated galleries that overwhelm clients or you accidentally cut the one frame where everyone finally looked at the camera.
Treating culling as a distinct, deliberate step solves both problems. You decide what to keep before you invest editing time, and you apply consistent judgment across the whole shoot instead of making tired, arbitrary calls at frame 900. The goal is not to keep the most photos. It is to keep the right photos, and to reach that decision quickly enough that culling stops eating your evenings.
Step 1: Back up before you delete anything
Culling and deleting are not the same thing, and conflating them is how photographers lose irreplaceable images. Before you reject a single frame, copy your cards to two locations, for example a working drive and a backup drive or cloud archive. Only then should you start marking frames.
During the cull itself, prefer rejecting and filtering over permanent deletion. Flag a frame as a reject, hide it from your working view, and move on. Keep the actual files until the gallery is delivered and paid for. Family clients frequently come back weeks later asking whether you captured a specific cousin or a candid hug, and you want the option to revisit a rejected frame rather than explaining that it is gone forever.
Step 2: Do a fast technical pass first
Your first pass through the take should be purely mechanical and quick. You are not choosing favorites yet. You are removing the frames that are simply not usable no matter how sweet the moment was. On this pass, reject anything that is clearly out of focus on the subject’s eyes, badly motion-blurred, severely over or underexposed beyond what you can recover, or accidental (the shot of the floor as you lowered the camera).
Move fast here and do not overthink it. If a frame is technically broken, it goes, even if the expression was perfect. A gorgeous smile on a photo where the eyes are soft is still not a deliverable image. Getting these obvious rejects out of the way early means every later pass deals with a smaller, cleaner set, which is where the real time savings come from.
Step 3: Group the near-duplicates and pick one expression
Family photography is full of clusters: five frames of the same pose, ten frames of a game of peekaboo, a burst where you were waiting for the baby to look up. The heart of good culling is choosing the single best frame from each cluster rather than keeping all of them.
When you compare frames inside a cluster, judge them on the things clients actually notice. Are everyone’s eyes open? Is the expression genuine rather than a forced say-cheese grin? For group shots, is this the frame where the most people look good at the same time? A photo where four of five family members are perfect usually beats one where everyone is stiff. Pick your keeper, reject the rest of the cluster, and keep moving. Resist the urge to keep two nearly identical frames just because you cannot decide. Decisiveness is a culling skill, and it gets faster with practice.
Step 4: Let AI culling handle the tedious detection
The mechanical parts of culling, spotting closed eyes, detecting soft focus, and grouping duplicate frames, are exactly the kind of repetitive judgment that AI handles well. This is where a purpose-built culling tool earns its place in a family photographer’s workflow. Instead of squinting at eyes across 1,200 frames, you let the software flag likely blinks, blurry shots, and clusters of similar images, then you make the final call.
Imagen is a desktop app for Mac and Windows, with the AI processing in the cloud, that culls as part of its workflow, and its AI family portrait culling that finds the best expression is aimed squarely at this problem. It reviews a full shoot, flags blinks, blur, and duplicates, and helps surface the frame in each group where expressions land best, so a session that used to take an hour of manual sorting can be narrowed down in a fraction of the time. AI filters such as closed eyes and blur then help you narrow the set further. You stay in control of the final selects; the tool just removes the tedious detection work that wears your eyes out. For family work, where the difference between keeper and reject often comes down to one open eye, that assist is genuinely useful.
It is worth being clear about what AI culling does and does not do. It flags candidates and groups similar frames; you still decide which expression tells the story of that family. Think of it as a very fast, very patient assistant doing the first sort, not a replacement for your taste.
Step 5: Choose your final gallery count with intention
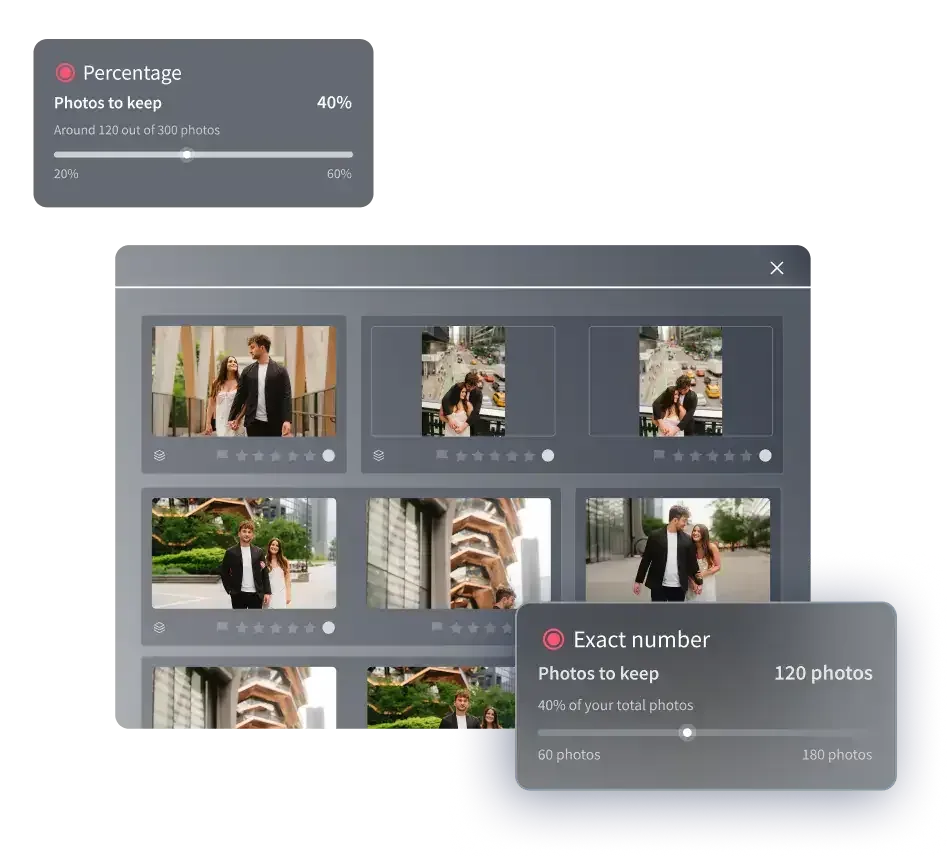
After the technical pass and the cluster selects, you will have a set of solid keepers. The last culling decision is how many of those actually go to the client. More is not better. A family scrolling 400 photos is more likely to feel overwhelmed than delighted, and a tighter gallery reads as more curated and more professional.
Set a rough target before you deliver, scaled to the session type. A short mini-session might warrant 20 to 40 images, a standard family session 50 to 80, and an extended-family or multi-look session more. Within that target, make sure you are telling the whole story: wide establishing shots, tight candids, individual portraits of each child, the full group, and the small in-between moments parents love. Cull for variety, not just for the ten technically best frames, or your gallery will feel repetitive.
Step 6: Move straight from culling into consistent editing
Culling and editing are separate steps, but they should hand off cleanly. Once your selects are locked, the next bottleneck is applying a consistent color and tone across the whole gallery so the session looks like one cohesive story rather than a patchwork of different looks. This is another place where batch AI editing pays off for family photographers who shoot high volume.
A tool that learns your personal editing style can apply it across an entire shoot, keeping skin tones, white balance, and contrast consistent from the sunny backyard frames to the shaded ones under the trees. Imagen is a desktop app for Mac and Windows that processes your RAW files in the cloud, and pay-as-you-go pricing scales with the photos you export. Pay-as-you-go is a monthly base fee plus a charge for each exported photo, and exploring the tools is free, so a busy family photographer can plan the cost of a season. If you want to see the full workflow in one place, try Imagen’s new Studio, where you cull, edit and export in one project. Imagen’s AI photo editing platform covers culling, consistent batch grading, and export for faster client delivery.
Common culling mistakes family photographers make
A few habits quietly slow photographers down or hurt the final gallery. Keeping too many near-duplicates is the most common one; it inflates both your editing time and the client’s decision fatigue. Editing before culling is another, since it wastes effort on frames that will not make the cut. Culling while exhausted late at night leads to inconsistent standards, so build in breaks or split long culls across sessions.
Two more worth naming: deleting rejects permanently before delivery, which removes your safety net, and culling out every imperfect-but-emotional frame. Family photography is not a beauty contest. Sometimes the slightly messy photo of a kid mid-laugh is the one the parents print, even if a more polished frame exists nearby. Cull for technical quality and for feeling, not for perfection alone.
How long culling should take (and how to speed it up)
There is no single correct number, but a useful benchmark is to aim for well under a minute per keeper across the whole process, and far less on your reject pass. If a typical family session is taking you two or three hours to cull manually, that is a signal to change your method, not your standards.
The biggest speed gains come from working in passes rather than judging each frame in isolation, from committing to decisions instead of hovering, and from letting AI handle blink and blur detection so you spend your attention only on the close calls. Consistency also compounds: the more you cull with a repeatable method, the faster your instincts get. For related workflow ideas, our guides on batch editing and fast client delivery pair naturally with a tight culling routine.
What’s new in Imagen: Family sessions get a better fit with Imagen, now an intelligent, agentic Studio for professional photographers where you cull, edit, review and export in one project, in any order. AI filters such as closed eyes and blur help you narrow a busy session, and the assistant finds photos when you ask in plain language, while you stay in charge of every choice. The Studio is rolling out gradually as a beta.
Frequently asked questions
What is photo culling in family photography?
Culling is the process of reviewing all the frames from a session and selecting which ones are worth editing and delivering, while setting aside the rest. For family photographers it means removing technically broken shots, grouping near-duplicate frames, and choosing the one with the best expression from each group, so the final gallery is tight, varied, and free of blinks and blur.
Should I delete rejected photos right away?
No. Back up your files first, and during the cull mark frames as rejects and hide them rather than deleting them permanently. Keep the actual files at least until the gallery is delivered and paid for. Family clients often return later asking about a specific relative or candid moment, and you want the option to revisit a rejected frame instead of having lost it.
Can AI culling really pick the best family photo for me?
AI culling is very good at the mechanical parts, flagging closed eyes and soft focus and grouping duplicate frames, which is the tedious work that slows you down. It surfaces strong candidates and helps you find the frame where expressions land best, but you still make the final creative selects. Treat it as a fast first-pass assistant, not a replacement for your taste and knowledge of the family.
How many photos should I deliver from a family session?
It depends on the session length, but a tighter, curated gallery almost always serves the client better than a huge one. As a rough guide, a mini-session might be 20 to 40 images, a standard family session 50 to 80, and an extended or multi-look session more. Whatever the count, cull for variety, wides, candids, individual portraits, and the full group, so the gallery tells the whole story.
