

How to Do Image Cropping for Portrait Photographers: A Step-by-Step Guide
Table of contents
- Why cropping matters more in portrait work
- Start with the eyes and the rule of thirds
- Respect the joints: where not to cut
- Match the aspect ratio to the final use
- A repeatable step-by-step cropping workflow
- Common cropping mistakes in portrait photography
- Keeping crops consistent across a full shoot
- What consistent cropping does for your delivery
- Frequently asked questions
Cropping a portrait is not just trimming edges. It is where you decide how close the viewer stands to your subject, how much of the scene stays in the frame, and where the eye lands first. For portrait photographers who shoot environmental, lifestyle, and family sessions, cropping is one of the fastest ways to strengthen a photo after the shutter closes, and one of the easiest to rush when you have hundreds of frames to deliver.
The short answer: crop to protect your subject, respect the eyes, keep the composition balanced, and match the aspect ratio to where the image will actually be used. Do that consistently across a whole gallery and your set looks intentional rather than accidental. The rest of this guide walks through the how, the common mistakes, and how to keep cropping consistent when the frame count climbs into the hundreds.
Why cropping matters more in portrait work
Portraits carry a lot of emotional weight in a small amount of space. A family sitting on their porch, a couple walking through a field, a musician in her studio: the crop tells the viewer what the picture is about. Cut too tight and you lose the story of the location. Cut too loose and the subject gets swallowed by the surroundings. Portrait cropping is really about controlling that balance between person and place.
There is also a practical reason. Most portrait sessions end up in more than one format. The same frame might become a horizontal print above a mantel, a square social post, and a vertical image on a phone screen. Each of those wants a different crop. If you shoot with a little breathing room around your subject, you keep the freedom to recompose later without cutting into anything important.
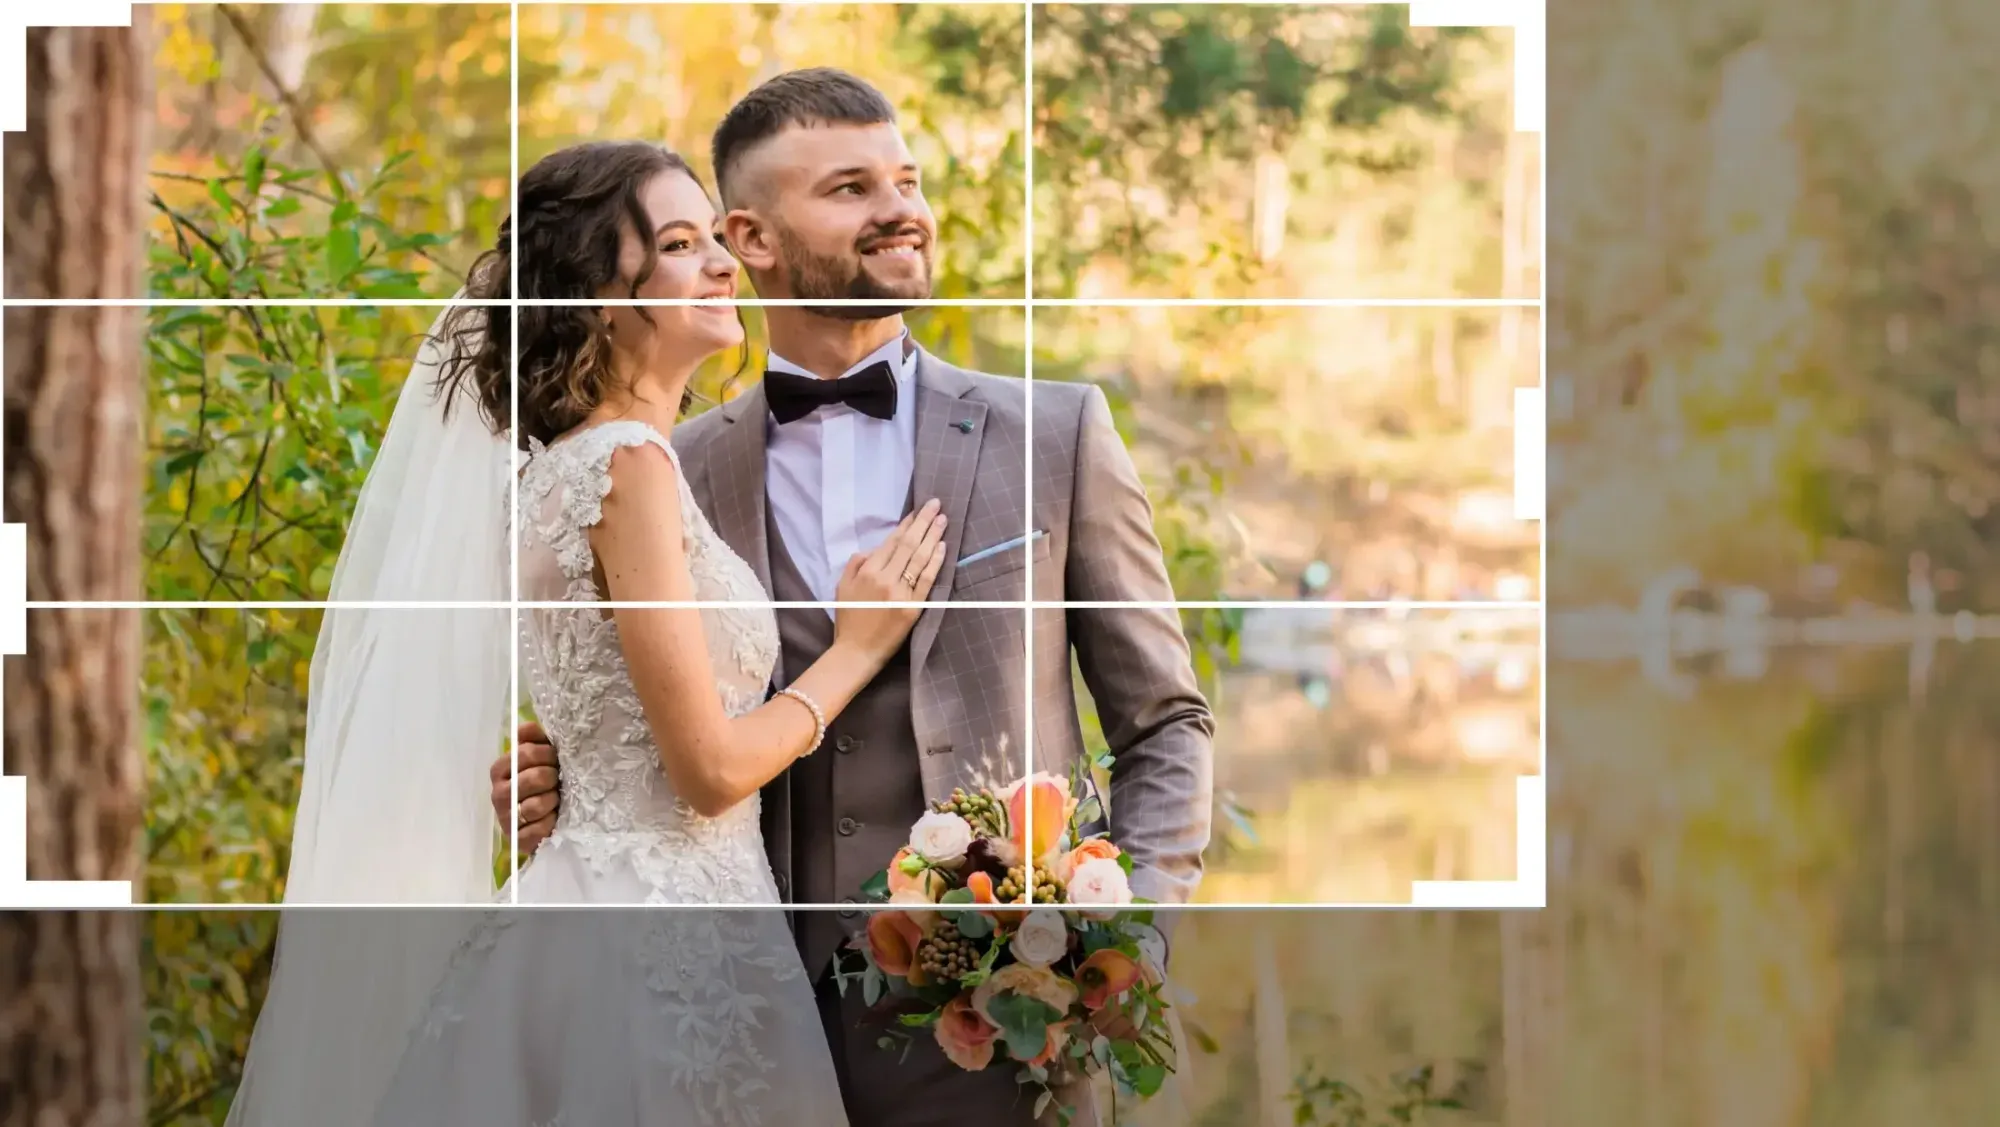
Start with the eyes and the rule of thirds
The most reliable starting point for any portrait crop is the eyes. In most portraits, the eyes are the emotional center, so place them along the upper third line of the frame rather than dead center. This gives the face natural weight and leaves comfortable space above the head. When you drop the eyes into the middle of the frame, portraits tend to feel heavy and static.
The rule of thirds is a guideline, not a law, but it is a good default. Imagine two horizontal and two vertical lines dividing your frame into nine equal parts. Positioning the subject, or the eyes, near one of the intersections usually creates a more engaging image than centering everything. Once you understand why it works, you will also know when to break it, for example when a perfectly symmetrical, centered composition is the whole point.
Respect the joints: where not to cut
Cropping through a body has rules that portrait photographers learn early and then sometimes forget under deadline pressure. As a general habit, avoid cutting people off at natural joints. Wrists, elbows, knees, and ankles are the worst places to end a crop, because the eye reads the cut as an amputation and the pose looks awkward.
Instead, crop through the middle of a limb or the middle of a section: mid-thigh, mid-forearm, mid-chest. If you are cropping a standing full-length portrait down to a three-quarter view, cut somewhere between the knee and the hip rather than right at the knee. Keep hands intact whenever you can, since a cropped-off hand at the frame edge draws attention for the wrong reason. And never crop the top of the head so tightly that it feels claustrophobic unless you are making a deliberate, close-in creative choice.
Match the aspect ratio to the final use
This is the step that separates polished portrait galleries from messy ones. Before you crop, ask where the image is going. Different destinations want different shapes, and portrait photographers usually deliver across several at once.
- 4x5 and 8x10 vertical: the classic print ratio for portraits. Flattering for standing and seated subjects, and what most labs expect for wall prints.
- 2x3: the native ratio of most full-frame and crop-sensor cameras, and the standard for 4x6 prints. Great for environmental portraits where the location matters.
- 1x1 square: ideal for social profiles and grid posts. Forces a tighter, centered composition, so shoot with room to spare.
- 16x9 horizontal: useful for website headers, slideshows, and lifestyle scenes where you want to show the environment around your subject.
The workflow lesson here is simple. If you know a client wants prints and social files, do not lock yourself into one crop. Keep the master file loosely cropped and export tighter versions for each format. Shooting with a bit of margin around the subject is what makes multi-format delivery painless.
A repeatable step-by-step cropping workflow
Here is a sequence you can apply to almost any portrait, so cropping becomes a quick, confident decision instead of a fiddly one.
Step 1: Straighten first. Fix any tilt before you crop. A crooked horizon or a leaning wall behind your subject undercuts everything else. Straightening usually trims a little off the edges, so do it before you commit to a tight crop.
Step 2: Find the subject’s weight. Decide what the photo is about. Is it the person, or the person in their environment? That answer sets how tight you go.
Step 3: Place the eyes. Set the eyeline on or near the upper third. Let the head have air above it, unless you are intentionally cropping close.
Step 4: Check the edges. Scan every border for bad cuts through joints, half-visible people, or distracting elements creeping in from the sides. Small edge cleanups make a big difference.
Step 5: Set the ratio. Apply the aspect ratio for the intended use. If you need several, export them from the same well-composed master.
Step 6: Review in context. Look at the crop next to the rest of the gallery, not in isolation. Consistency across the set is what makes the whole delivery feel professional.
Common cropping mistakes in portrait photography
A few errors show up again and again, and all of them are easy to avoid once you know to watch for them.
Cropping too tight with no room to breathe. Beginners often crush the subject against the frame edges. A little negative space gives portraits room to feel calm and considered.
Centering everything. Dead-center compositions can work, but as a default they flatten the image. Off-center placement usually feels more alive.
Amputating at the joints. The joint rule matters. Cutting at a wrist or ankle makes even a great pose look clumsy.
Ignoring the background at the edges. A bright distraction or a stray person at the border pulls the eye away from your subject. Crop to clean up the perimeter.
Inconsistent crops across a gallery. This is the big one for portrait shooters delivering full sessions. If one image is tight and centered, the next is loose and off-center, and a third has the eyes in the middle, the set looks unplanned even when every individual frame is fine.
Keeping crops consistent across a full shoot
Cropping a single hero image well is not hard. Cropping four hundred images from a family session, all to a consistent standard, in an evening, is where portrait photographers lose hours. The composition rules above are quick to apply to one photo and exhausting to apply hundreds of times by hand while staying consistent.
This is exactly the bottleneck AI cropping is built to remove. Imagen’s Crop Agent applies smart, subject-aware cropping across a whole gallery, detecting your subjects and framing them consistently to the ratio and composition rules you set, rather than making you drag a crop box across every frame. For portrait work with varied aspect ratios, that means you can define how you want people framed once and let the tool carry that decision across the full set, then step in only where a shot needs a hand.
Imagen is an AI batch photo editing platform that learns your personal style through AI profiles, then applies consistent color, tone, and now cropping across an entire shoot. It also culls, works with RAW files, and runs as a desktop app for Mac and Windows with the AI processing in the cloud, so the heavy work stays off your computer. It is worth being clear about what the platform is and is not: it excels at batch grading, shoot-wide consistency, culling, and subject-aware cropping, and it speeds up client delivery. For work like heavy compositing, detailed object removal, or perspective correction, you would still reach for a dedicated tool built for that job.
What consistent cropping does for your delivery
When every image in a gallery shares the same compositional logic, the whole set reads as one coherent body of work. The client scrolls through and feels a rhythm rather than a jumble. That consistency is a quiet signal of professionalism, and it is far easier to achieve when the framing decisions are applied uniformly instead of re-invented frame by frame.
It also protects your time. The hours you would have spent dragging crop handles go back into shooting, editing tone, or simply delivering faster. Imagen’s photo editing runs on straightforward pay-as-you-go pricing, a monthly base fee plus a charge for the photos you export, so the cost of automating the tedious parts of a large portrait gallery is easy to estimate as your volume grows. For a photographer processing hundreds of frames per session, shaving the per-image handling time while keeping the crop consistent is the difference between a late night and a delivered gallery.
If you want to build the habit, start with your composition rules on paper, apply them by hand until they are second nature, then let automation carry them across volume. You can explore the full platform and its AI photo editing tools on the Imagen homepage when you are ready to test it against a real session. Imagen’s new Studio lets you cull, edit and export in one project.
What’s new in Imagen: Imagen is now an intelligent, agentic Studio for professional photographers, where you cull, edit, review and export together in one project, in any order. When you want a consistent portrait look, apply your Personal AI Profile learned from past edits, or try more than one AI Profile on a selected set of photos, which takes some processing time. The Studio is rolling out gradually as a beta.
Frequently asked questions
What aspect ratio is best for portrait photography? For prints, 4x5 and 8x10 vertical are the traditional favorites because they flatter standing and seated subjects. The 2x3 ratio matches most cameras natively and suits environmental portraits. For social, 1x1 square and vertical formats work best. The right answer depends on where the image will be seen, which is why keeping a loosely cropped master and exporting tighter versions per platform is the safest approach.
Where should I never crop a person? Avoid cutting at natural joints such as wrists, elbows, knees, and ankles, because the eye reads those cuts as awkward amputations. Crop through the middle of a limb or body section instead, keep hands intact when you can, and leave comfortable space above the head unless you are making a deliberate close crop.
How do I keep cropping consistent across a whole gallery? Define your composition rules first, such as eye placement on the upper third and a preferred aspect ratio, then apply them the same way to every image. For large sessions, subject-aware AI cropping like Imagen’s Crop Agent applies your framing decisions across the full set automatically, which keeps hundreds of portraits consistent without manual box-dragging on each one.
Should I crop in-camera or in post? Both. Compose carefully in-camera so your subject is well placed, but leave a little margin around them so you retain flexibility. That margin lets you recompose in post for different formats without cutting into anything important. Cropping in post is also where you clean up edges, straighten, and adapt one strong frame into several deliverable shapes.
