

8 Editing Presets Best Practices for Wedding Photographers
Table of contents
- 1. Build presets around light, not trends
- 2. Nail exposure and white balance before the preset
- 3. Keep a lean, well-named library
- 4. Separate color presets from tone and detail fixes
- 5. Match presets to skin tones, not just the scene
- 6. Refine by hand where the preset falls short
- 7. Test a preset across a full sample set before the whole gallery
- 8. Evolve from static presets to a personalized editing profile
- How presets fit into a faster wedding workflow
- Frequently asked questions
Editing presets are the fastest way to give a wedding gallery a consistent, signature look, but they only save time when you build and apply them with intention. The best-practice approach is simple: design a small set of presets around your real shooting conditions, calibrate them to accurate exposure and white balance first, then refine each image by hand where the light demands it. Treated that way, presets become a reliable starting point rather than a one-click gamble.
This guide walks through eight practices that keep a wedding workflow both fast and beautiful, from organizing a lean preset library to knowing when a preset should give way to a personalized AI editing profile. Whether you shoot bright-and-airy or deep-and-moody, the goal is the same: a whole day of images that look like they belong together, delivered before your couples start wondering where their photos are.
1. Build presets around light, not trends
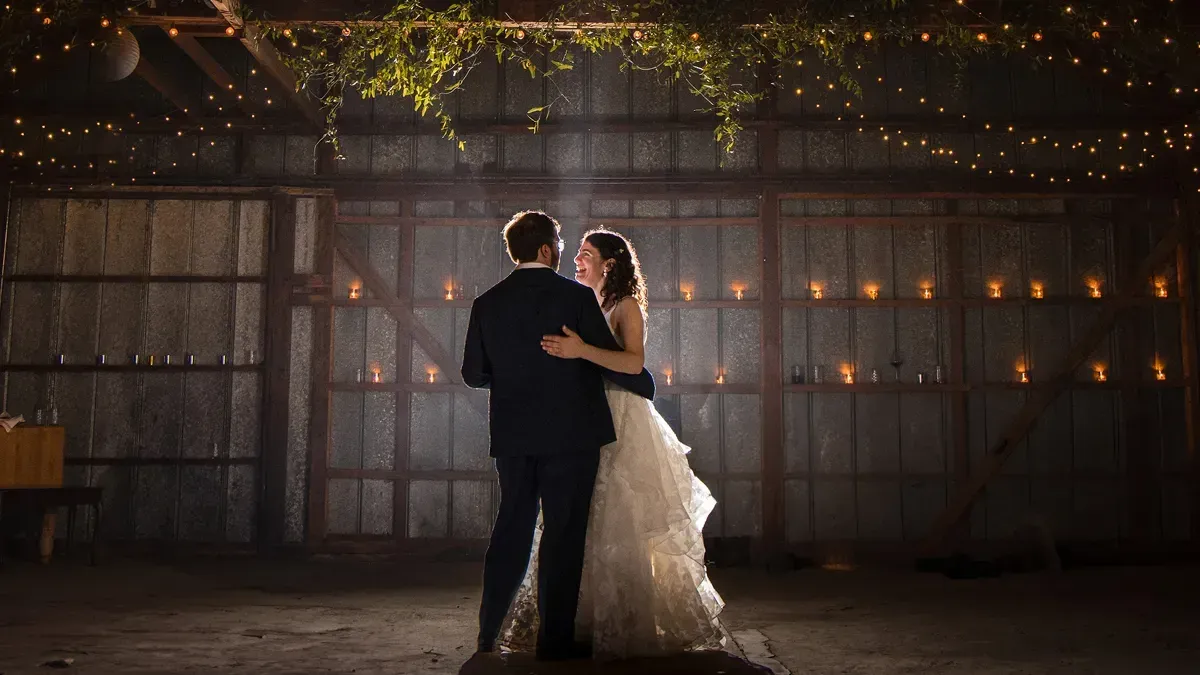
The most common preset mistake is chasing a popular look that was designed for someone else’s camera, lens, and lighting. A preset made for golden-hour desert light will fight you in an overcast church. Instead, build your library around the scenarios you actually shoot: bright outdoor ceremonies, dim receptions with mixed tungsten and LED, harsh midday portraits, and candlelit first dances. When a preset is tuned to a recurring lighting situation, it lands close to finished far more often, and you spend your time refining instead of rescuing.
Keep a short note on which preset you reach for in each condition. Over a season, that record becomes a map of your own style, and it tells you exactly where your presets are strong and where they still need work.
Trend-driven looks also age quickly. A heavy teal-and-orange grade or a crushed matte black that felt fresh two years ago can date an entire wedding gallery, and couples keep these images for decades. Presets built around accurate color and flattering light hold up far longer than presets built around whatever filter is popular this season, which protects both your reputation and your couples’ memories.
2. Nail exposure and white balance before the preset
A preset is a set of relative adjustments layered on top of your image. If the underlying exposure is a stop too dark or the white balance is stained by tungsten, the preset amplifies the problem rather than fixing it. Get the fundamentals right first. Set a neutral white balance, correct exposure so skin tones sit where you want them, then apply your look on top of a clean base.
This is why syncing white balance across a set of similar frames before styling them pays off. When every image in a bracket shares the same neutral starting point, your preset produces the same result across all of them, and the gallery holds together instead of drifting frame to frame.
3. Keep a lean, well-named library
A folder with two hundred presets is not a style, it is a decision tax. Every extra option is another choice you make thousands of times across a wedding season. Trim your library to a handful of core looks plus a few purposeful variations, and name them so the name tells you when to use it, such as “Reception Warm” or “Overcast Portrait.” A lean, honestly named set is faster to work with and produces a more coherent body of work, because you keep returning to the same trusted looks.
Organize the library the way you actually shoot a day, roughly in chronological order: getting ready, ceremony, portraits, reception. When your presets are grouped by moment rather than dumped in one long alphabetical list, your hand learns where each look lives and the styling pass gets faster with every wedding you edit.
4. Separate color presets from tone and detail fixes
It is tempting to bake sharpening, noise reduction, lens corrections, and heavy contrast into one master preset. Resist that. Color and mood belong in your creative preset. Technical corrections, which vary with the lens and ISO of each shot, belong in their own step or in your import defaults. Keeping the two separate means you can restyle a set later without re-fixing the same technical issues, and a single moody color preset stays usable across many different shooting conditions.
For genuinely damaged frames, resist the urge to solve everything inside a preset. Serious noise at high ISO or motion blur from a slow shutter is better handled by a dedicated denoise or sharpening tool built for that job, applied only to the frames that need it.
5. Match presets to skin tones, not just the scene
Weddings bring together guests with a wide range of skin tones, and a preset that flatters one may push another toward orange or gray. Check your look against the full range of people in the gallery, not just the couple in the hero shots. Small adjustments in the HSL panel, particularly to the orange and red channels, protect natural skin while keeping your overall color signature intact. A preset that respects every guest’s complexion is worth ten that only look good on a single test frame.
Reception lighting deserves special attention here. Colored uplighting, LED dance floors, and warm string lights can cast strong tints across faces, and a daylight-tuned preset will not correct for them. Keep a variation of your look with a slightly cooler white balance and gentler saturation for these rooms, so guests keep natural skin even when the venue is bathed in magenta.
6. Refine by hand where the preset falls short
A preset gets you most of the way, not all of it. Backlit veils, spotlit dance floors, and windows blowing out behind a couple will always need a local touch. Build the habit of scanning each styled image for the two or three spots a global preset cannot solve, then fix them with local adjustments. The preset does the heavy lifting on ninety percent of the frame, and your hand finishes the last ten percent that makes the image feel intentional rather than automated.
Some corrections sit outside preset territory entirely. Removing a stray exit sign, straightening a leaning cathedral, or merging a true bracketed exposure blend are jobs for a dedicated retouching, perspective, or exposure-blending tool, used deliberately on the frames that earn it.
7. Test a preset across a full sample set before the whole gallery
Before you run a look across two thousand images, apply it to a representative sample first: a few from the ceremony, the reception, the portraits, and the details. This catches the frames where your preset breaks down, such as the dim reception shots that turn muddy or the bright portraits that clip highlights. Adjust the preset or your plan based on that sample, and you avoid discovering a systematic problem after you have already committed the whole day to it.
8. Evolve from static presets to a personalized editing profile
Static presets have a ceiling. They apply the same numbers to every image regardless of content, which is why they always need cleanup. The best-practice evolution is to move from a fixed preset toward an editing approach that adapts to each frame while still expressing your style. This is where personalized AI profiles change the workflow. Rather than one rigid recipe, the tool learns your editing decisions across thousands of your own past images and applies that judgment shot by shot, adjusting for the exposure and color of each frame the way you would.
Imagen builds exactly this kind of personal AI profile from your catalog, then edits a full wedding in batch with consistent color and tone across the entire shoot, culls the obvious rejects, and works on your RAW files from a desktop app for Mac and Windows, with the AI processing done in the cloud. If you want a ready-made starting point while your own profile trains, Imagen’s Lightroom preset pack for wedding photography gives you a curated set of wedding-ready looks to build from. Pay-as-you-go is a monthly base fee plus a charge for the photos you export, and exploring the tools is free. That helps turn the slowest part of the week into a quicker review pass. You can try Imagen’s new Studio, where you cull, edit and export in one project, on a real gallery at the Imagen homepage.
How presets fit into a faster wedding workflow
Presets solve the styling problem, but they do not solve the volume problem. A wedding still leaves you culling thousands of frames and syncing settings across long sequences before any preset even runs. That is why the strongest workflows pair a small, disciplined preset library with automation for the repetitive work: consistent culling, catalog-wide color matching, and fast delivery. When the mechanical parts are handled, your creative choices, the looks you designed around your own light, are what actually reach the couple. For more on trimming turnaround, see our guides on wedding photography editing tips.
What’s new in Imagen: Wedding photographers get a fuller picture in Imagen, now an intelligent, agentic Studio for professional photographers where you cull, edit, review and export in one project, in any order. Your Personal AI Profile, learned from your past edits, carries your style, and you can send AI edits back to Lightroom Classic or export finished JPG, TIFF or PNG files straight from Imagen. The Studio is rolling out gradually.
Frequently asked questions
How many editing presets does a wedding photographer really need?
Fewer than most people keep. A core set of three to six looks tuned to your common lighting conditions, bright outdoor, overcast, warm reception, and dim indoor, covers the vast majority of a wedding day. Add a small number of purposeful variations only when a recurring situation genuinely needs one. A lean library is faster to work with and produces a more consistent gallery than a sprawling collection you have to sort through every time.
Should I apply the same preset to the entire wedding gallery?
Use the same overall style across the gallery so it feels cohesive, but expect to switch between a few related presets as the light changes through the day, and to refine individual frames by hand. Applying one identical preset to every image, from the sunny ceremony to the candlelit dance, will leave some shots muddy and others blown out. Cohesion comes from a consistent color signature, not from an identical recipe on every frame.
Are presets or AI editing profiles better for weddings?
They serve different needs. A preset is a fixed starting point that is quick to share and apply, but it treats every image the same and always needs cleanup. A personalized AI profile learns your editing decisions and adapts to the exposure and color of each frame, so it holds your style across an entire varied shoot with far less manual correction. Many photographers start with presets and move to a personal profile as their volume grows.
Will using presets make all my weddings look identical?
Only if you apply them mechanically. A preset defines your color and tonal signature, which is exactly the consistency you want in your brand, but each wedding still has its own venue, light, and couple. When you refine by hand and let the specific conditions of each day come through, presets give you a recognizable style without flattening every wedding into the same image.
