

How to Cull Photos in Lightroom Faster (2026 Guide)
Table of contents
- Key Takeaways
- Prerequisites for High-Speed Culling
- Optimizing the Import Process for Speed
- Mastering Keyboard Shortcuts for Manual Culling
- Using AI to Automate Your Culling
- Comparing Culling Methods: The Right Tool for the Job
- Handling Burst Shots with Survey and Compare Modes
- Creating Dynamic Selections with Filters and Smart Collections
- The Final Cleanup and Export Process
- Frequently Asked Questions
- Why is Lightroom still lagging during culling even after I followed these steps?
- Can I use AI culling on photos on my iPad?
- How do I recover a photo I accidentally rejected and deleted from disk?
- Is AI culling accurate enough for professional work?
- What’s the difference between culling and editing?
- Does AI culling work with RAW files?
- How much does AI culling cost?
- Should I cull before or after importing into Lightroom?
Culling thousands of photos after a shoot is one of the biggest time sinks in any photographer’s workflow. It’s a tedious, eye-straining process that can take hours, delaying the creative work you actually love. You’re left clicking through hundreds of near-duplicates, squinting to check for sharpness, and second-guessing every choice.
But it doesn’t have to be that way. By optimizing your setup, mastering Lightroom’s hidden tools, and applying modern AI, you can reduce your culling time by up to 90%. This guide breaks down the exact steps to stop wasting time and start culling photos with incredible speed and accuracy, getting you to the editing stage faster than ever.
Key Takeaways
- Hardware is Your Foundation - Don’t try culling a 4,000-photo wedding on a laptop with 8GB of RAM. For smooth performance in Lightroom Classic 15.0+, you need at least 16GB of RAM, but 32GB+ is strongly recommended for handling large RAW files.
- Optimize Your Import - Speed starts at import. Generating Smart Previews allows you to cull at lightning speed, even if your original RAW files are on a slow external drive. These previews are about 1/20th the size of the original files.
- The Keyboard is King - Relying on your mouse is a massive bottleneck. Mastering simple keyboard shortcuts like P (Pick), X (Reject), and U (Unflag) combined with Auto-Advance can cut your manual culling time in half.
- AI Culling is the New Standard - Manual culling is becoming obsolete. Tools like Imagen’s AI culling can analyze 1,000 photos in under a minute, flagging blur, closed eyes, and poor composition automatically.
- Use the Right View Mode - Don’t just click “next.” Use Survey Mode (N) to compare multiple burst shots at once and Compare Mode (C) for a side-by-side critical sharpness check of your top two candidates.
- Let Lightroom Do the Sorting - Create Smart Collections that automatically gather all your “Picked” photos. This creates a dynamic “keepers” folder that updates in real-time as you cull.
- Human Error is Real - Studies show that fatigue-induced errors in manual culling can increase by 40% after just two hours of work. AI doesn’t get tired, ensuring consistent accuracy.
Prerequisites for High-Speed Culling
Before you even think about importing a single photo, you need to make sure your system isn’t working against you. A slow computer or an unoptimized Lightroom catalog can turn a simple culling session into a frustrating slideshow. Think of it like a race car: it doesn’t matter how skilled the driver is if the engine is sputtering. Let’s get your engine tuned up first.
Honestly, this is the part most people skip, and it’s why they complain about Lightroom being slow. A few minutes of prep saves hours of lag. Here’s a checklist to run through before any major culling session:
- Sufficient RAM - Adobe’s official minimum is 16GB of RAM for Lightroom Classic, but let’s be real-that’s not enough for professional use. For culling large batches of high-resolution RAW files (like those from a 45MP+ camera), 32GB of RAM is the realistic minimum. Anything less and you’ll experience frustrating delays as you switch between photos.
- Fast Storage - Where you store your catalog and previews matters. An old spinning hard drive is a major bottleneck. Your Lightroom catalog and previews should live on a fast internal drive, preferably an NVMe SSD, for the fastest possible access times. Your RAW photos can be on a slower external drive, especially if you’re using Smart Previews.
- Updated Software - Always run the latest version of Lightroom Classic. Adobe frequently releases performance improvements, bug fixes, and updates to its AI engine that can make a noticeable difference in speed. As of 2026, you should be on version 15.0 or later.
- Enable GPU Acceleration - This is a simple checkbox that can have a huge impact. Go to Preferences > Performance and make sure “Use Graphics Processor” is set to “Auto” or “Custom” with your dedicated graphics card selected. According to Puget Systems benchmarks, a capable GPU can improve image rendering speeds by up to 300%.
- Optimize Your Catalog - Over time, your Lightroom catalog can become fragmented and slow. Before a big culling job, go to File > Optimize Catalog. This reorganizes the database file and can make the whole application feel more responsive. You should do this at least once a month.
Getting these foundational elements right ensures that the software itself isn’t the reason you’re slow. Now, we can focus on the workflow.
Optimizing the Import Process for Speed
Your culling process doesn’t start in the Library module; it starts in the Import dialog. The choices you make here directly determine how fast you can move through your photos later. Waiting for full-resolution RAW files to render one by one is a recipe for disaster. We can do much better. Here’s how to set up your import for maximum culling velocity.
-
Select “Embedded & Sidecar” for Initial Previews.
In the “File Handling” panel on the right side of the Import dialog, you’ll see a “Build Previews” dropdown. For the fastest possible start, choose Embedded & Sidecar. Lightroom will use the small JPEG previews that your camera already embedded in the RAW file. This is the quickest way to see all your photos in the Library module right after import, allowing you to do a fast first pass to reject obvious junk (misfires, completely black frames, etc.) immediately.
-
Generate Smart Previews for Disconnected Speed.
This is the most important step. Check the box that says “Build Smart Previews.” A Smart Preview is a lightweight, fully editable DNG file that’s only about 2550 pixels on its longest edge. At roughly 1MB each, they’re about 1/20th the size of a typical 25-50MB RAW file. Lightroom can load and switch between these tiny files almost instantly. Once they’re built, you can even disconnect the external drive containing your original RAWs and continue to cull and even edit your photos without any lag. The speed difference is night and day.
-
Apply Basic Metadata on Import.
Use the “Apply During Import” panel to your advantage. At a minimum, you should have a metadata preset that adds your copyright information to every photo. You can also add keywords relevant to the entire shoot (e.g., “Smith Wedding,” “2026,” “Chicago”). This saves you from having to do it later and makes your library more searchable from day one. It’s a small step, but efficiency is about winning back seconds everywhere you can.
By building Smart Previews, you’ve essentially created a lightweight proxy version of your entire shoot. You’re no longer dependent on the speed of your external drive or the processing power required to render a 60MP RAW file every time you hit the right arrow key.
Mastering Keyboard Shortcuts for Manual Culling
If you’re still culling photos by clicking on stars or flags with your mouse, you’re leaving a massive amount of speed on the table. Every time you move your hand from the keyboard to the mouse and back, you’re losing precious seconds. Over thousands of photos, those seconds add up to hours. The goal is to keep one hand on your keyboard’s rating keys and the other on the arrow keys. That’s it.
Professional retouchers and editors live by keyboard shortcuts for a reason: they’re brutally efficient. A typical wedding shoot can take a photographer 3 to 6 hours to cull manually. Mastering this step alone can cut that time in half.
The Core “Speed Culling” Keys
You don’t need to learn a hundred shortcuts. For culling, you only need to master a few. The most common system revolves around picks and rejects:
- P = Pick (Flag as a Keeper) - This is your “yes” pile. If the photo is a contender, hit P.
- X = Reject (Flag for Deletion) - This is your “no” pile. If it’s out of focus, someone blinked, or it’s a misfire, hit X. These will be deleted later.
- U = Unflag - Made a mistake? Hit U to remove the Pick or Reject flag.
- Arrow Keys - Use the left and right arrow keys to move between photos.
But here’s the real pro tip: turn on Auto-Advance. You can do this by going to the Photo menu and selecting Auto-Advance, or even easier, just press the Caps Lock key. With Caps Lock on, every time you press P, X, or a number rating, Lightroom will automatically jump to the next photo. No need to hit the right arrow key. This one change creates a smooth, rhythmic workflow: look, rate, look, rate. It’s incredibly fast.
And don’t forget the cognitive load. After two hours of staring at a screen, your judgment starts to fade. A study in the Journal of Visual Ergonomics found that fatigue-induced errors in repetitive visual tasks increase by 40% after the second hour. A faster, more rhythmic process helps you finish before that fatigue sets in.
Rating Systems: Stars vs. Colors
While Pick/Reject is great for a first pass, sometimes you need more nuance. Here’s a common multi-pass strategy:
- First Pass (P/X) - Go through the entire shoot quickly with Auto-Advance on. Hit P for anything that’s technically sound (in focus, good exposure, no blinks). Hit X for all the obvious junk. Don’t overthink it.
- Second Pass (Stars) - Filter your library to show only your “Picked” photos. Now, go through these and use star ratings. A simple system might be:
- 3 Stars - A good, deliverable photo.
- 4 Stars - A great photo, a portfolio candidate.
- 5 Stars - The absolute best of the best, the “hero” shots.
- Third Pass (Colors - Optional) - You can use color labels for specific actions. For example, you could mark all photos destined for the blog with a green label, or photos that need significant retouching in Photoshop with a red label.
This tiered approach breaks a massive task into smaller, more manageable steps, allowing you to make better decisions at each stage.
Using AI to Automate Your Culling
Mastering keyboard shortcuts is a huge leap forward, but the next evolution in culling speed isn’t about manual dexterity. It’s about automation. Why spend hours performing a repetitive visual task when a highly trained AI can do the initial heavy lifting for you? With AI adoption among professional photographers hitting 62% in 2026, it’s clear that automation is the future of efficient workflows.
This is where a tool like Imagen completely changes the game. Imagen’s AI photo culling feature doesn’t just look for blurry photos. It analyzes your images for technical and artistic qualities, including focus, closed eyes, subject separation, and even composition, to give you a ranked and sorted gallery in minutes.
For a typical wedding with 2,500 to 4,500 photos, Imagen’s AI can process the entire set in a fraction of the time it would take a human. We’re talking about running an analysis of 1,000 images in less than one minute. This transforms a 4-hour task into a 15-minute review session.
How the Imagen AI Culling Process Works
Getting started is straightforward. You’re not changing your core Lightroom workflow; you’re just adding a powerful automation step at the beginning.
- Upload Your Project - Instead of starting in Lightroom, you begin in the Imagen desktop app. You point the app to the folder of photos you just imported into your Lightroom catalog.
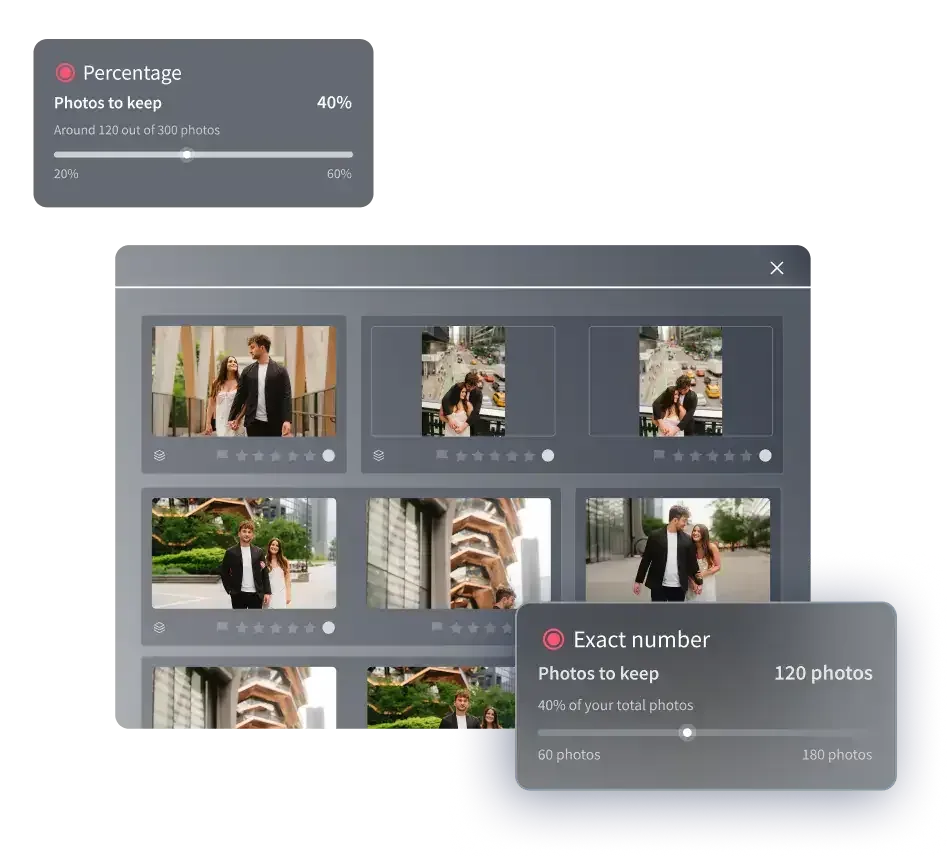
- Set Your Culling Preferences - This is where you tell the AI what you’re looking for. You’ll see options to have Imagen select the best photos, group duplicates, and identify photos with closed eyes. You can specify whether you want a “tighter” selection (fewer photos, only the absolute best) or a “wider” one (more options to choose from).
- Let the AI Analyze - Once you start the process, Imagen uploads your photos to its cloud servers for analysis. This is where the powerful happens. The AI scores and ranks every single photo based on its criteria.
- Review and Download - When the analysis is complete, you review the results in the Imagen desktop app. Here you can see the AI’s selections, review the grouped duplicates, and make any final adjustments. Once you’re happy, you click a button, and Imagen writes all its ratings (Picks, Rejects, star ratings, color labels) directly to your Lightroom catalog metadata. When you open Lightroom, all the culling work is already done.
The biggest bottleneck in post-production has always been the initial selection process. AI culling eliminates that friction, allowing photographers to move from capture to creative editing almost immediately. It’s not about replacing the photographer’s eye; it’s about giving them a hyper-efficient assistant who handles the 80% of tedious work so they can focus on the final 20% that requires their unique vision.
Itamar Haim, AI Photography Workflow Specialist
The result is that you open Lightroom to find your photos already sorted, flagged, and rated. Your job shifts from a tedious manual sorter to a final curator, saving you hours of work on every single shoot.
Comparing Culling Methods: The Right Tool for the Job
You’ve several options for culling, from Lightroom’s built-in tools to specialized software. There’s no single “best” way; the right choice depends on your specific needs, budget, and the type of shoot you’re working on. the main contenders.
| Feature | Lightroom Classic | Photo Mechanic | AI Culling (Imagen) |
|---|---|---|---|
| Initial Speed | Moderate (Fast with Smart Previews) | Extremely Fast (Renders embedded JPEGs) | Fastest (Automated cloud processing) |
| Workflow | All-in-one: Import, Cull, Edit, Export | Specialized: Ingest and Cull only | Automated: Cull first, then review in LR |
| Duplicate Handling | Manual (Survey Mode) | Manual side-by-side comparison | Automatic grouping of similar shots |
| Objective Analysis | None (Human choice only) | None (Human choice only) | Yes (Detects blur, closed eyes, etc.) |
| Learning Curve | Moderate | Low | Very Low |
| Best For | Photographers wanting a single-app workflow | Photojournalists needing max ingest speed | Wedding/event pros with high volume |
Photo Mechanic has long been the favorite of photojournalists because of its legendary speed at ingesting and viewing files; it doesn’t build a big database like Lightroom. However, for many wedding and portrait photographers, the workflow of culling in Photo Mechanic and then importing the selects into Lightroom can feel disjointed. Modern AI tools offer a compelling alternative by automating the most time-consuming part of the process while keeping you inside the Lightroom ecosystem.
Handling Burst Shots with Survey and Compare Modes
You’ve run your AI cull or completed your first manual pass. Now you’re left with groups of very similar photos, especially from “burst mode” sequences. Think of a bride walking down the aisle, the first kiss, or a speaker at a conference. You might have 20 photos that are nearly identical, but you only need the one perfect moment. Clicking back and forth between them in the standard Loupe view is inefficient and makes it hard to spot subtle differences.
This is where Lightroom’s specialized viewing modes become essential. Let’s imagine a common scenario: a wedding ceremony. The photographer captures a 15-shot burst of the couple exchanging rings.
Handling the Sequence with Survey Mode
Your first tool is Survey Mode. Its job is to help you view many similar images at once to quickly narrow down the field.
- Select the Burst - In the Library grid, hold down Shift or Ctrl/Cmd and select all 15 photos from the ring exchange sequence.
- Enter Survey Mode - Press the letter N on your keyboard. All 15 photos will now appear on screen at once.
- Whittle Down the Options - Now, quickly scan for obvious flaws. Is someone’s expression awkward in one? Is the officiant blocking the view in another? To remove a photo from the comparison, hover over it and click the small ‘X’ that appears in the bottom-right corner. Keep doing this until you’re left with your top 2-3 candidates.
Survey mode is perfect for making broad-stroke decisions based on composition and expression. It’s about getting from 15 options down to just a few in under 30 seconds.
Choosing the Finalist with Compare Mode
You’ve got your two best shots from the sequence, but now you need to make the final call based on critical sharpness. This is where Compare Mode shines.
- Select Your Finalists - With just your top two photos selected, press the letter C on your keyboard.
- Side-by-Side Analysis - The two photos will appear side-by-side. Lightroom automatically locks the zoom and pan, so if you zoom in to 100% on one photo to check the focus on the ring, the other photo will zoom in to the exact same spot.
- Make the Final Pick - You can now easily see which photo has the sharper focus or the better micro-expression. Once you’ve decided, you can flag the winner with ‘P’ and reject the other with ‘X’ directly from this view.
Pro Tip: Use Stacking. To keep your grid tidy, you can group these bursts into stacks. Select the entire sequence, right-click, and go to Stacking > Group into Stack. Now those 15 photos will appear as a single image in your grid, which you can expand or collapse at will.
Creating Dynamic Selections with Filters and Smart Collections
Once your initial rating pass is done, whether manually or with AI, the real power of Lightroom’s database comes into play. Lightroom isn’t just a photo viewer; it’s a powerful organizational tool, and its Library Filter bar is your command center. Approximately 74% of professional photographers use Lightroom as their primary tool, yet many never go beyond filtering by star rating.
You can use filters to perform targeted culling passes, isolating specific types of photos that often contain rejects. Think of it as using a magnet to pull all the potential problem shots out of a giant pile.
Creative Filtering Techniques for Culling
Open the Library Filter bar by pressing the `` key. Here are some powerful ways to use it:
- Filter by ISO - At a wedding reception, you might have been forced to shoot at a very high ISO. You can filter to show only photos taken above, say, ISO 6400. This lets you quickly review all your noisiest images at once to decide which ones are usable and which should be rejected for excessive grain.
- Filter by Lens or Focal Length - Do you’ve a lens that you know is a bit soft when shot wide open? You can filter to show every photo taken with that specific lens at its widest aperture (e.g., 50mm f/1.4). This allows you to do a specific sharpness check on just those photos.
- Filter by Camera - If you’re a second shooter or working with a team, you can filter by camera serial number to review only your photos or those from a specific team member.
- Filter by Text - This is incredibly useful. You can search the metadata for any text, like a file name or keyword you applied on import.
Automate Your “Keepers” with Smart Collections
A Smart Collection is a live, rule-based folder. It automatically gathers any photos in your catalog that meet the criteria you define. This is the perfect way to create your final selection without manually dragging and dropping anything.
Here’s how to create a Smart Collection for your final culled photos:
- In the Collections panel, click the “+” icon and choose “Create Smart Collection.”
- Name it something like “Final Picks - [Client Name].”
- Set the rule to be “Rating is greater than or equal to 3 stars” (or whatever your minimum keeper rating is).
- You can add another rule, like “and Pick Flag is set to Picked.”
- Click “Create.”
Now, this collection will automatically and instantly contain every photo you’ve rated as a keeper. As you continue to cull and rate, it updates in real time. This becomes your central hub for the editing phase, ensuring you never miss a photo you intended to deliver.
The Final Cleanup and Export Process
You’ve done the hard work. Your photos are rated, the keepers are gathered in a Smart Collection, and the rejects are flagged. The final step is to clean up your catalog and disk space, and prepare your final selection for the editing stage. It’s tempting to just jump into the Develop module, but a few minutes of housekeeping now will prevent future headaches.
Getting Rid of the Rejects
All those photos you flagged with ‘X’ are just taking up space. It’s time to remove them. This is a critical step, and it’s important to understand your options.
- Filter for Rejects - In the Library module, go to Library > Refine Photos. This will deselect your picks and select only the unflagged and rejected photos. Or, more simply, use the filter bar to show only photos with the ‘Rejected’ flag.
- Trigger the Deletion - Press Ctrl+Backspace (Windows) or Cmd+Delete (Mac). This brings up the “Delete Rejected Photos” dialog box.
- Choose Your Deletion Method - You’ve two choices, and it’s vital you know the difference.
- Remove from Lightroom - This option takes the photos out of your catalog but leaves the original files on your hard drive. Use this if you’re not 100% sure you want to permanently delete them.
- Delete from Disk - This is the one you usually want. It removes the photos from your catalog AND permanently deletes the original files from your hard drive, freeing up valuable space. Be certain before you click this.
Preparing for Editing and Delivery
With the junk gone, your catalog is now lean and contains only your selected images. What’s next?
Your Smart Collection of “Final Picks” is now your working set. From here, you can begin the editing process. If you plan to use AI-powered editing, this is the perfect collection to send to a tool like Imagen’s AI photo editing, which can apply your personal style to the entire batch consistently, and you can fine-tune frames in the built-in editor (Beta) before you export.
with 28% of photographers now culling or editing on the go, syncing your final collection to the cloud is a great next step. You can right-click on your Smart Collection and choose “Sync with Lightroom.” This will upload the Smart Previews to Adobe’s cloud, making your culled photos available for tweaking on Lightroom Mobile or a tablet while you’re away from your main computer. This flexibility is key for a modern, efficient workflow.
What’s new in Imagen: Imagen is now an intelligent, agentic Studio for professional photographers, so culling is no longer a stop of its own. You cull, edit, review and export in one project, in any order. Use AI culling to narrow a shoot, helped by AI filters such as blur and closed eyes, or skip it and cull manually for free. You can also ask the assistant to find photos in plain language, with you steering. The Studio is rolling out gradually as a beta.
Frequently Asked Questions
Why is Lightroom still lagging during culling even after I followed these steps?
If you’ve already built Smart Previews and have enough RAM, the issue could be your preview cache. Go to Edit > Preferences > File Handling and try increasing the “Camera Raw Cache Settings” size to 20GB or more. Also, ensure your graphics card drivers are fully up to date.
Can I use AI culling on photos on my iPad?
Not directly in most cases. AI culling tools like Imagen typically work with your desktop Lightroom Classic catalog. The best workflow is to run the AI cull on your main computer first. Then, you can sync the final culled collection to the cloud to review or edit on your iPad via Lightroom Mobile.
How do I recover a photo I accidentally rejected and deleted from disk?
Unfortunately, if you chose “Delete from Disk,” the original file is gone from your hard drive and is likely unrecoverable without specialized data recovery software. This is why it’s critical to be sure before using this option. If you only chose “Remove from Lightroom,” the file is still on your drive, and you can re-import it.
Is AI culling accurate enough for professional work?
Yes, but it should be seen as a powerful assistant, not a final decision-maker. An AI is incredibly effective at eliminating 80-90% of the obvious rejects (blurry, blinks, duplicates). Your job is to then review the AI’s much smaller selection to make the final creative choices. It saves time on the technical pass so you can focus on the artistic one.
What’s the difference between culling and editing?
Culling is the process of selection. It’s where you review all the photos from a shoot and decide which ones are good enough to keep and edit. Editing, or post-processing, is the process of adjusting things like color, exposure, and contrast on the photos you’ve selected.
Does AI culling work with RAW files?
Yes. AI culling platforms are designed to work with RAW files. They typically analyze the embedded previews for speed and then apply the final metadata (flags, ratings) to the original RAW files in your Lightroom catalog.
How much does AI culling cost?
Pricing varies by platform. Some have subscriptions, while others are pay-per-photo. For example, with Imagen pricing you can explore the tools for free and cull manually for free, while pay-as-you-go photographers pay on export for what they deliver. Any of these can easily be justified by the hours saved.
Should I cull before or after importing into Lightroom?
It’s almost always better to cull after importing into Lightroom, specifically after building Smart Previews. While some photographers use external apps like Photo Mechanic for a fast initial pass, Lightroom’s Smart Previews are now so fast that importing first and culling inside Lightroom is a highly efficient, all-in-one workflow.
