

7 Common Image Cropping Mistakes for Headshot Photographers to Avoid
Table of contents
- 1. Cropping at a joint or a natural cut line
- 2. Beheading the subject or clipping the chin
- 3. Getting the headroom wrong
- 4. Ignoring the eye line and looking room
- 5. Cropping inconsistently across a set
- 6. Cropping to the wrong aspect ratio for the destination
- 7. Over cropping and killing the resolution
- How Imagen helps headshot photographers crop consistently at scale
- A quick workflow for consistent headshot crops
- Frequently asked questions
A headshot lives or dies on the crop. You can nail the light, the expression, and the connection with your subject, then quietly undercut all of it in post by cutting the frame in the wrong place. The most common cropping mistakes for headshot photographers are chopping the frame at a joint or the chin, ignoring the eye line, leaving too little or too much headroom, cropping inconsistently across a set, and squeezing a portrait into an aspect ratio the client’s platform will crop again anyway.
The good news: every one of these is avoidable once you know the pattern. This guide walks through the seven mistakes that show up most often in headshot work, why each one weakens the image, and how to fix it fast, whether you shoot ten portraits a week or two hundred corporate headshots in a single booking day. At the end you will find a short workflow for keeping crops consistent when volume gets high.
1. Cropping at a joint or a natural cut line
The classic mistake is slicing the frame exactly at a wrist, an elbow, the shoulder seam, or the base of the neck. A crop that lands on a joint makes the body look amputated rather than framed, and the eye snags on the awkward stump instead of traveling to the face. For headshots this matters most at the shoulders and the collarbone, since those are usually the lowest points in the frame.
The fix is to crop through soft tissue, not through the hinge. Cut mid upper arm rather than at the elbow, and let the shoulders sit fully inside the frame or crop well below them, never right on the seam. A good habit is to ask, before you commit, whether the bottom edge falls on a place the body naturally bends. If it does, move it up or down a few percent.
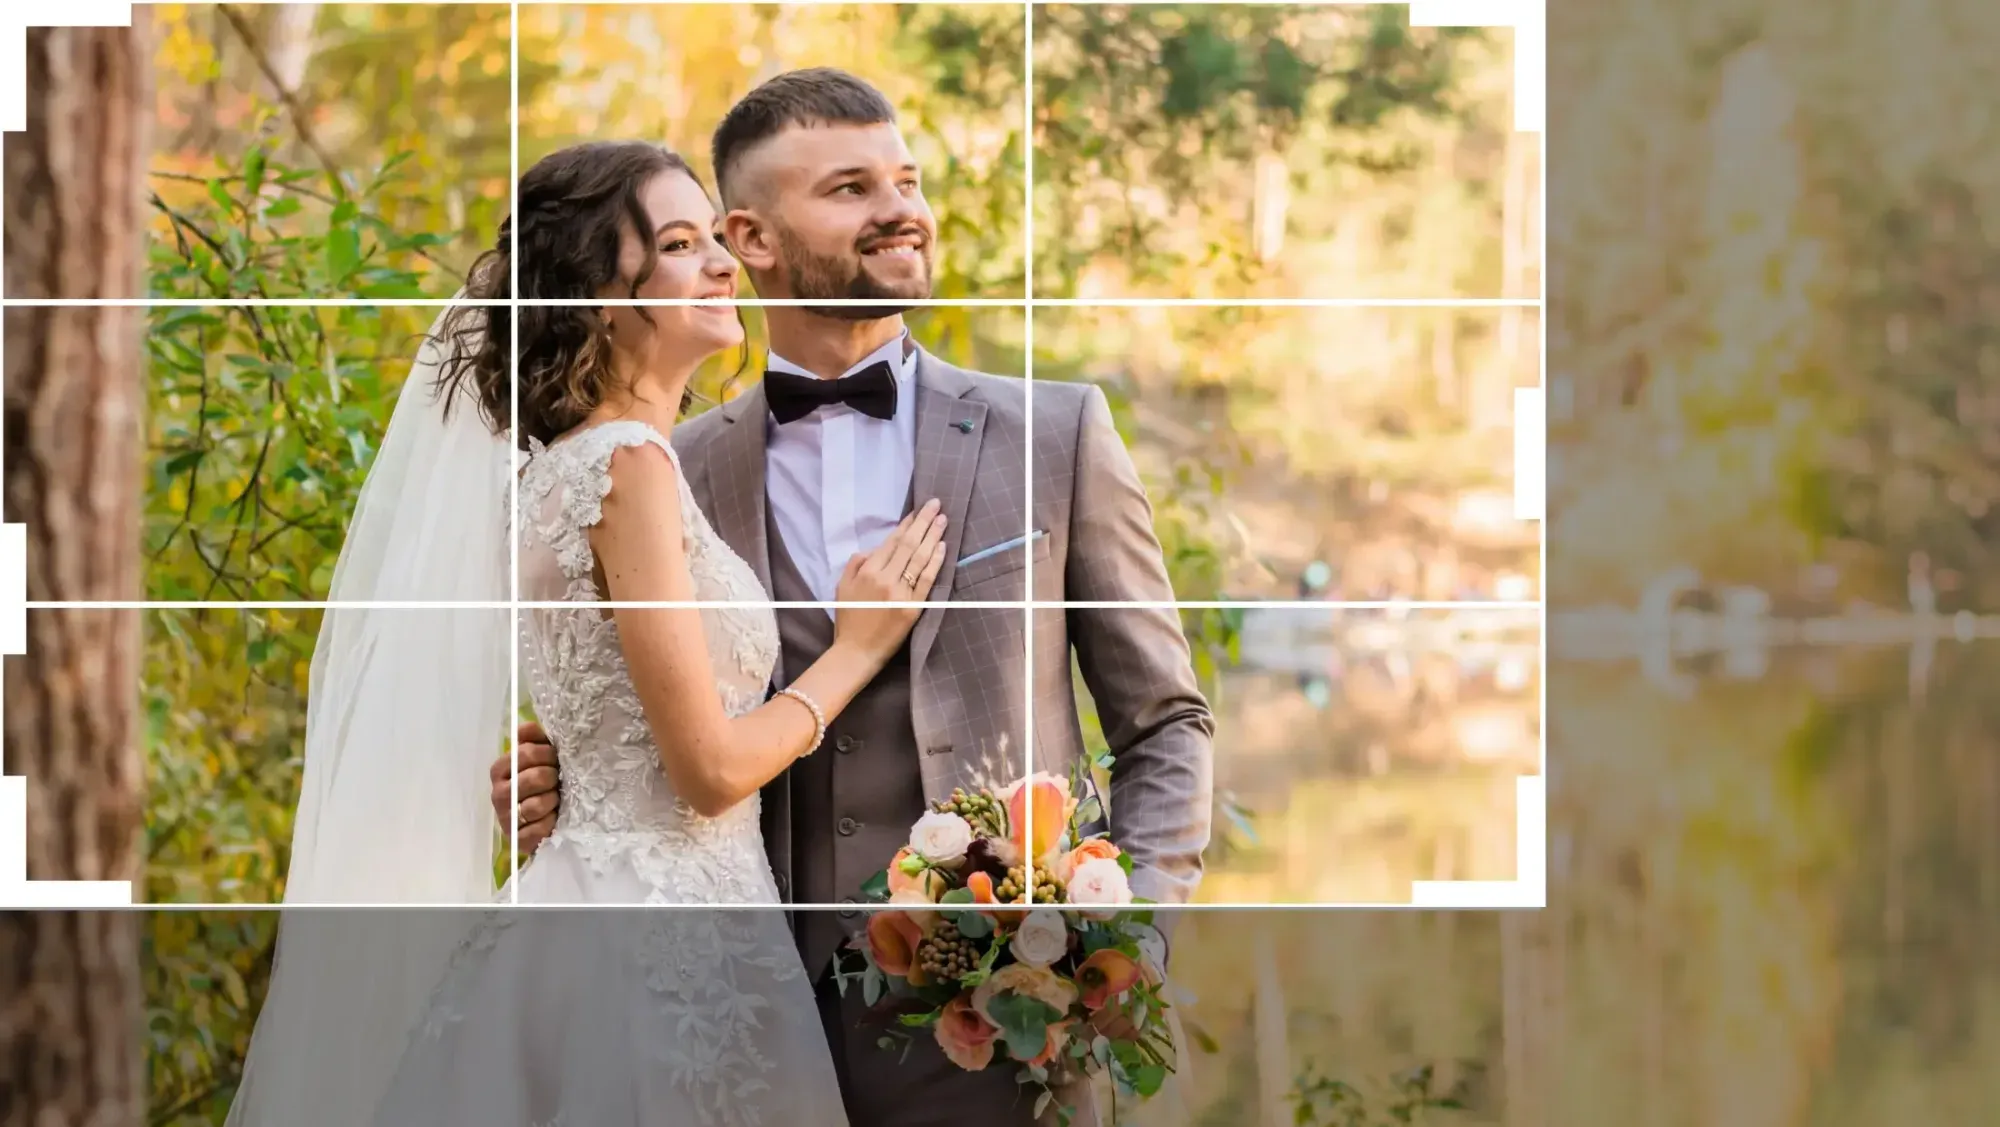
2. Beheading the subject or clipping the chin
Two opposite errors live at the top and bottom of a headshot. The first is cutting off the top of the head so aggressively that the skull looks flat, which reads as a mistake rather than a stylistic choice. The second, and more damaging for professional headshots, is clipping the chin or the bottom lip. A chin crop looks like an accident every time and instantly signals amateur work to a hiring manager or a client’s marketing team.
If you want a tight crop that removes the top of the head, commit to it fully and cut above the eyebrows with confidence, keeping the eyes in the upper third. If you want a conventional business headshot, leave the whole head intact with a little air above it. The one place you should almost never cut is anywhere on the chin, jaw, or mouth.
3. Getting the headroom wrong
Headroom is the space between the top of the head and the top edge of the frame. Too much of it strands the face in the lower half of the picture and makes the subject look small and unsure. Too little makes the image feel cramped, as if the head is about to bump the ceiling. Both are among the most frequent cropping mistakes in headshot photography because the sweet spot is narrow and easy to drift past.
Aim for the eyes to sit roughly on the upper third line, with a modest, even band of space above the hair. For a corporate or LinkedIn style headshot, that band is usually small. For a more editorial or environmental portrait you can open it up. The key is intention: decide on your headroom before you crop, then apply the same amount across the shoot so no single frame looks like an outlier.
4. Ignoring the eye line and looking room
Eyes are the anchor of any headshot, so the crop should be built around them. When a subject’s gaze is angled slightly off camera, the frame needs a little more space on the side they are looking toward. Crop tight on that side and the portrait feels like the person is about to walk into the edge of the frame, which creates a subtle, nagging tension the viewer cannot name.
Place the eyes deliberately, usually on or near the upper third, and give a straight-to-camera gaze balanced space on both sides. For a three quarter turn, add looking room in the direction of the eyes and nose. This single adjustment separates portraits that feel composed from ones that feel merely centered, and it costs nothing but attention.
5. Cropping inconsistently across a set
This is the mistake that hurts most at volume. One person books a single headshot and a slightly loose crop is fine. A company books forty employees for a team page, and now every portrait needs to match: same headroom, same tightness, same distance from lens to subject, same aspect ratio. When crops drift from frame to frame, the gallery looks uneven and unprofessional even if each individual image is strong.
Consistency is a workflow problem, not a talent problem. Set a target crop before you start culling, define it as a rule rather than a feeling, and apply it to every image in the batch. Cropping each portrait by hand and by eye is exactly where inconsistency creeps in, because human judgment shifts across a long editing session. This is the point where headshot photographers most often turn to automation, which we cover below.
6. Cropping to the wrong aspect ratio for the destination
A headshot rarely lives in only one place. It might go on a LinkedIn profile, a company about page, a conference badge, a press kit, and a printed brochure, and each of those wants a different shape. Crop once to a single ratio and you force the platform to re crop, usually badly, cutting off part of the head or shifting the face off center. Delivering only a square when the client needs a vertical, or only a tight crop when they also need breathing room for text overlay, creates rework and unhappy clients.
The fix is to shoot a touch wider than you think you need, so you preserve room to crop for multiple ratios later, and to deliver the common shapes your clients actually use. Keep the subject’s eyes and face safely inside the area that survives every crop. When you know a headshot will be used on a specific platform, crop a version specifically for it rather than hoping a one size delivery holds up everywhere.
7. Over cropping and killing the resolution
Cropping in tight during editing is tempting, especially when you want to fix framing you missed in camera. But every crop throws away pixels, and a headshot cropped too aggressively will look soft on a printed banner or a large monitor even if it looks fine as a thumbnail. Punching in to rescue a loose composition also flattens the perspective relationship you set with your focal length, which can subtly distort the face.
Frame as close as you reasonably can in camera so your crops in post are small refinements rather than heavy rescues. Check the final pixel dimensions against the largest intended use, not the smallest. If a client might print at size, protect your resolution by keeping crops conservative and getting composition right at capture.
How Imagen helps headshot photographers crop consistently at scale
Most of the mistakes above are easy to avoid on a single image and genuinely hard to avoid across hundreds of them. That is where automation earns its place in a headshot workflow. Imagen is an AI photo editing platform that learns your personal editing style from your past work and then applies it across a whole shoot, including a consistent, repeatable crop. Instead of eyeballing headroom and eye line frame by frame, you define the look once and let the tool hold that standard across every portrait in the batch.
Imagen’s AI portrait crop tool for photographers is built for exactly this problem: it recognizes the face and shoulders, then crops each headshot to the composition rules you set, so a forty person corporate gallery comes back with matching headroom and matching tightness instead of forty slightly different judgment calls. It also grades color and tone consistently across the set, culls the obvious rejects, and works in the cloud on your RAW files, so you are refining a finished batch rather than starting each image from zero, and the built-in editor (Beta) lets you crop and straighten any frame by hand.
The pricing is straightforward and built for volume. Pay as you go is a monthly base fee plus a charge for the photos you export, so the cost follows a booking day that produces hundreds of headshots that all need the same crop and the same grade, and exploring the tools is free. You keep full control: the AI proposes the consistent crop and edit, and you review and adjust before delivery. To see how it fits your own workflow, try Imagen’s new Studio, where you cull, edit and export in one project, starting at the Imagen homepage.
A quick workflow for consistent headshot crops
Putting it together, here is a simple loop that prevents most cropping mistakes. First, decide your composition rules before you edit: headroom, eye line position, tightness, and the aspect ratios you will deliver. Second, shoot a little wider than your tightest intended crop so you keep options open for different destinations and protect resolution. Third, apply your crop rules to the whole batch at once rather than one image at a time, which is where consistency lives or dies.
Fourth, spot check the edges of every frame for joint cuts, chin clips, and looking room before you export. Fifth, confirm the final pixel dimensions against the largest intended use. When the volume is high, lean on a tool that can hold your crop standard across the entire set so the gallery reads as one cohesive body of work. For related reading, see our guides on portrait editing workflow tips and building a repeatable style for client delivery.
What’s new in Imagen: Imagen is now an intelligent, agentic Studio for professional photographers, one project where you cull, edit, review and export in any order. For headshots, the built-in editor (Beta) offers crop and straighten tools, presets you can import from Lightroom or build yourself, and versions of each edit, so a tighter crop never costs you the first one. The Studio is rolling out gradually.
Frequently asked questions
Where should I crop a professional headshot? For a standard business headshot, keep the whole head in the frame with a modest, even band of headroom, place the eyes near the upper third, and crop the bottom edge below the shoulders or through the mid upper arm. Avoid cutting at the chin, the shoulder seam, or any joint. If you want a tighter, more editorial crop, cut above the eyebrows on purpose and keep the eyes high in the frame.
How much headroom should a headshot have? Enough to feel intentional and not so much that the face sinks into the lower half. A small, even band above the hair works for corporate and LinkedIn style portraits, while a more editorial look can open the space up. The most important thing is applying the same headroom across the whole set so no frame looks like an outlier.
How do I keep crops consistent across a big corporate booking? Define your crop as an explicit rule before you start, not a feeling you apply per image, then apply it to the entire batch at once. Cropping by hand across a long session is where inconsistency creeps in, so many photographers use an AI crop tool that recognizes the face and shoulders and applies the same composition to every portrait, giving a gallery with matching headroom and tightness.
Should I crop to one aspect ratio or several? Deliver the shapes your clients actually use, since a headshot often needs a square for one platform, a vertical for another, and room for text overlay in a third. Shoot a touch wider than your tightest crop so you preserve room to make several ratios, keep the eyes and face safely inside every crop, and avoid forcing a platform to re crop and cut off part of the head.
